
DIY Treat Bag Tutorial
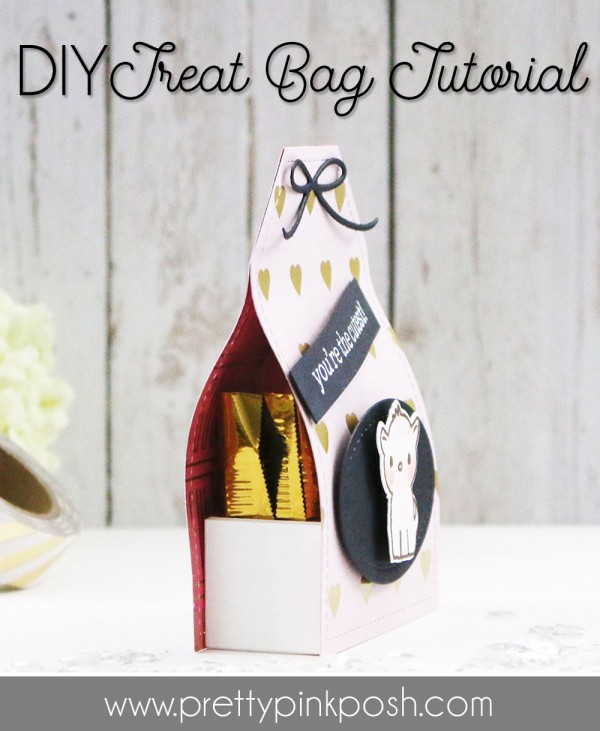
Hello Everyone, Joni here for a treat bag tutorial for Valentine’s Day (but you could adapt it for other occasions). You can simply change the color of the patterned paper and sentiments to make it work to the theme of your choice.
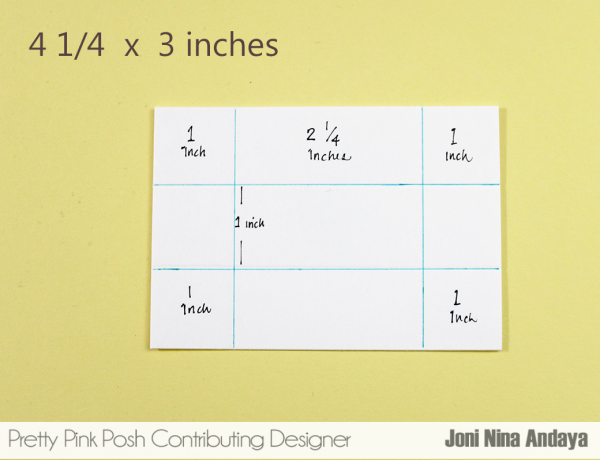
For this project I cut a piece of cardstock like the image below 4 ½ by 3 inches.
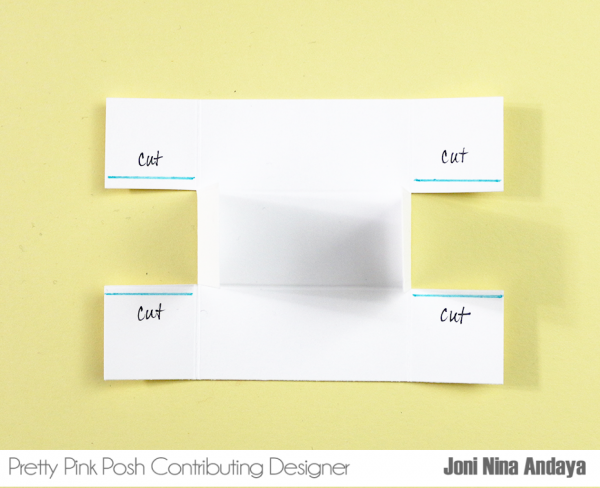
Next, I cut the middle side of the piece of cardstock like the image below, then fold to make a box.
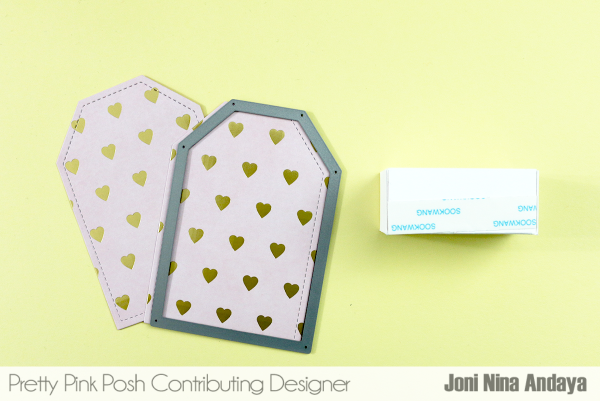
Next, I put a double sided tape on both sides of the box and cut the tag using the Stitched Duo 1 dies.
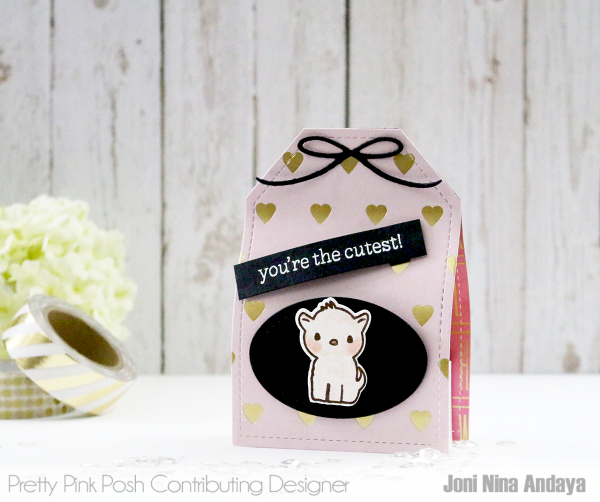
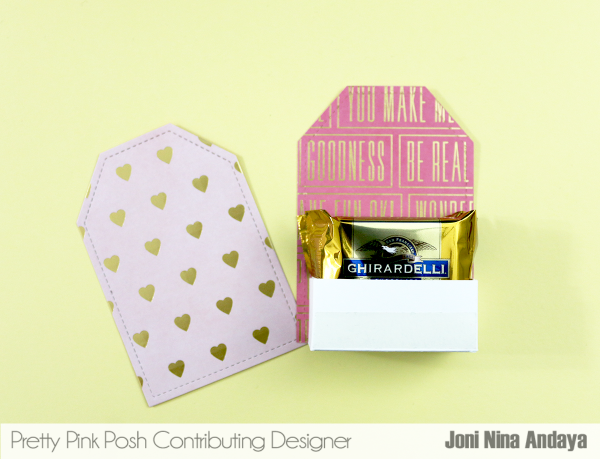
For assembling, I adhered both of the tags on both sides of the box. This box can hold 3 Ghirardelli chocolate square.
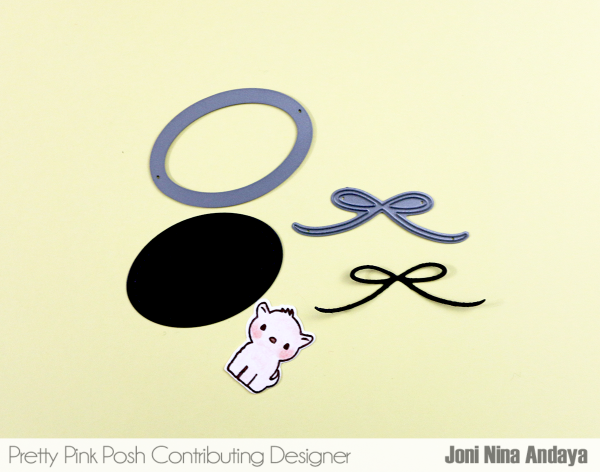
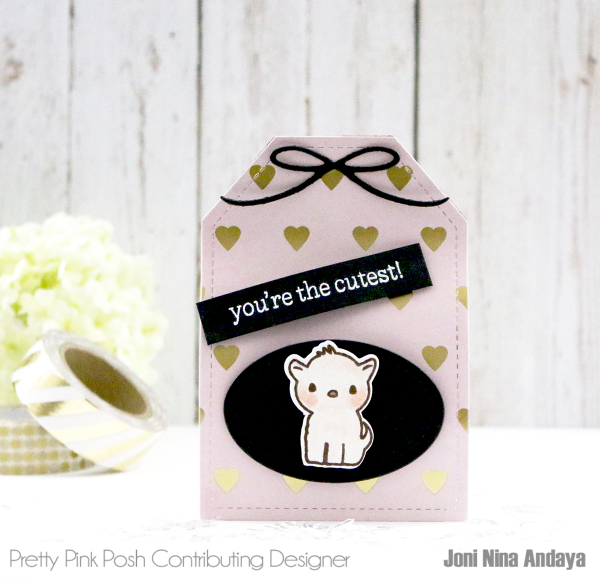
To decorate my box, I kept it simple. I die-cut a black cardstock using the oval tag from Stitched Tags die and I also used the bow die-cut from Twine and Bows dies. I also used the stamp and dies from Holiday Pals for the tag.
Here’s the look of the finished goodie tag side view.
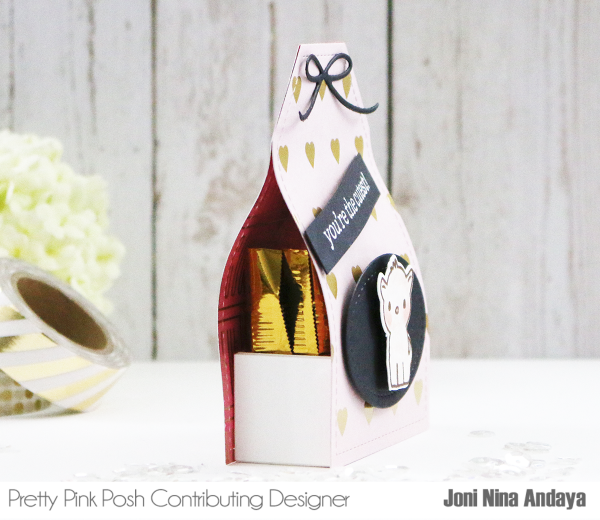
Here’s the front view.
I hope you guys enjoyed this tutorial for your next goodie project. Thank you so much for stopping by and don’t forget to tag #prettypinkposh on Instagram with your projects featuring our stamps, dies and sequins!

Cute! What a great idea!
Love treat, very cute and appears easy to make.
Adorable treat bag…thanks for the tutorial.
Thank you for this tutorial…was looking for a quick project for my students for Valentine’s day.
Thanks for this tutorial for a quick and easy goodie bag. Great directions.
Aw, this is SO SWEET Joni. Just adorable!