
Tutorial: Flat Shaker Card
Hello and Happy Friday!
I’m so excited to have Liz here on the blog sharing a tutorial on how to create easy shaker cards using the new Mini Heart Confetti! No need for fun foam or thick mounting tape with this tutorial…
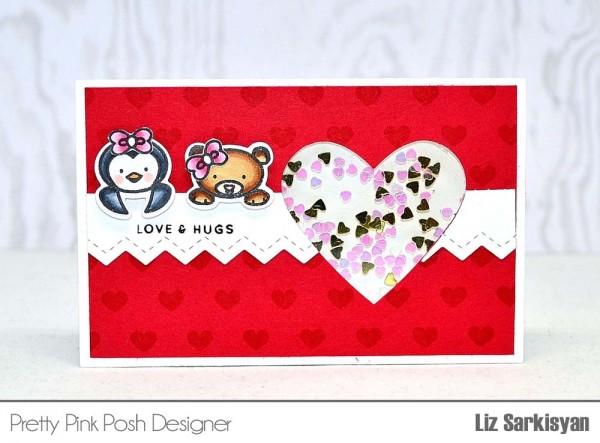
I do love this time of the year, and as Valentine’s Day approaches, I thought what better way to send to family and friends, a small card filled with adorable mini hearts in the form of a flat shaker so that I could easily mail out.
Here, I used this adorable little penguin and bear from the Winter Friends stamp set along with adding a tiny bow on each one. I must say, this set is one of my favorites and can be used all year round. Not just for Christmas.
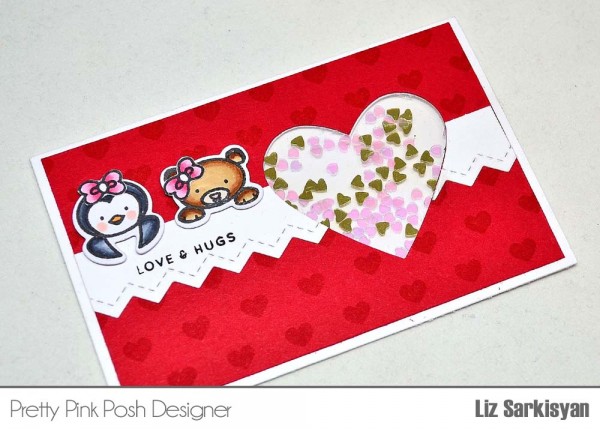
These are so much fun to make and go quickly for creating several of them. You won’t want to stop with just one. Also, it’s so much fun to play with these adorable Mini Heart Confetti in Iridescent and Gold colors. Here is a little tutorial along with measurements.
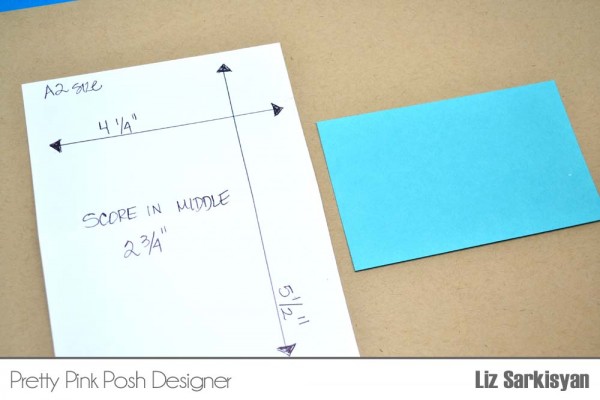
Step one: Cut a piece of card stock A2 size ( 4 1/4″ x 5 1/2″) and score in the middle at 2 3/4″
Step Two: Cut a smaller piece of cardstock ( 2 1/2 ” x 4″) that will be used for decorating

Step Three: Punch out a heart on the right hand side or desired area using a punch or die
Step Four: Next, I embossed the blue rectangle using We R Memory folder called Chain and added this adorable scallop border from the Stitched Border 1 die collection from Pretty Pink Posh and adhered it to the cardstock.
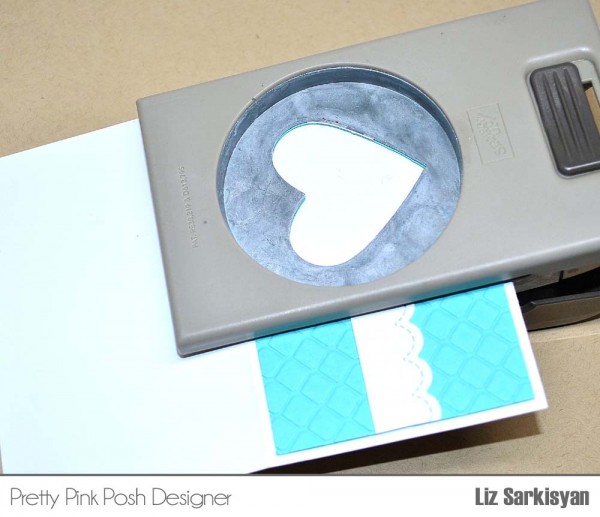
Step Five: Since I needed to punch out another heart directly on the card base, I used the blue cardstock to help me align where I needed to punch out the heart. Keep in mind, do not glue it down, but instead use it as a placement to help you.

As you can see, now you have the card base with the heart punched out along with the smaller blue card stock as well.
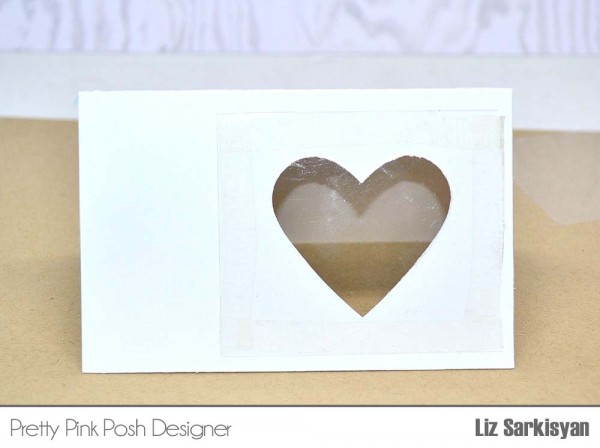
Step Six: Add a piece of acetate on top of the heart to cover it. Here, I cut approximately 2 3/4″ x 2 rectangle.
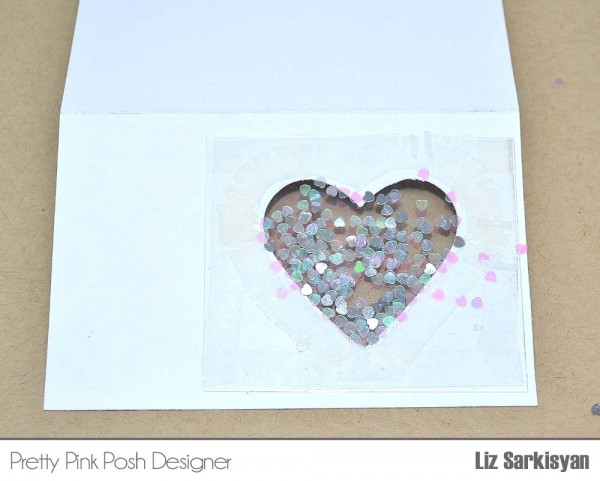
Step Seven: Now add adhesive on top of the acetate starting around the entire heart, than along the sides of acetate. Think like you were adding foam mount and creating a wall around the heart to keep the sequins in. Here, I added in these adorable Mini Hearts from Pretty Pink Posh in Iridescent and Silver which I love how it sparkles.
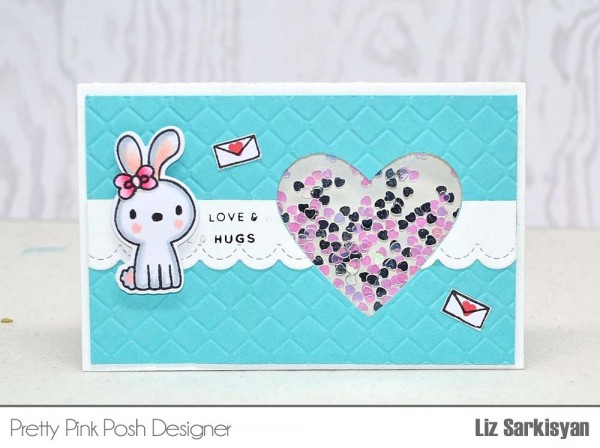
Final Step: Add the smaller card stock on top of the card base aligning it with the heart shape and finish decorating. Here I used a sentiment from the Sending and Wishing set from Simon Says Stamp along with this adorable bunny from the Holiday Pals set from Pretty Pink Posh. Again, this set is not just for Christmas as you can see.
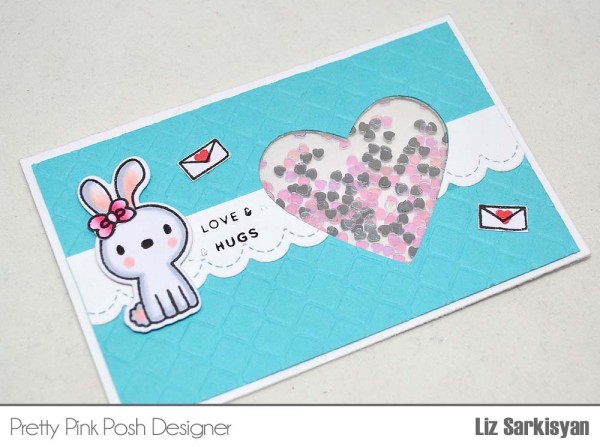
Don’t want to forget, I also added in these adorable little mini envelopes from the Birdie Notes set (releasing in March) where I also used the little tiny heart it came with.![]()
If you want another great Valentine post, Liz created an additional tutorial over on her blog for a candy treat holder. It’s absolutely darling and uses the same stamps from this post! Read her post HERE.

I’ll be back on Valentine’s Day with my next Favorite Free Fonts feature. It’s been a while since I did the last one and I know you all love them!
From the design team and I, we hope you have a LOVE-ly weekend.

The flat shaker cards are my new favorite because I can mail them in a regular, non-padded envelope. These are ADORABLE! Thank you so much for sharing! :)
This is so sweet. Love the tiny hearts. Shakers are my favorite cards and the hearts work perfect with a flat shaker. Lovely design. TFS
Hi, thanks for sharing this very cute and alternative way of making a shaker card. x
Super cute cards Liz. A great idea.
Love these adorable little gift ideas, so creative Liz!
Love these cute cards! Thanks for sharing.