
One Stamp Set // Three Cards + Video
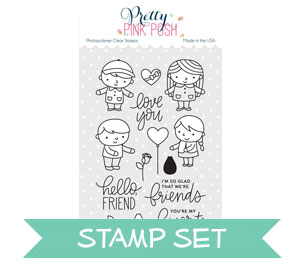
Hello everyone, Eloise here and today I have a 1 stamp set, 3 cards video for you all. I’m going to be using the Friends Forever stamp set today since there is a lot of images as well as a lot of sentiments, which is what I want. Along with the stamp set I’m also using a few Pretty Pink Posh dies and sequins, too.

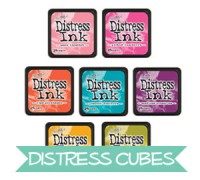
For my first card today, I used the Window Frames dies to create an opening into some watercolour cardstock, ink blended some Squeezed Lemonade and Mustard Seed Distress Ink on top of the panel and created a shaker card using the Friendship Mix, Petunia Seed Beads, Sparkling Clear Stars and Sparkling Clear Seed Beads. I used a double layer of foam tape, since I wanted a lot of shake to happen. I sealed off the shaker using some white cardstock.

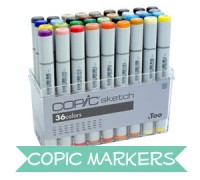
On top of my window shaker, I added some images I previously coloured with my Copic Markers and then adhered them with glue dots. For my sentiment I used some Twisted Citron Distress Ink onto some more cardstock and cut out a banner using the Stitched Notes dies. I then stamped the ‘Love You’ sentiment from the Friends Forever stamp set on top of the banner with black ink. I added foam tape onto the back and added onto the top of my panel. I then wrapped around some hemp cord and tied a bow. I mounted the entire panel onto a blue card base and the card was complete.

For the second card, I die cut the Stitched Film Strip from some white cardstock first and then moved onto my background. I laid out my elements on the background first to see where I wanted everything placed, once I knew I took some Wild Honey and Spiced Marmalade Distress Ink and used a piece of acetate, smooshed the ink on top, sprayed it with water and pressed down onto the cardstock. I repeated this until I was happy with the result. I then dried it off with a heat tool and stamped the sentiment ‘Hello Friend’ on the left with black ink.

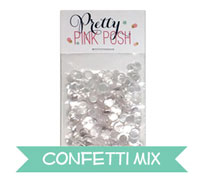
I then adhered my kids that were previously coloured also with Copic Markers and adhered them to the back of the film strip. I then added foam tape all along the back and adhered it down to the card panel. To finish it up I added some Sparkling Clear Confetti Mix and then adhered the entire panel to a card base.

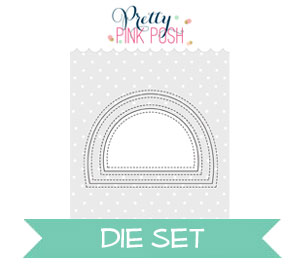
For my third card I first cut a piece of watercolour paper with the frame die that comes in the Stitched Notes die set. Once that was cut I used the Peekaboo Windows dies and cut the rectangle one out of the panel and also out of some masking tape. I then masked off the windows and used the Twisted Citron Distress Ink to colour the top of my piece and then fading it out to white. Once the green was blended I used the negative masking tape piece and placed that around the windows and used some painters tape to help hold it down and then used the Squeezed Lemonade to do the same inking to the windows. I then splattered on some water and dried it with a heat tool.

After everything was adhered and dried, I added my sentiment ‘I’m So Glad That We’re Friends’ from the same Friends Forever stamp set and stamped that underneath the windows with some black ink. I then went ahead and added adhesive to the whole back of the die cut panel and then added my images behind the window. I then added some foam tape behind the entire panel and kids and then I added some colour onto my card base. I used Tumbled Glass Distress Ink and ink blended it onto my card base, blending it out to white. I added my panel on top and my card was complete.
Ohh wow… love the video… you do so much right into the details… awesome tutorials….kiddos r soo cute…
thnx for sharing…
Sch ADORABLE cards ! love them!
Adorable! Love how you’ve used different window dies on your cards.
So cute. Darling images and love the coloring and sequins.
Hello. All 3 cards are adorable and the kids are so cute! Love them.
Awesome cards my dear, a lovely job on them all. PPP DOES have sweet stamp sets and dies, never mind the pretty sequins…