
Sneak Peek: Bold Blooms
 Hello, Pretty Pink Posh fans! This is Yana and today I wanted to share a technique video to show you two different ways to add color to outline images from the Bold Blooms stamp set that releases on May 1st!
Bold Blooms is a smaller set that features a number of beautiful floral and greenery images. There are coordinating dies available for this set but you can always use your stamps with or without the dies.
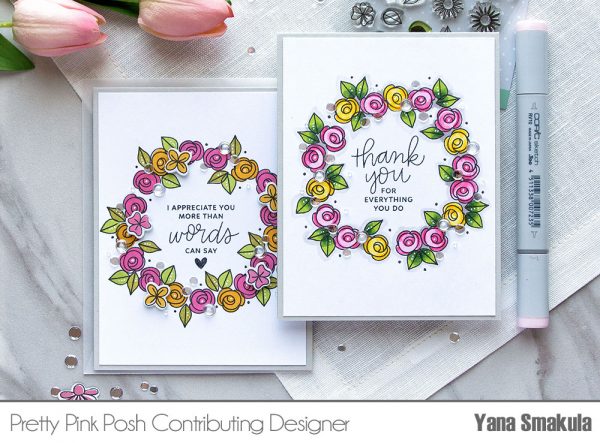
I started working on my card by stamping floral wreaths onto white cardstock panels cut to 4×5 ¼“. I made sure to outline a circle shape using a pencil to assure my wreath would be perfectly round.
For my stamping I decided to use just one flower shape – rose and two leaf shapes. I first stamped a number of flowers using black ink following my pencil line and later came in and stamped the leaves. You can chose to have a smaller wreath if you like, but I wanted to make sure my wreath would fit a sentiment so I made mine pretty large. As I was stamping my roses I made sure to rotate my image every time I made an impression. I wanted my wreath to look more organic, I wanted roses to face different directions and I also wanted to somewhat group my roses – I made little clusters with two flowers in each.
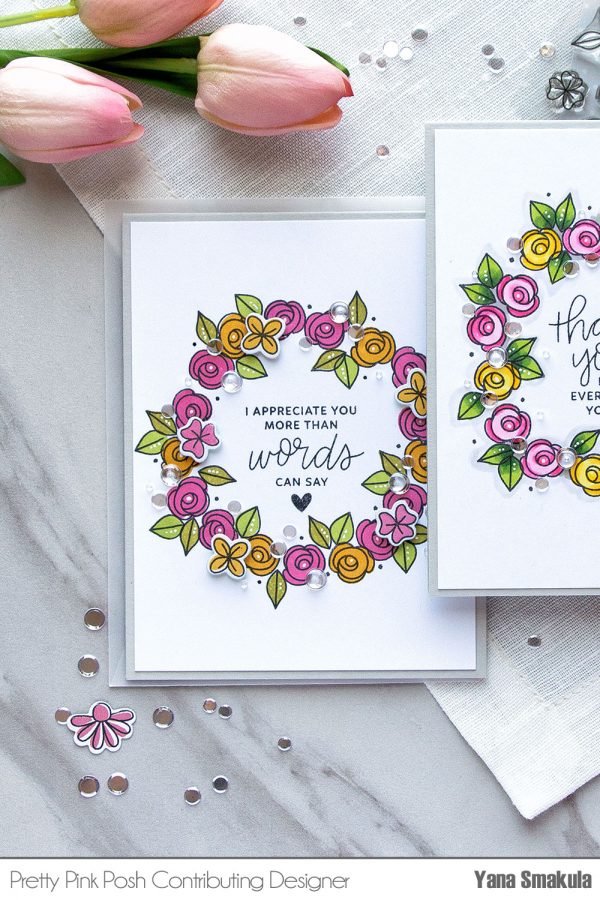
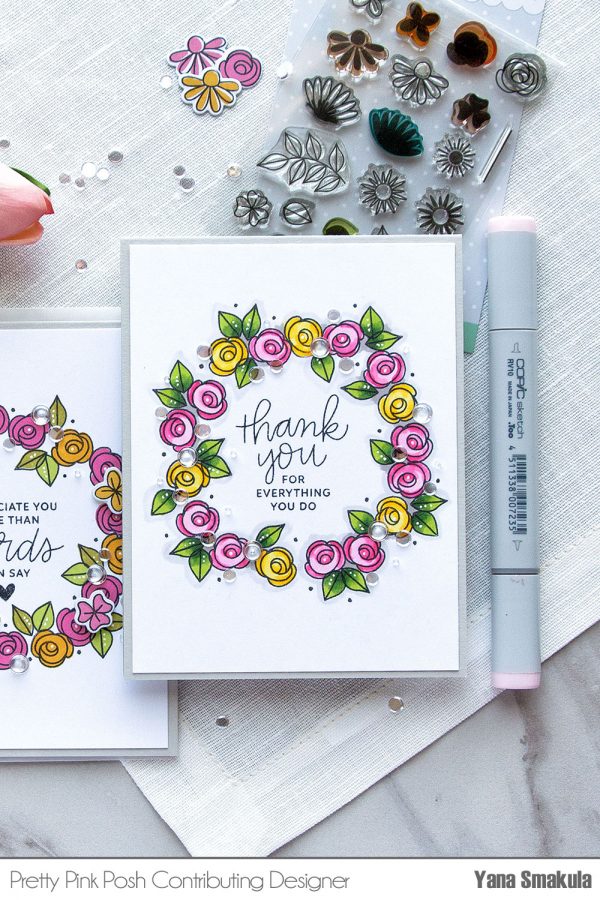
For my sentiments I used the new Thoughtful Greetings stamp set and stamped them messages in black ink. One of my sentiments reads “I Appreciate You More Than Words Can Say” and the second one reads “Thank You for Everything You Do”. I love the font used for these sentiments and I can see myself using it often on different projects.
After my stamping was done I used a pencil eraser and erased that circle pencil shape I had on my panels.
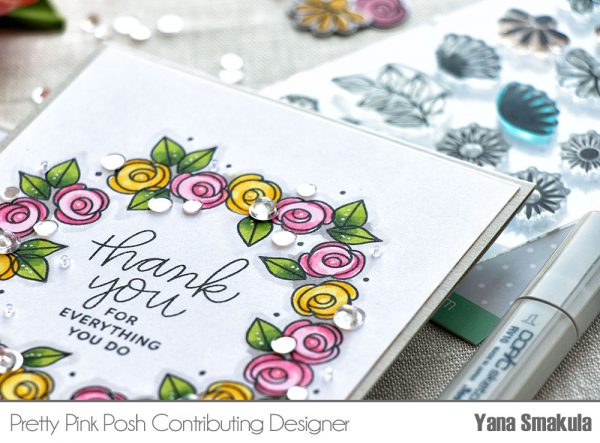
To do my coloring I used solid layer stamps to color one of my panels and also alcohol markers to color another one. And this is what is great about this set – you can chose to use solid layer stamps to add color to your outline images or you can use your favorite coloring mediums – pencils, markers, and even watercolors.
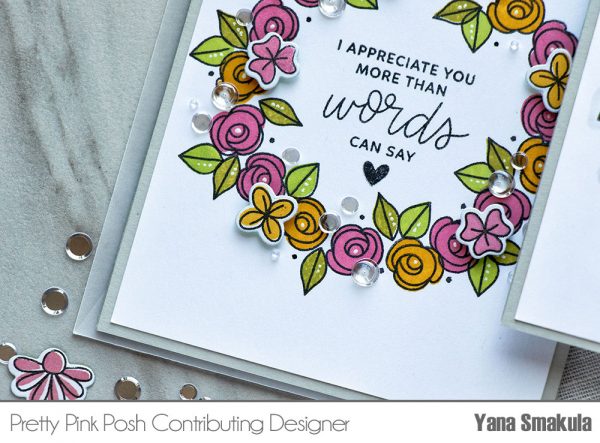
I used two shades of green ink to “color” my leaves; as for the roses – I went with lots of pink and just a hint of yellow. These images are rater easy to align – these are simple shapes so the solid layers fit inside outline layers very easily. By the way, you can always go for a slightly offset look if you want – I love how that looks.
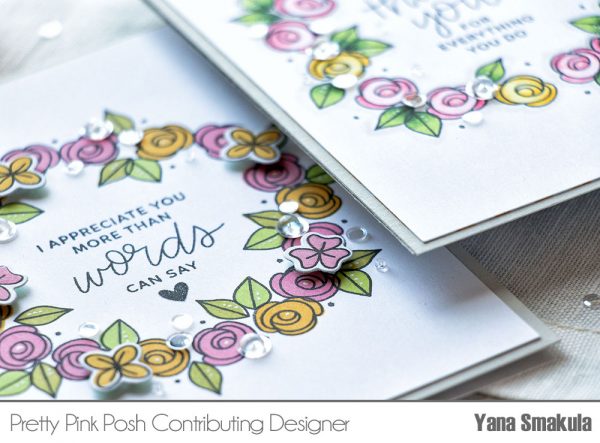
To color my second wreath I used Copic Markers. I used the following colors: YG67, YG17, YG03 – to color leaves; RV14, RV13, RV10 to color pink flowers; Y19, Y15 and Y13 – to color yellow flowers.
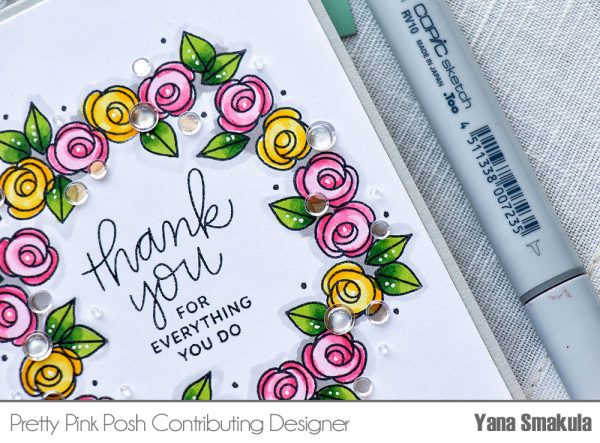
To add some details to my wreath and my images I used a black pigment pen and a white gel pen.
I adhered my panels onto A2 top folding card bases made out of light gray cardstock and to spice one of my cards up I foam mounted a few stamped and die cut flowers. I wanted to add some interest to this card and I decided to do that using little die cut pieces.
One last thing I did – I embellished my cards using some sparkling clear confetti, clear droplets and beads.
Watch my video tutorial below to learn how I made this card.

Happy cardmaking! Join us tomorrow as we reveal another new set from our May release!
Its Beautiful !
What a sweet set. I love all of the small scale florals.
What a pretty card and so excited to see this release.
Beautiful cards and this looks like a lovely stamp set!! Excited to see what else is coming in the May release
So beautiful!
What a beautiful card set Yana!! Always love your fab cards – AND I LOVE THESE STAMPS!! Great video!!
Very pretty card. I want to make one too!
What a great stamp set. Love, Love your card. Wonderful coloring and design. Thanks for the video.
Liking what I’m seeing!! Can’t wait to see them all. Really like the small flowers and the font on the sentiments.
I love the new floral set and the lovely wreath cards. The PDF does not appear to be working.
Judy, thank you for letting me know! I had to update a plug-in on my site so it appears to be working again now!
So pretty!!!!!!!
Awesome cards and video Yana!!!!
Wonderful cards and like the two ways they were created. This stamp set would be great for so many occasions. I need to check out the sequins you used. Thanks for the video.
Love, love, love, love, love that rose! Can’t wait!
What lovely set and your cards are beautiful :-)