| | |

Easter Box Card + Video

Hi, friends! It’s Lauren and I am back with a new video on the Pretty Pink Posh YouTube channel today. I’m continuing my collection of making holiday themed box cards with Spring and Easter!

Watch the video above  I  Watch the video in HD on YouTube

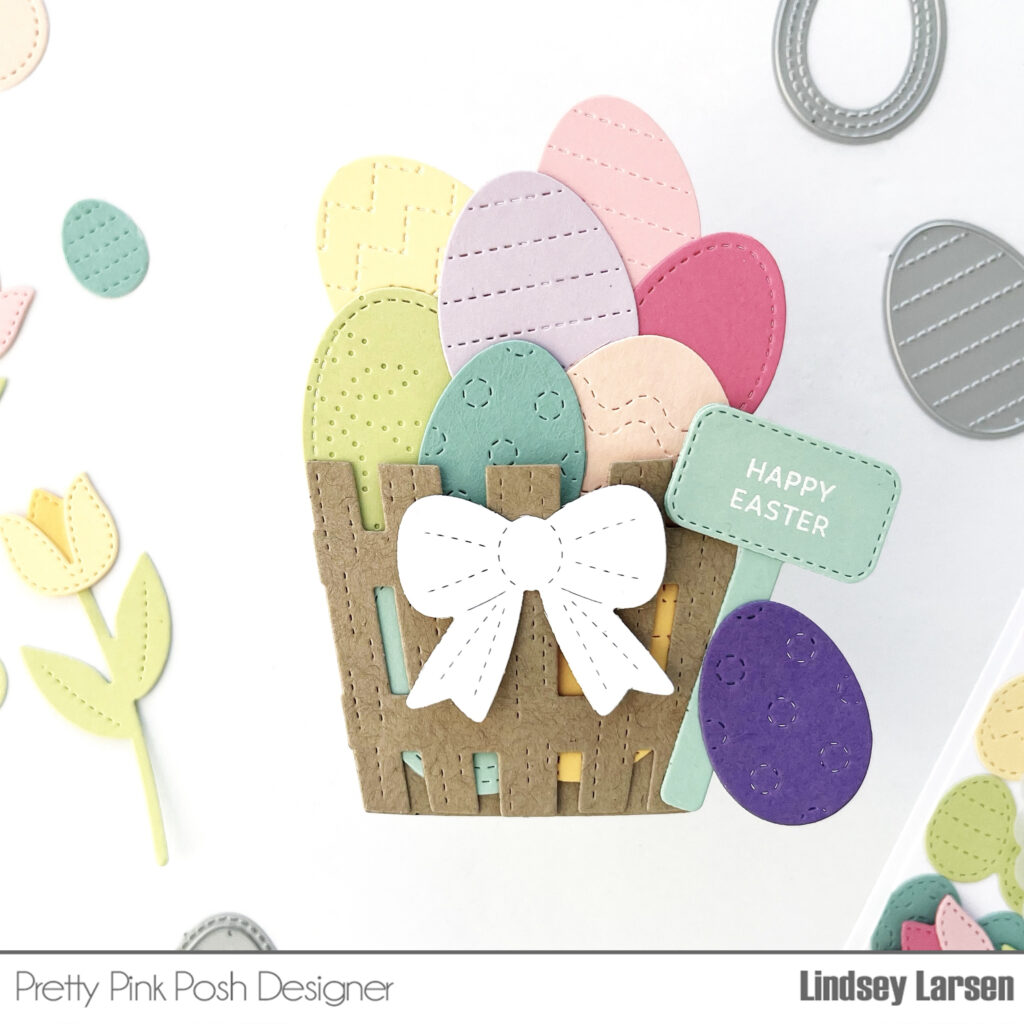
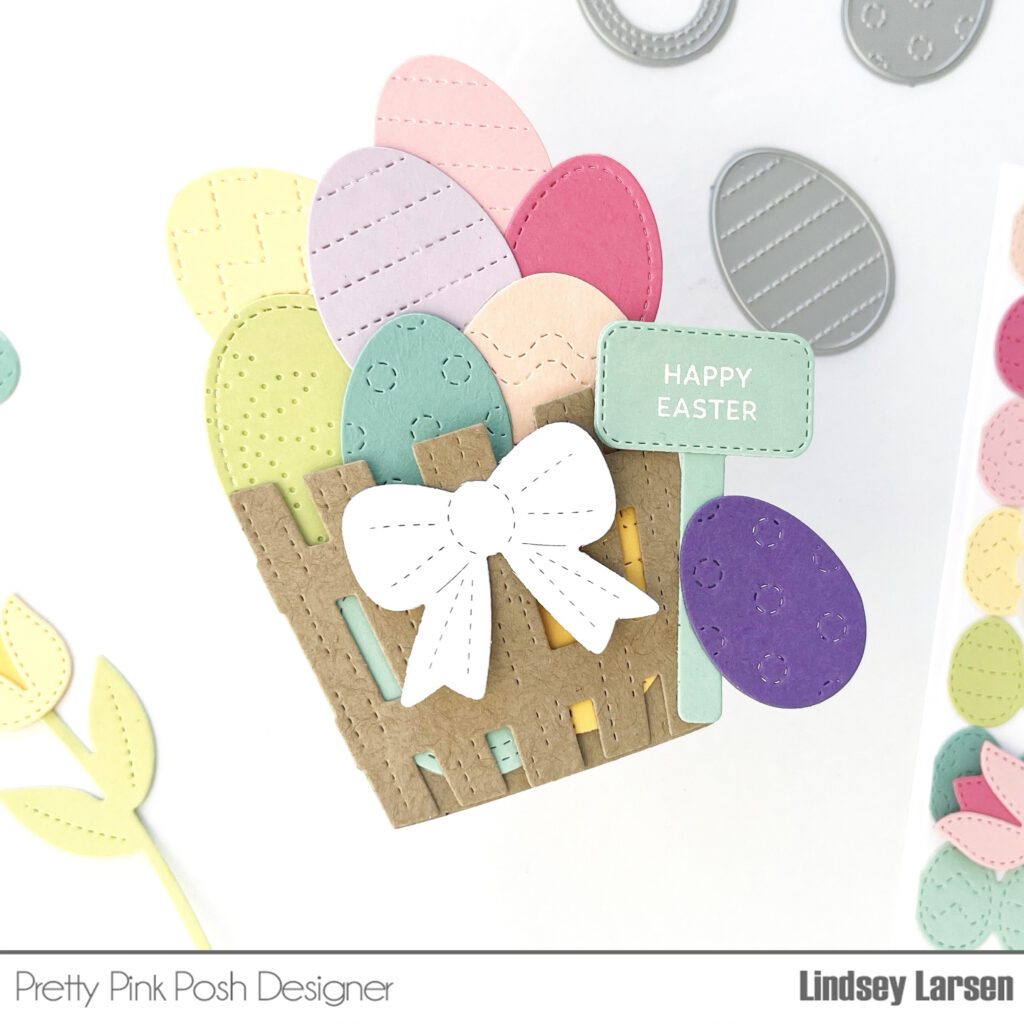
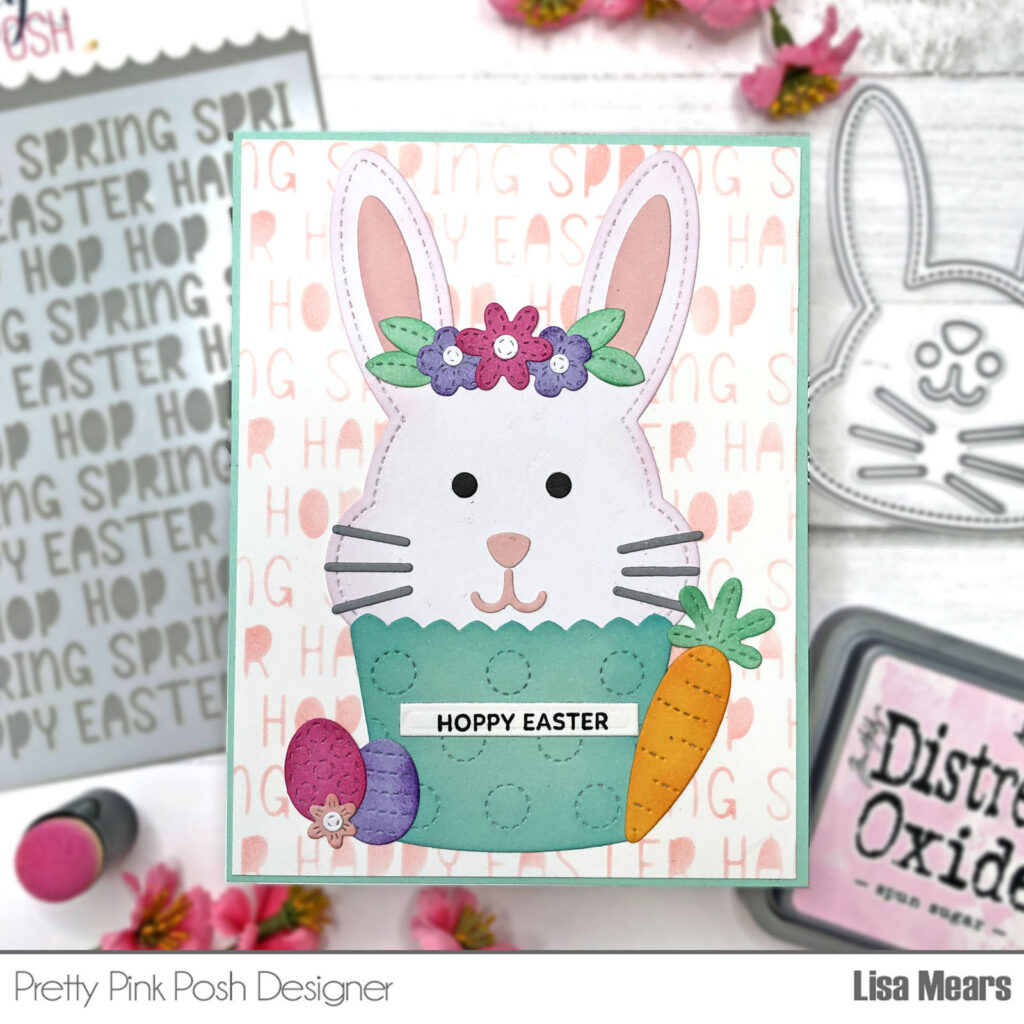
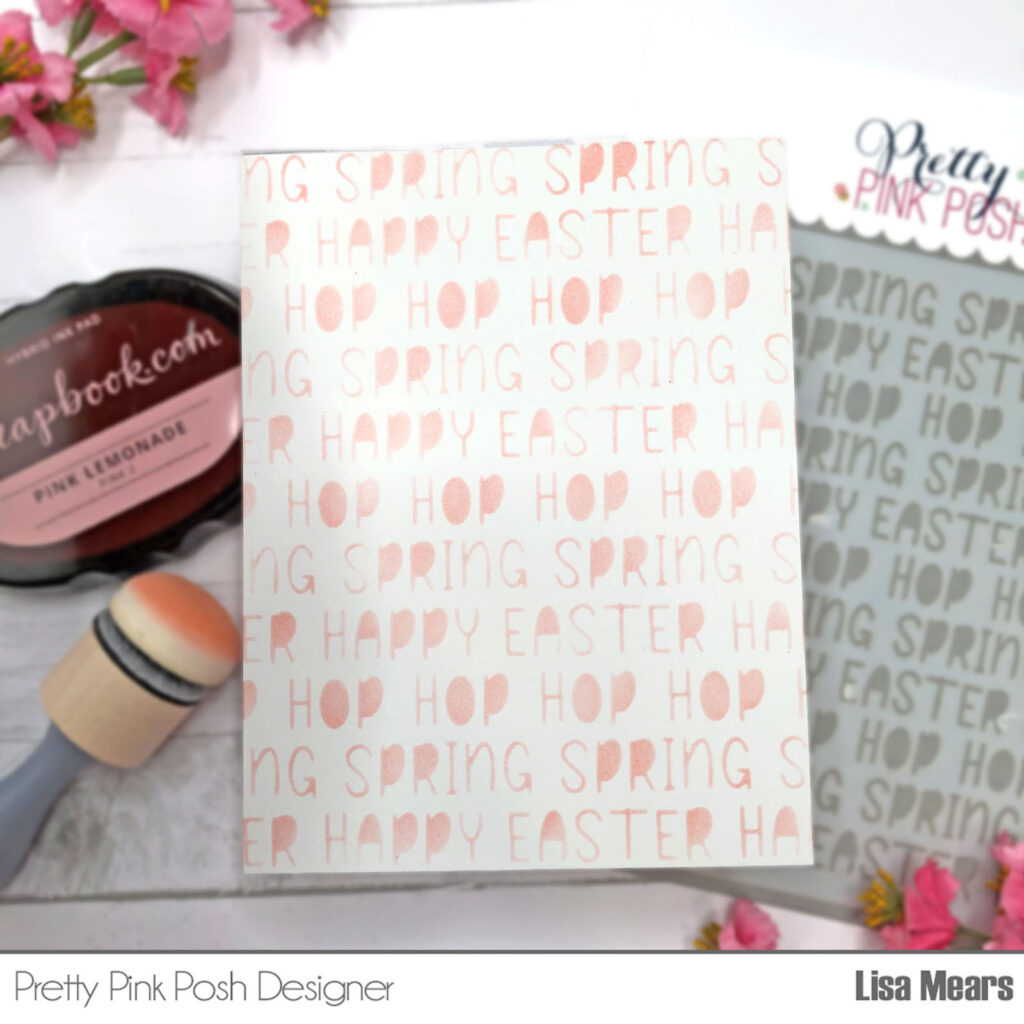
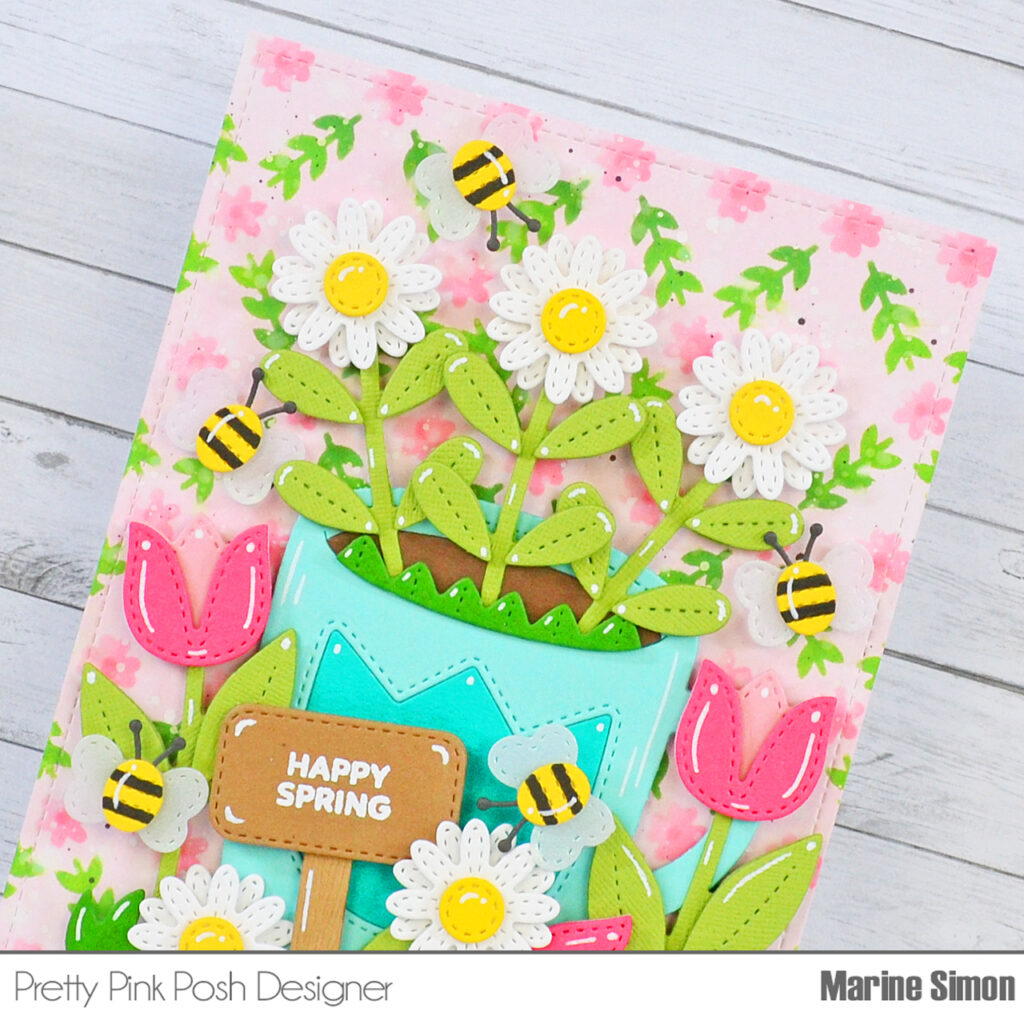
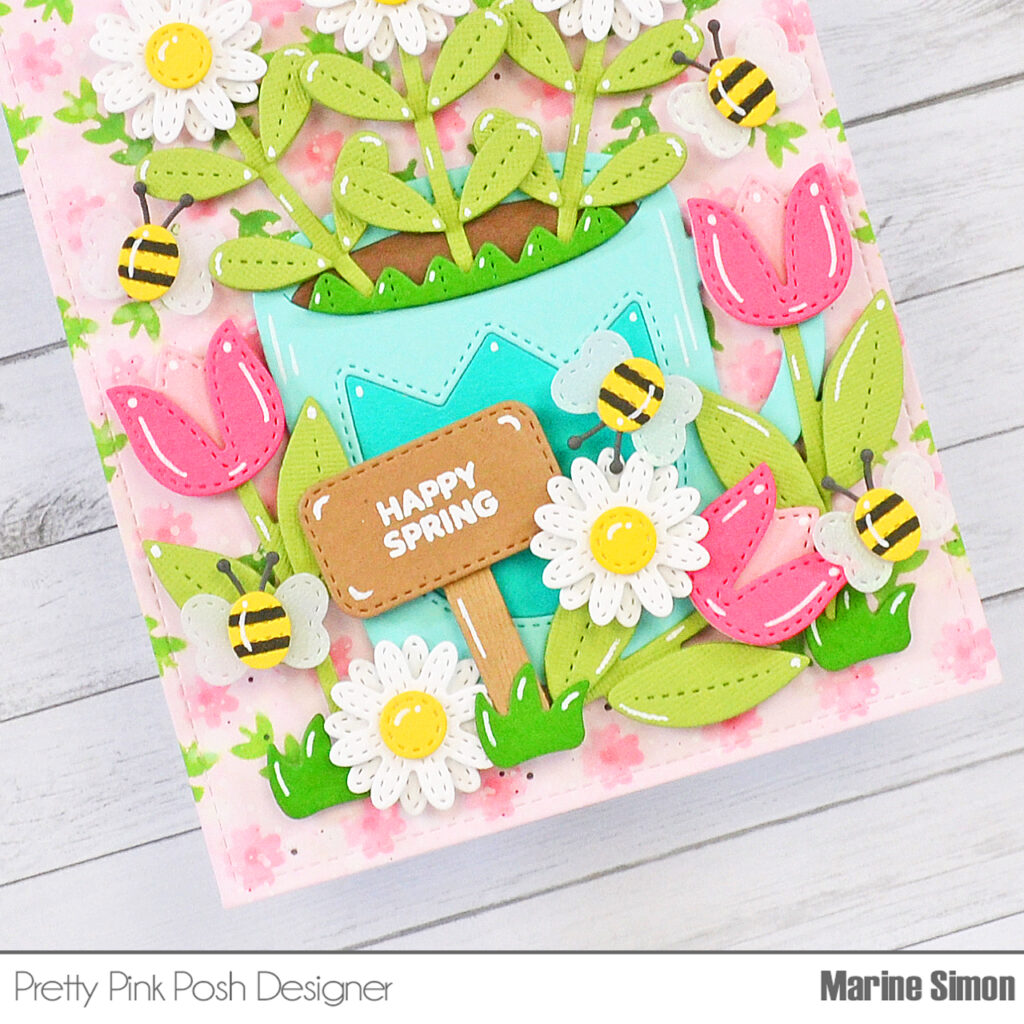
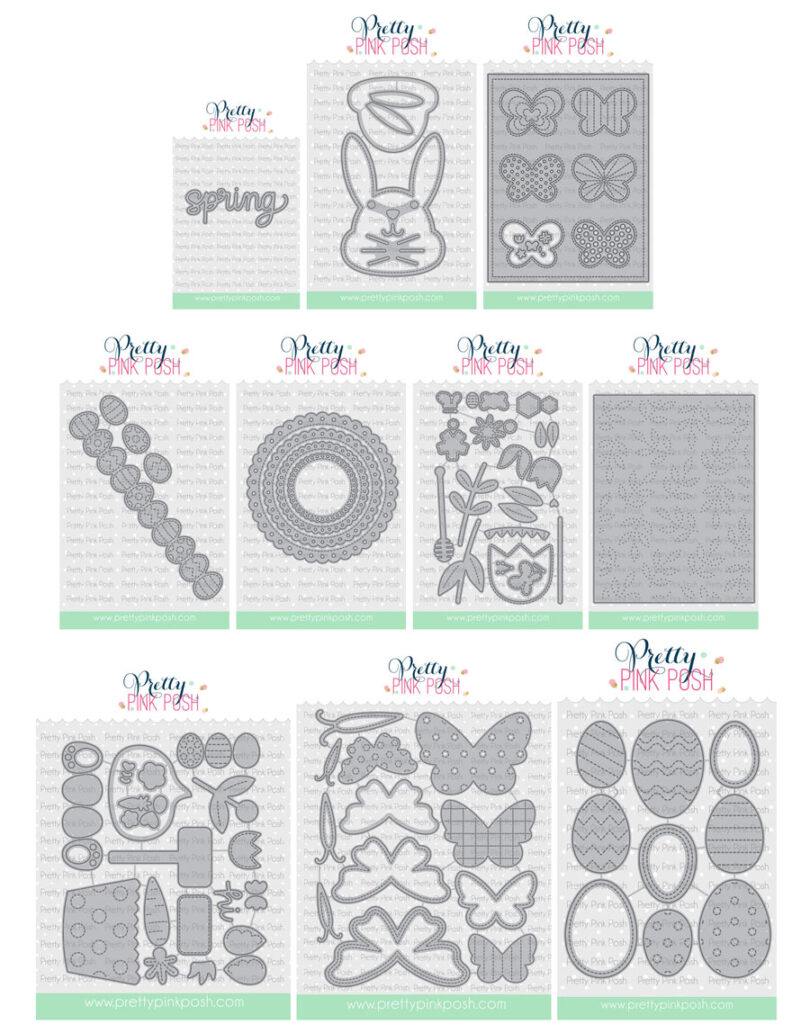
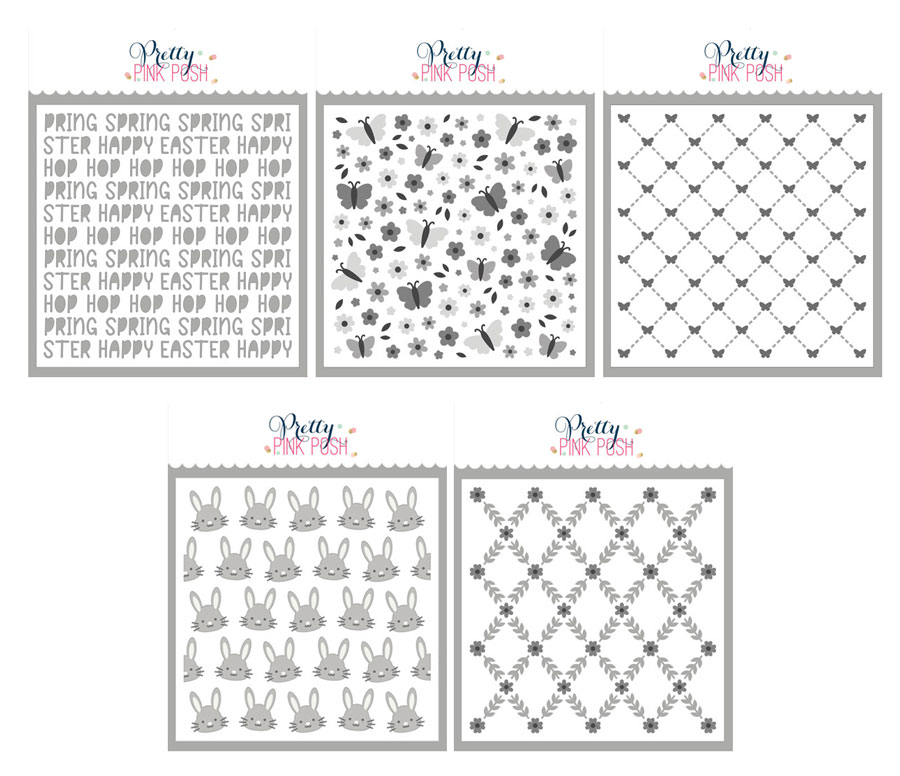
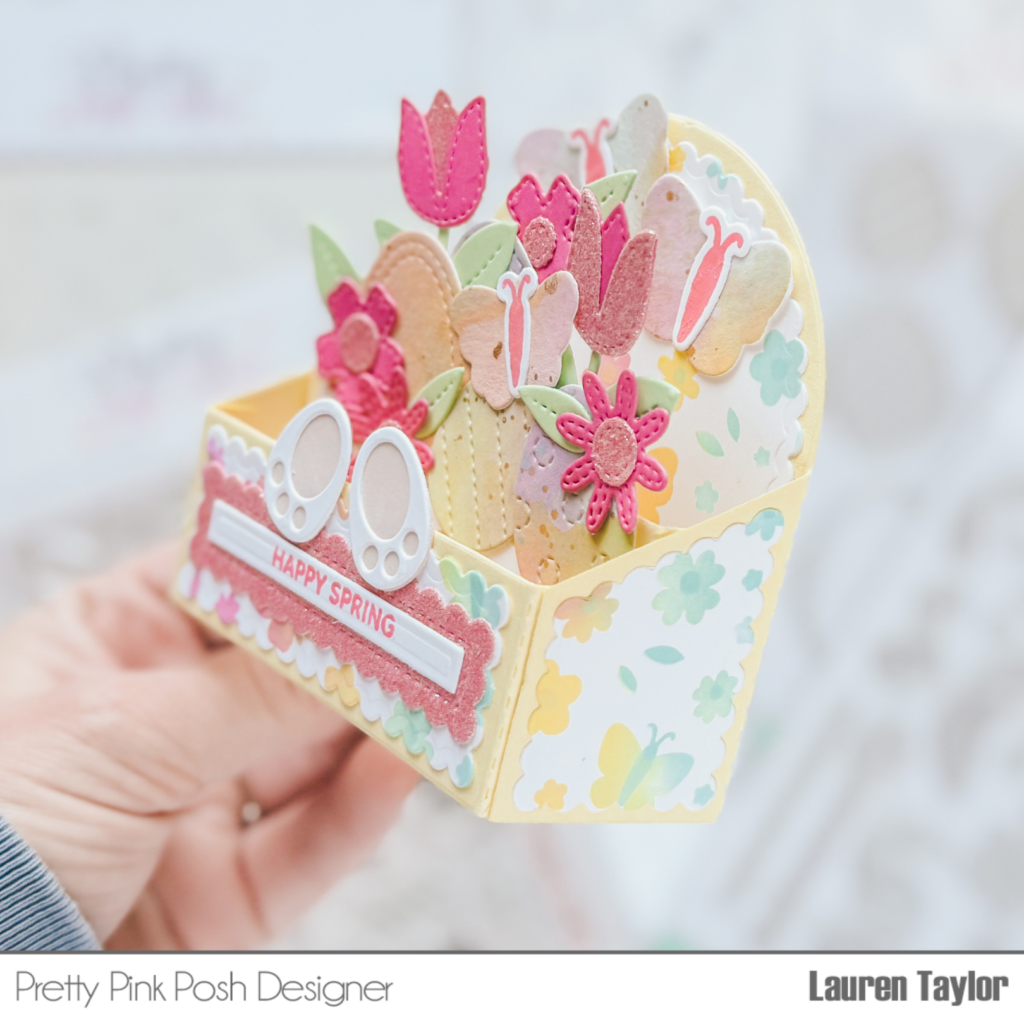
I started with die cutting the Scallop Box Card Dies out of yellow cardstock for the base pieces and smooth, white cardstock for the scalloped pieces to do some ink blending. I used the new Layered Butterfly Floral Stencils with Distress Oxides in Picked Raspberry, Saltwater Taffy, Salvaged Patina, and Squeezed Lemonade to create the design on the scalloped die cuts. I assembled the Scallop Box Card base together and added the stenciled scalloped pieces to the panels.

Pretty Pink Posh: Easter Box Card + Video

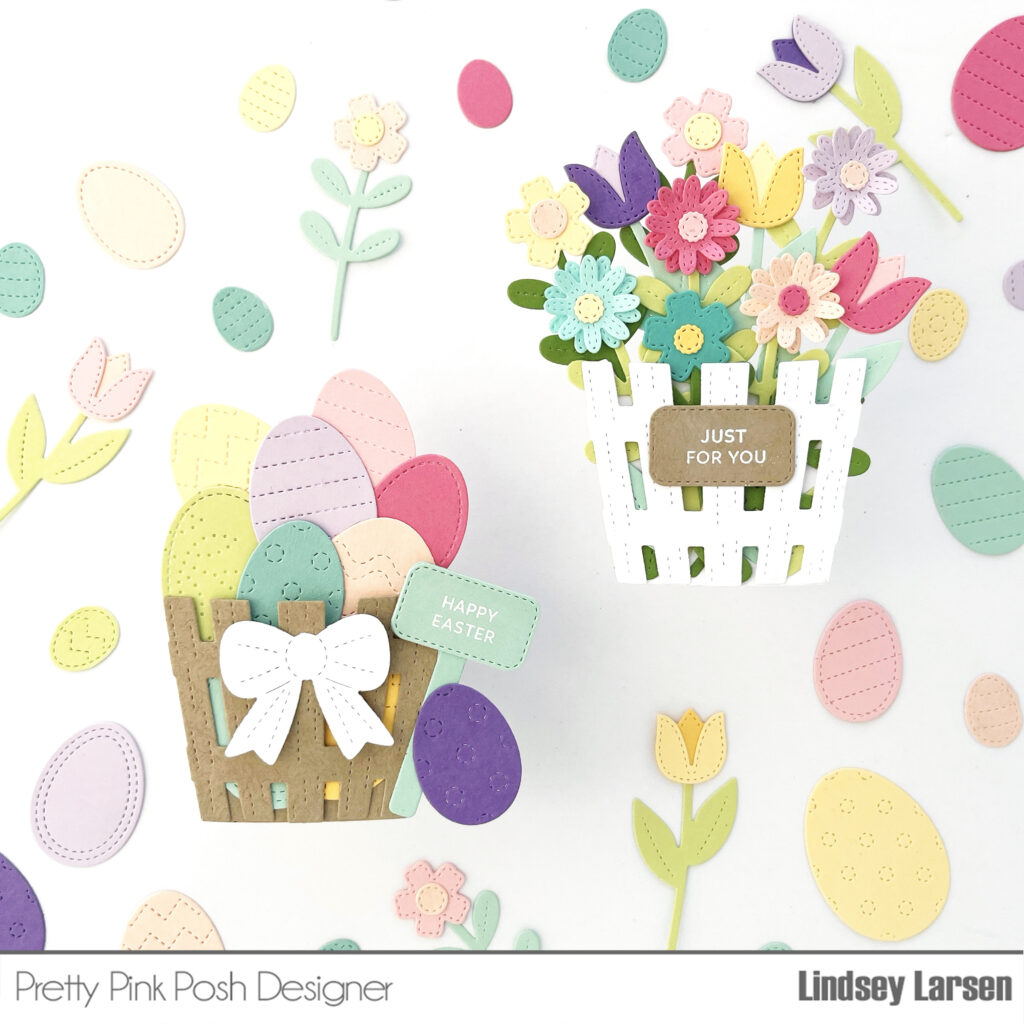
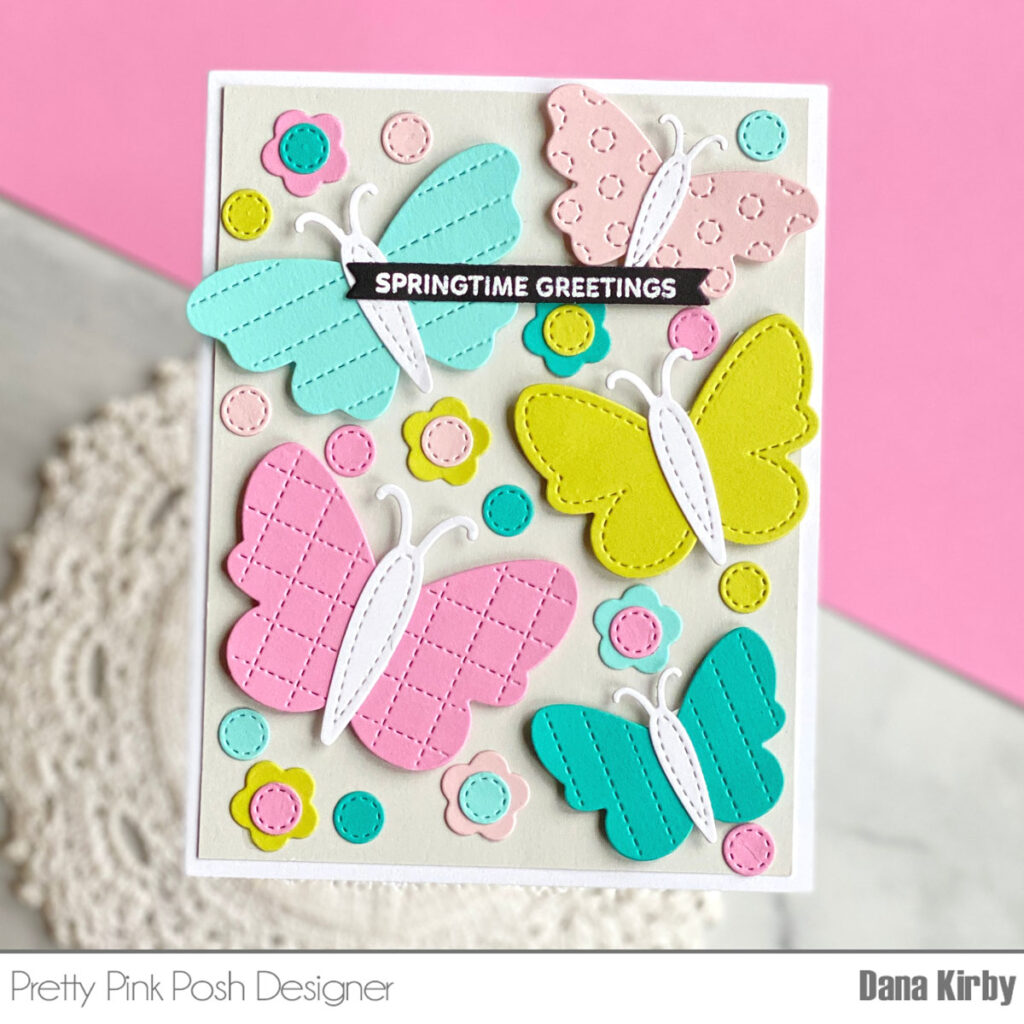
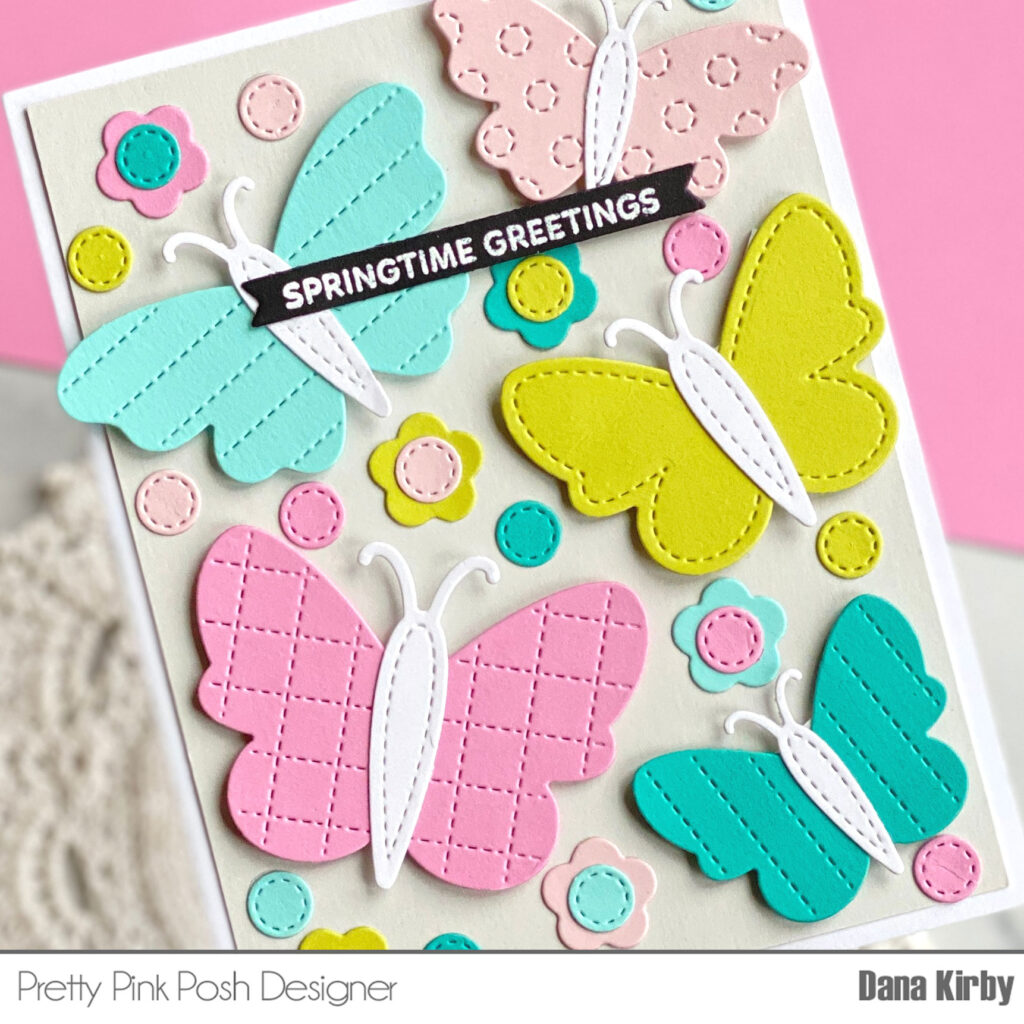
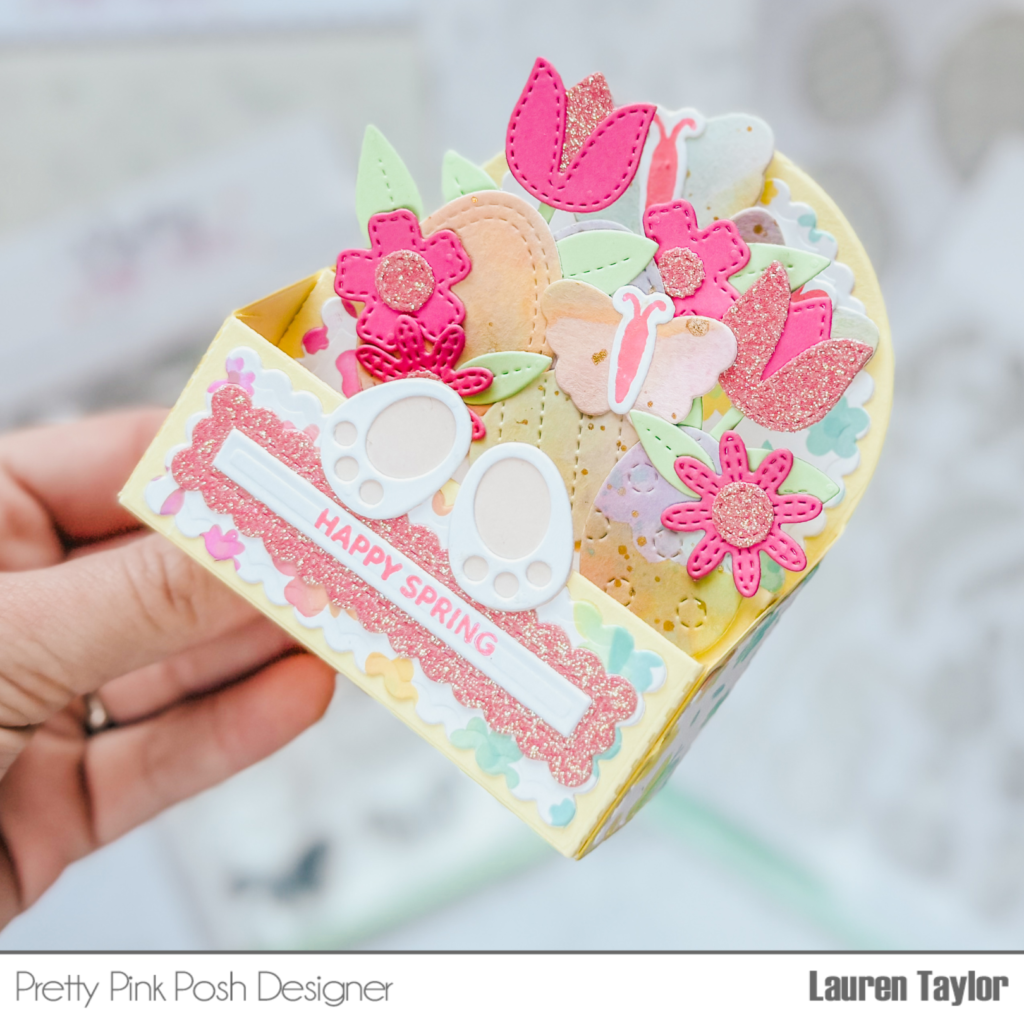
Using a large piece of watercolor cardstock, I used the same Distress Oxides to ink squish and blend all the colors to give a watercolor look. I also splattered on gold watercolor for some sparkle! When it was dry, I used the Stitched Eggs Dies and Decorative Butterflies coordinating dies to cut out eggs and butterflies. I die cut as much as I could out of the panel, but only a used a few for today and I’ll save the rest for a future project.

Pretty Pink Posh: Easter Box Card + Video

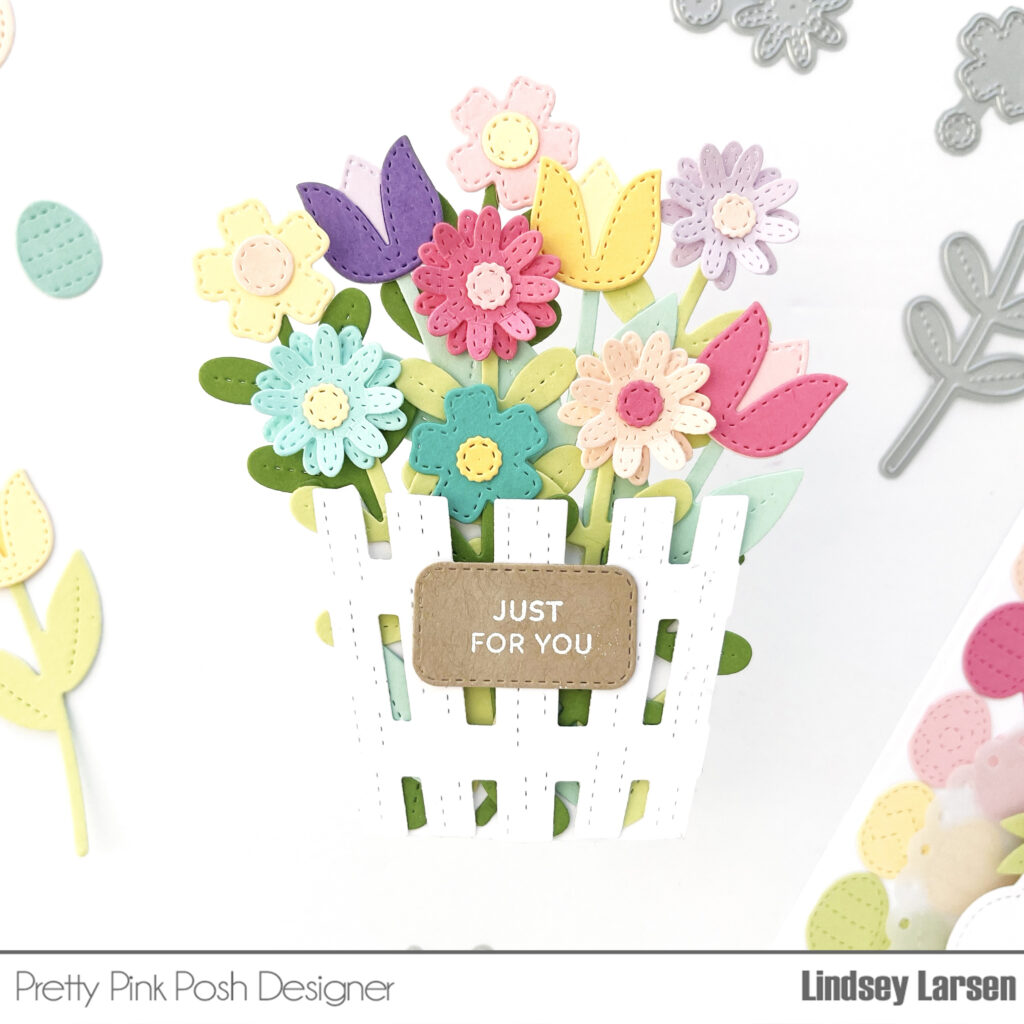
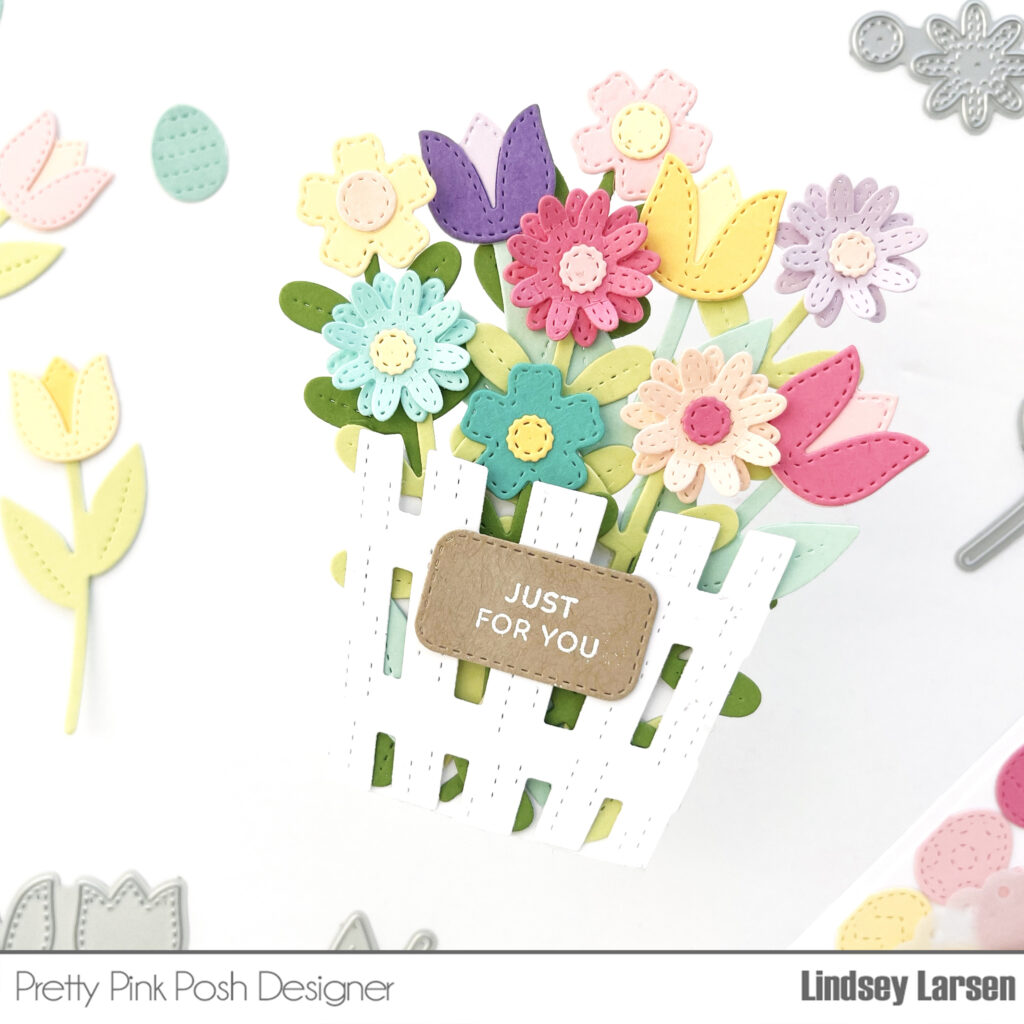
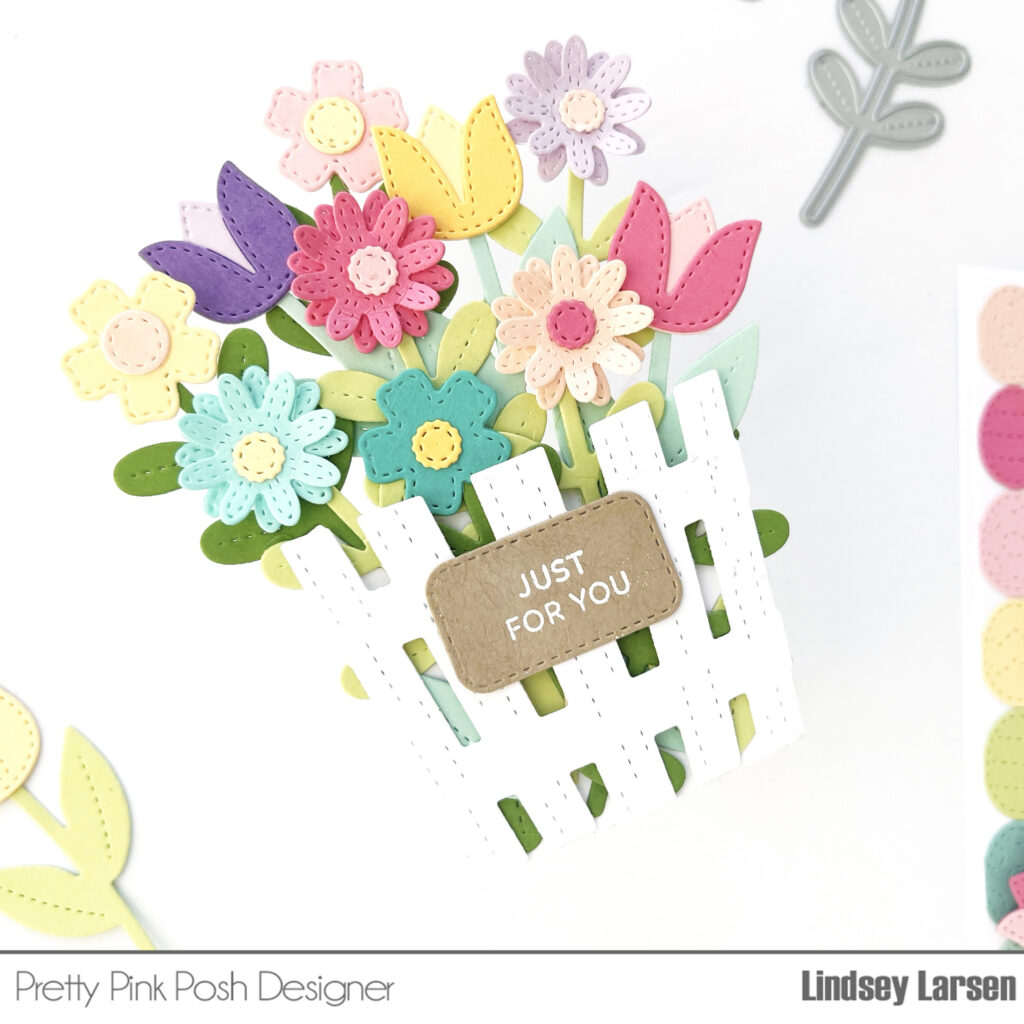
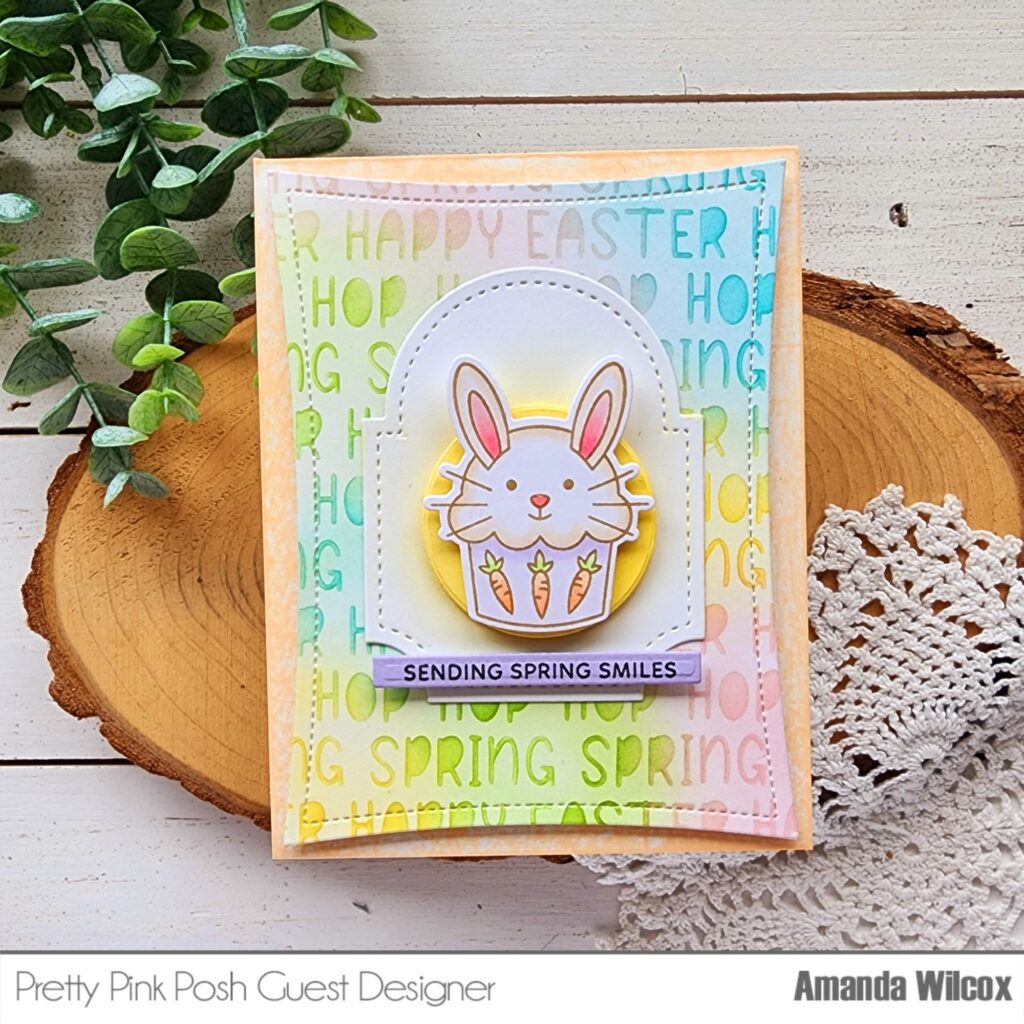
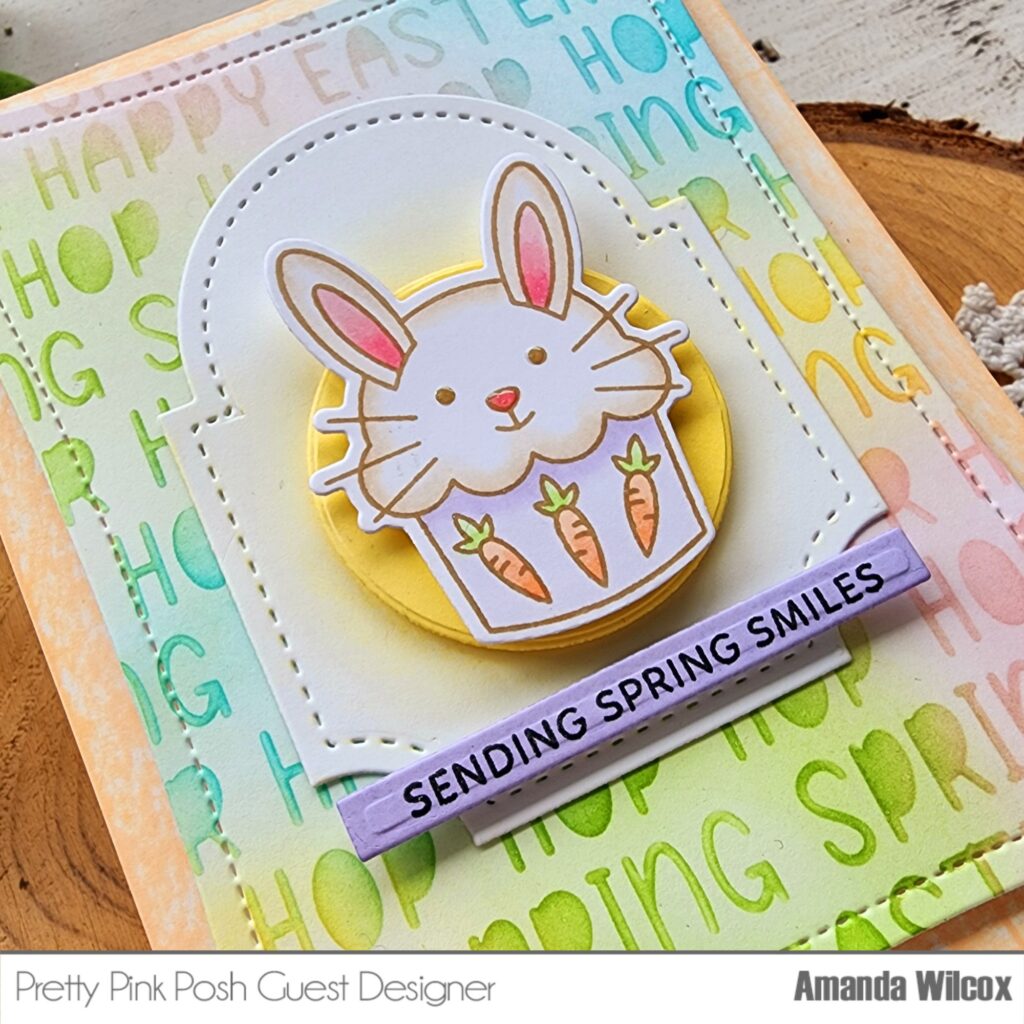
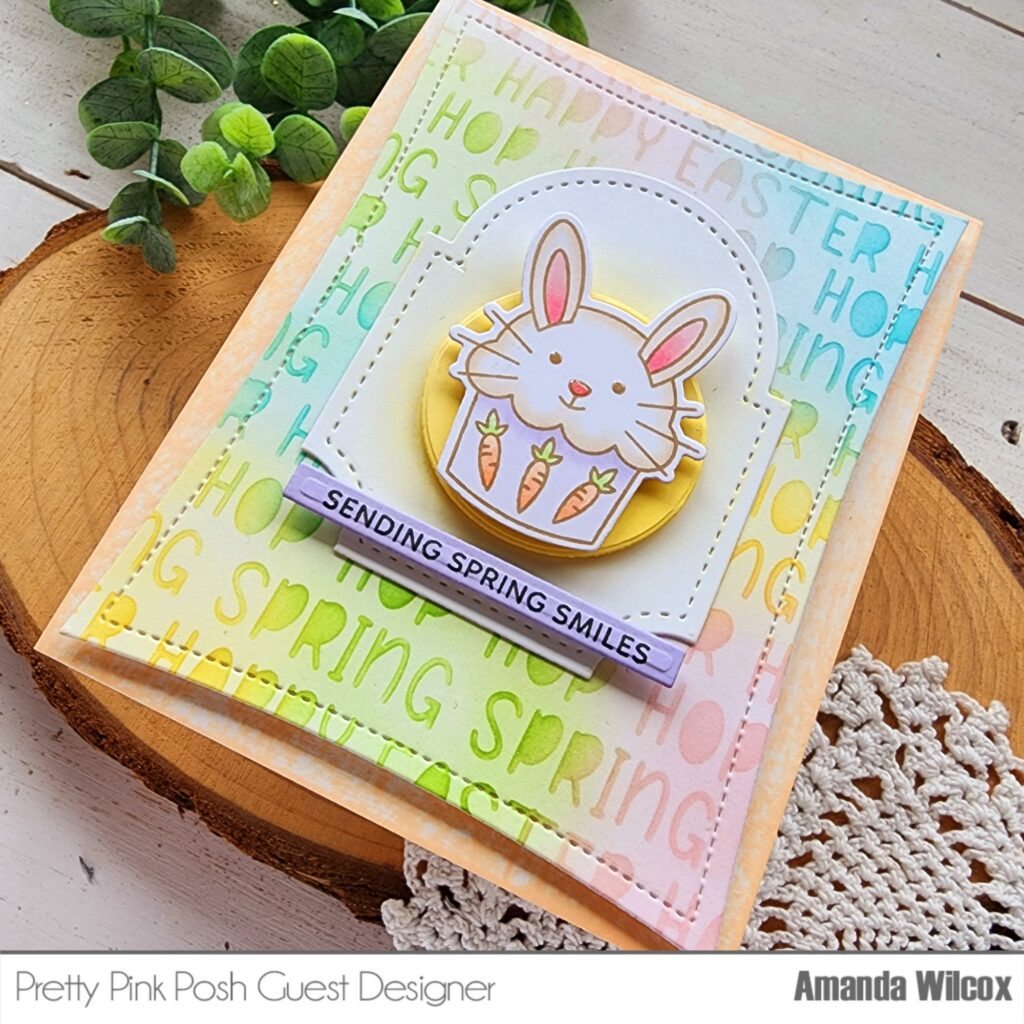
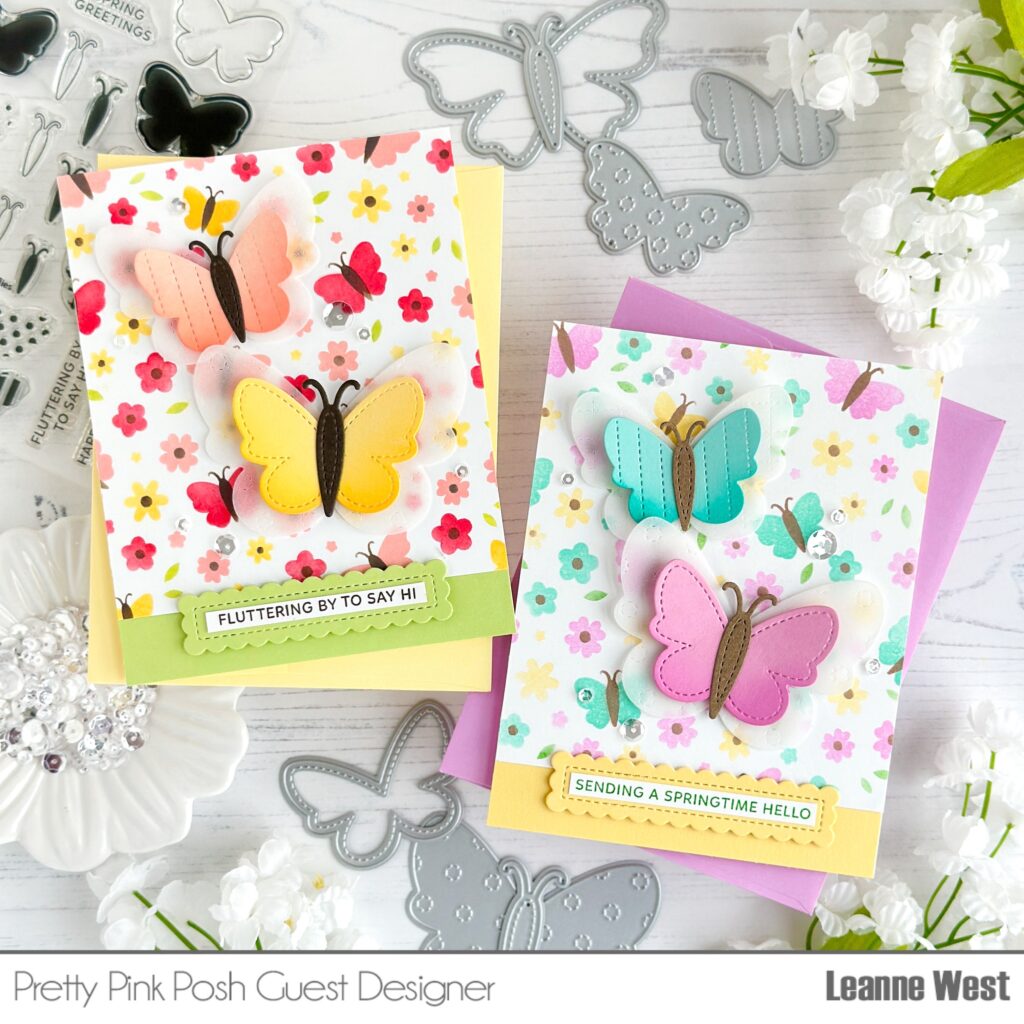
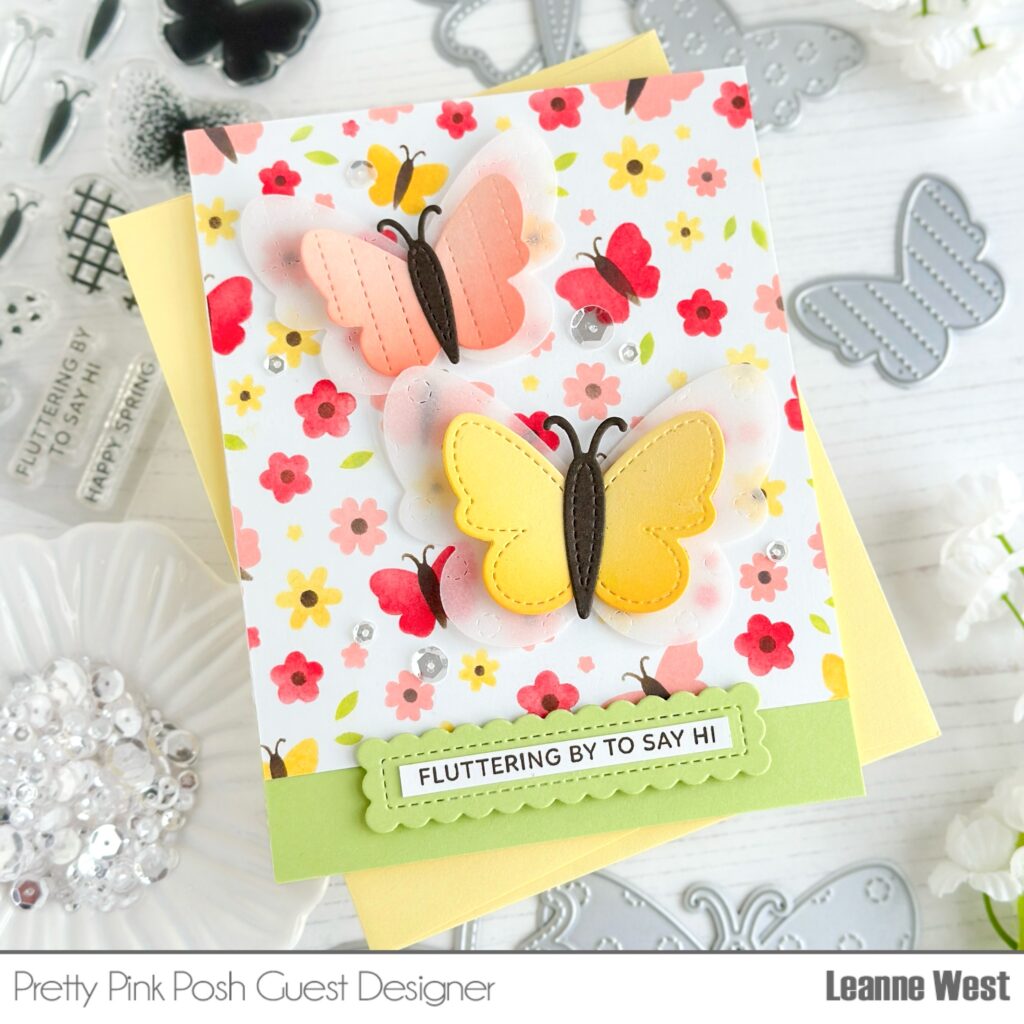
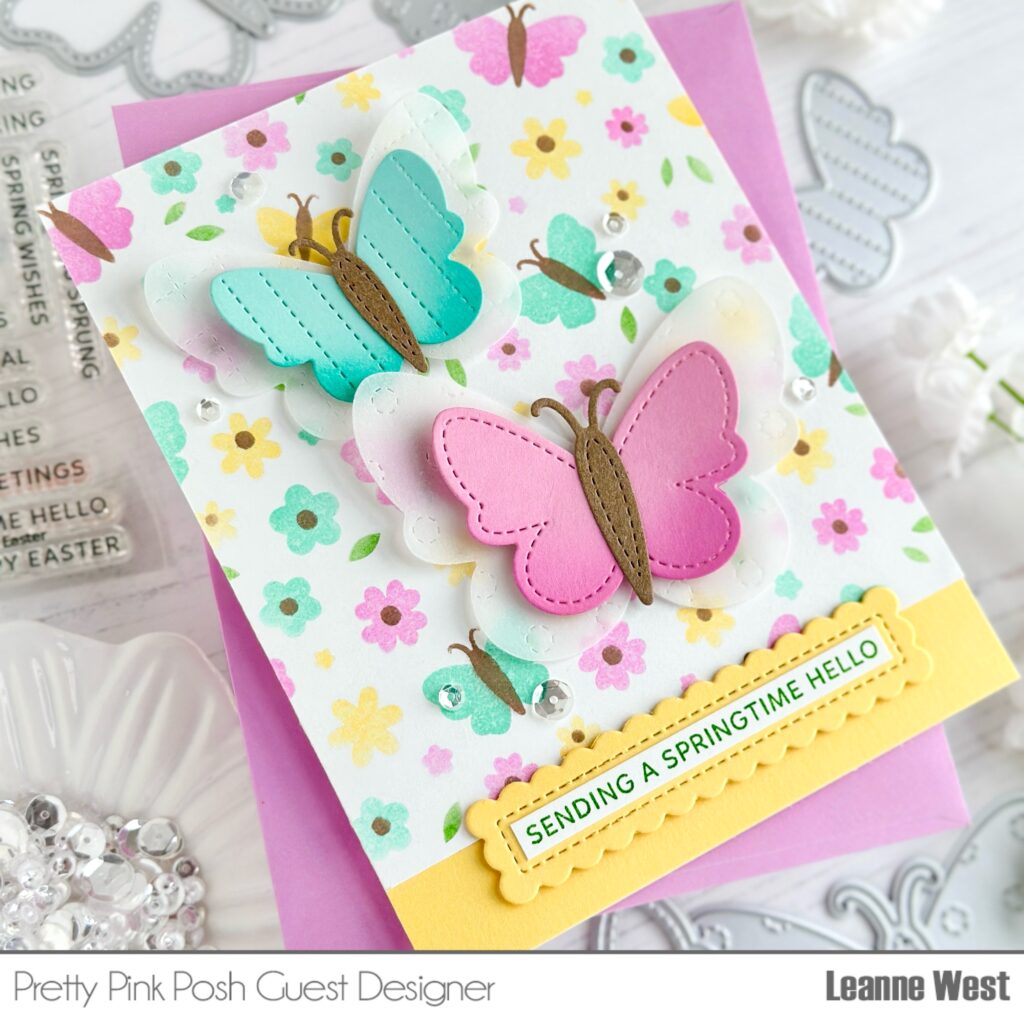
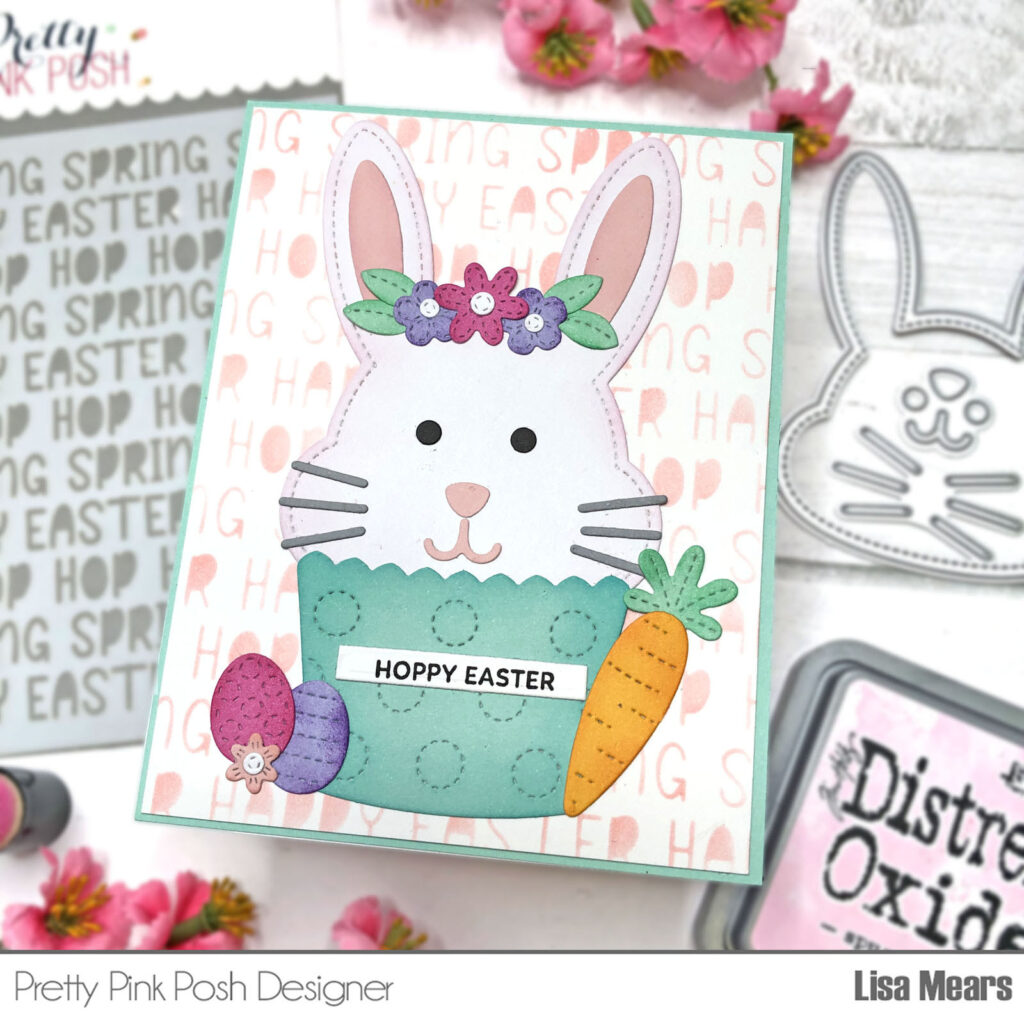
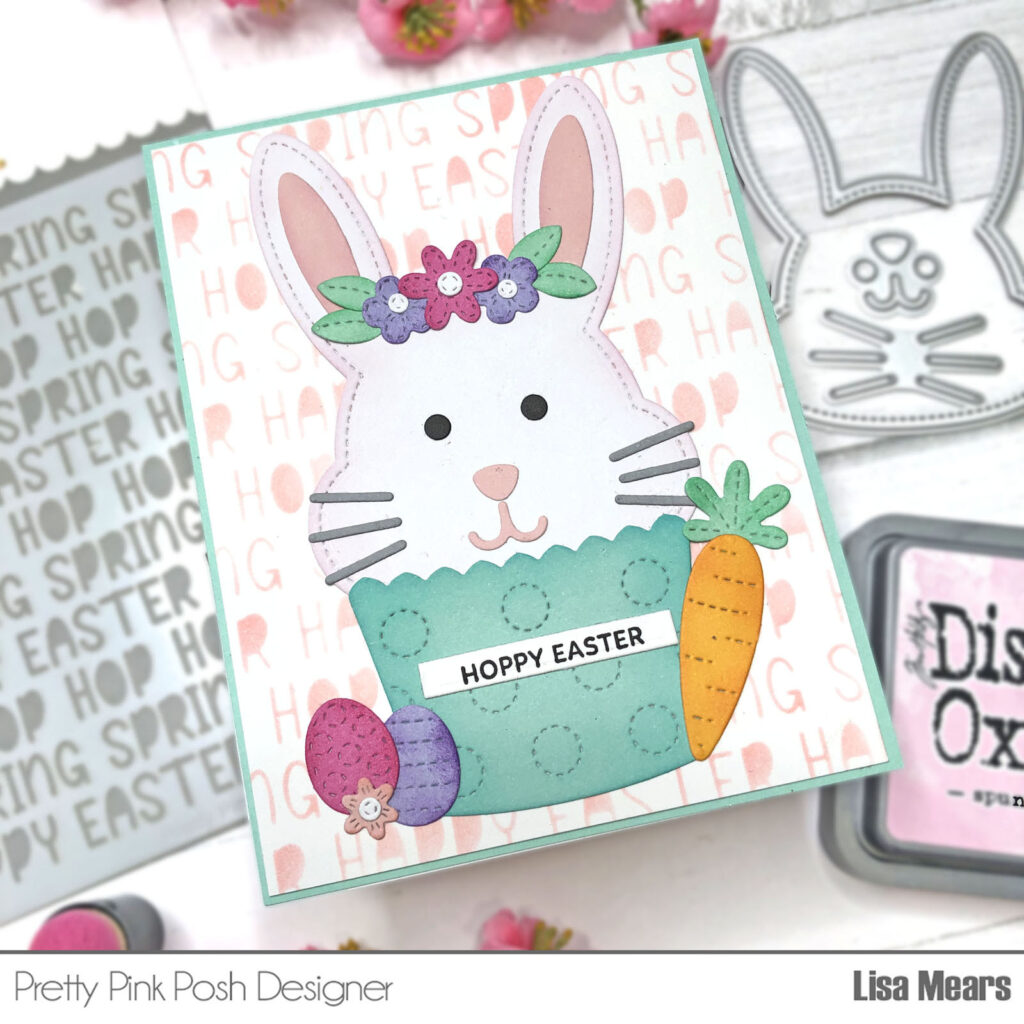
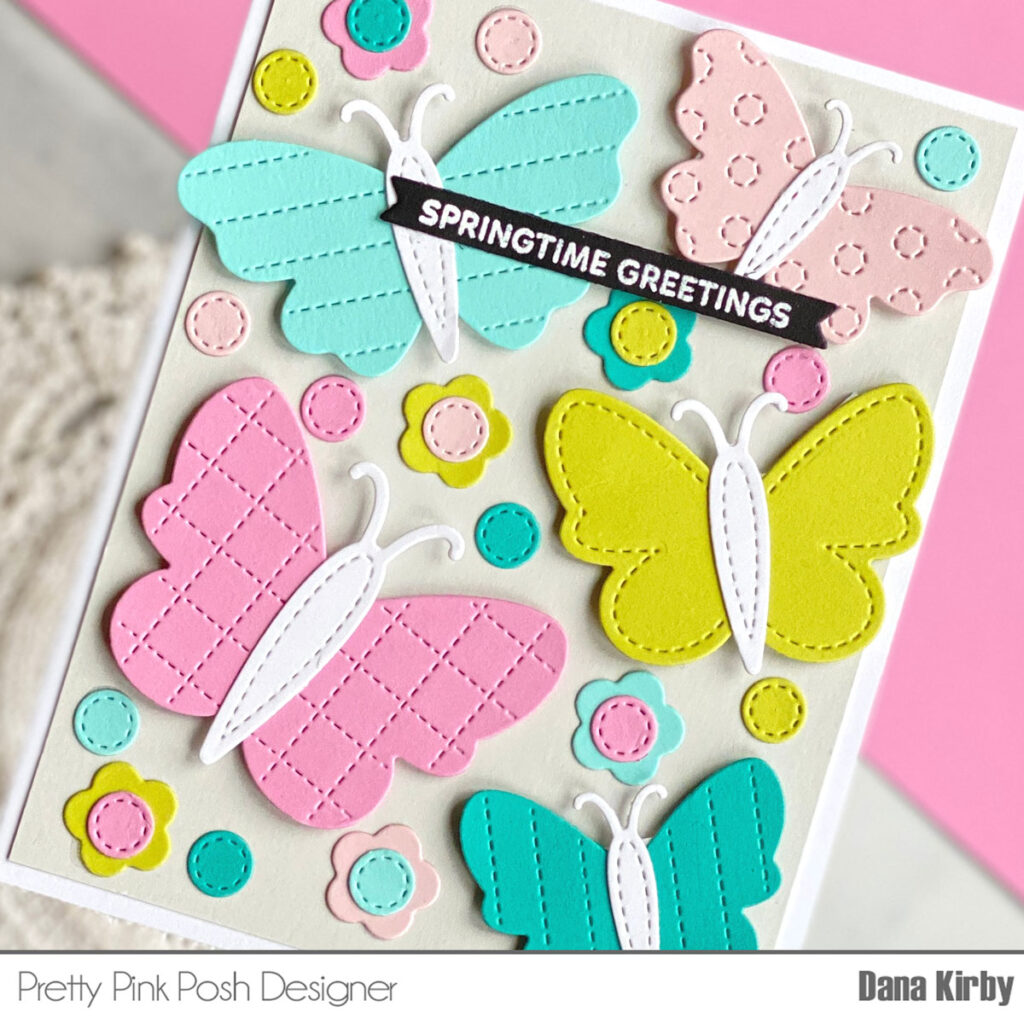
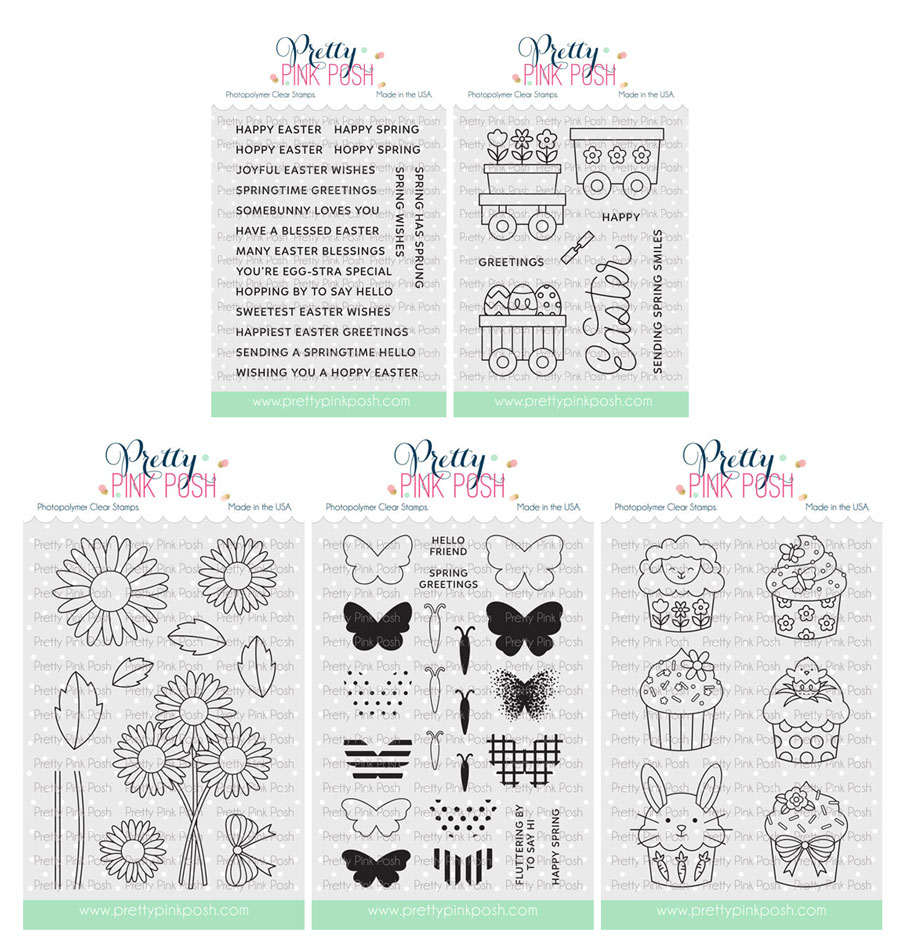
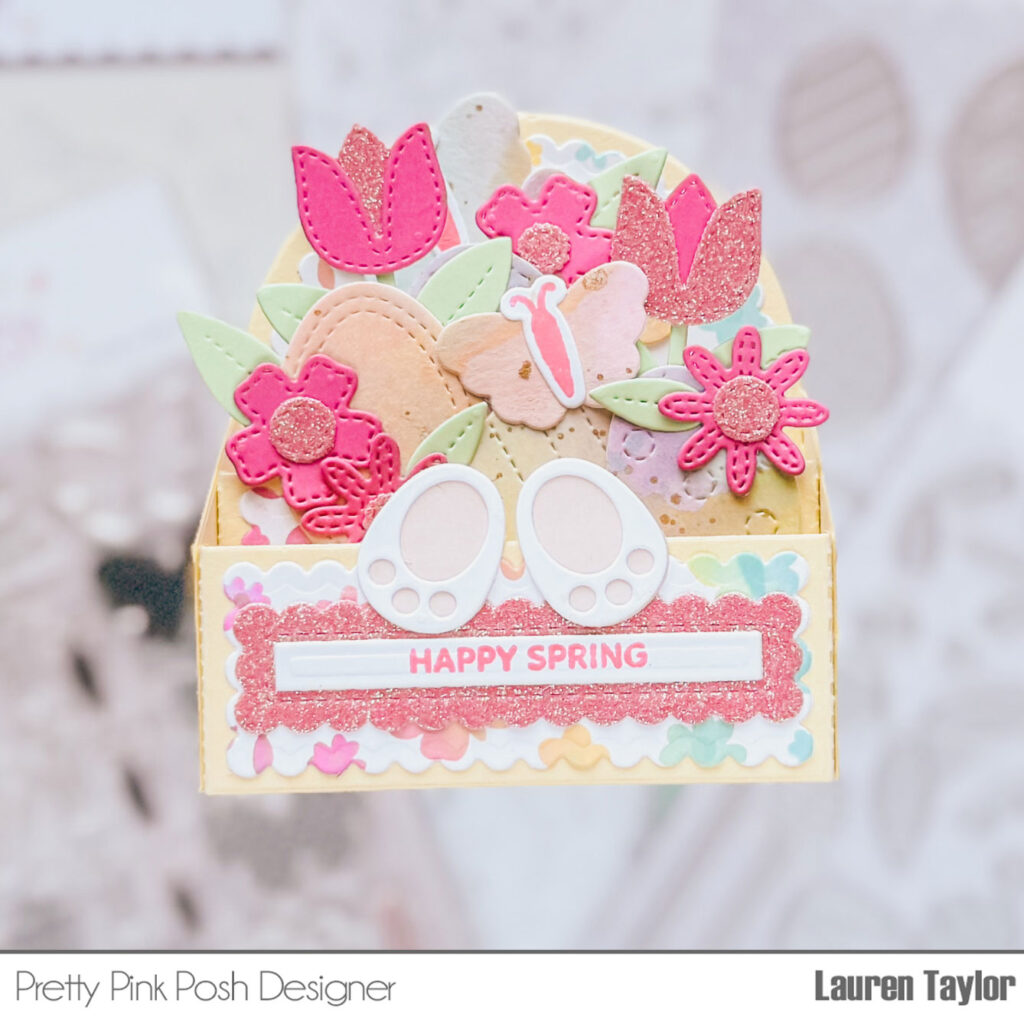
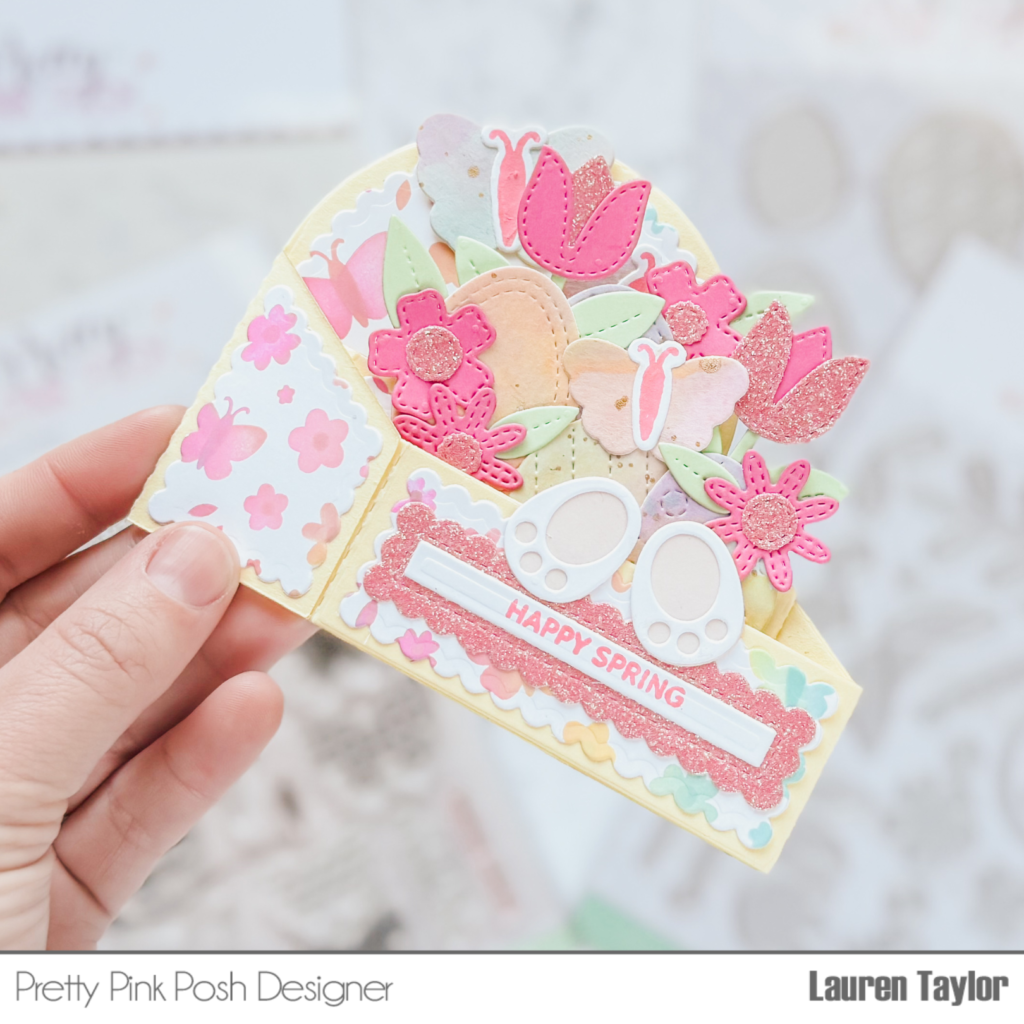
For the butterflies, I also stamped the bodies from the Decorative Butterflies Stamp Set with a pink ink and used the coordinating dies to cut them out. I glued them to the center of the butterfly die cuts from the watercolor cardstock. I also cut the bunny feet and flower stem from the Big Easter Cupcake Dies, strips from the Sentiment Strips Dies, and flowers and leaves from the Spring Mug Additions Dies.

Pretty Pink Posh: Easter Box Card + Video

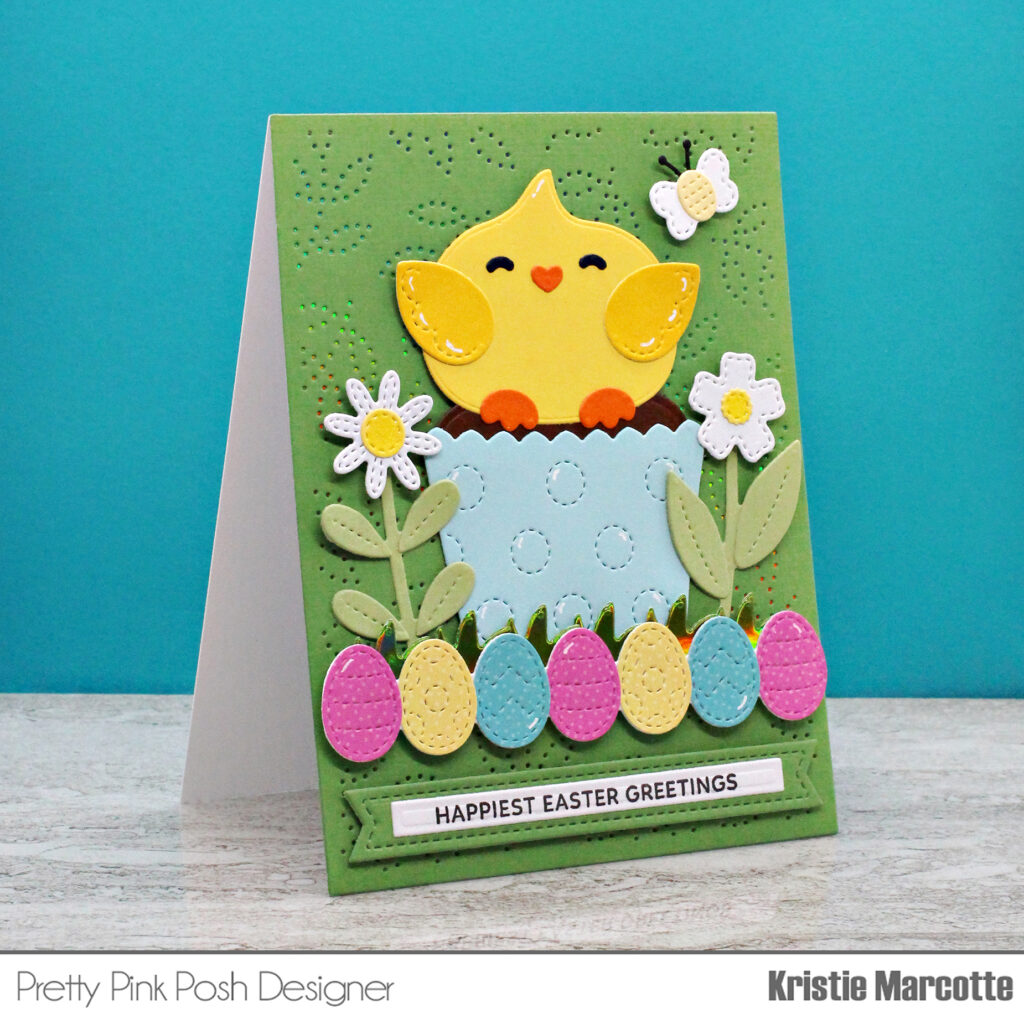
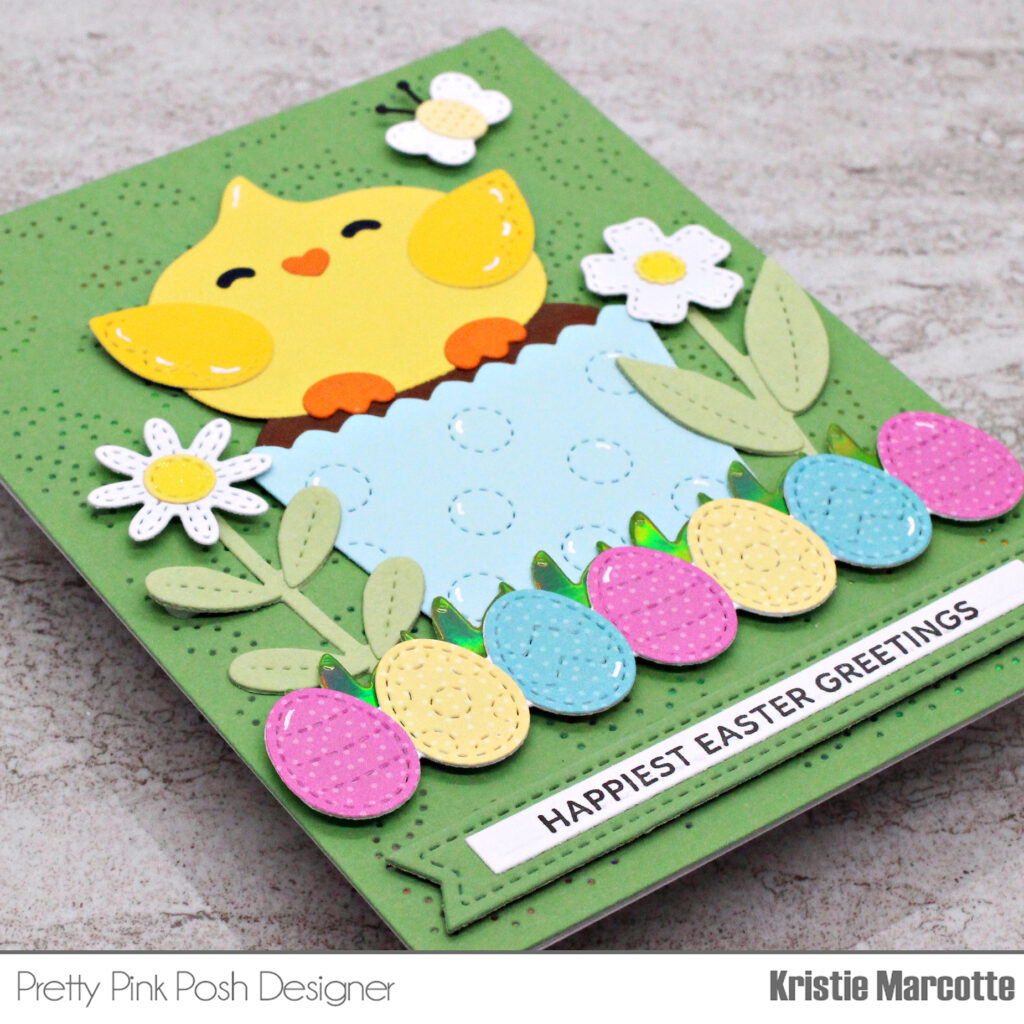
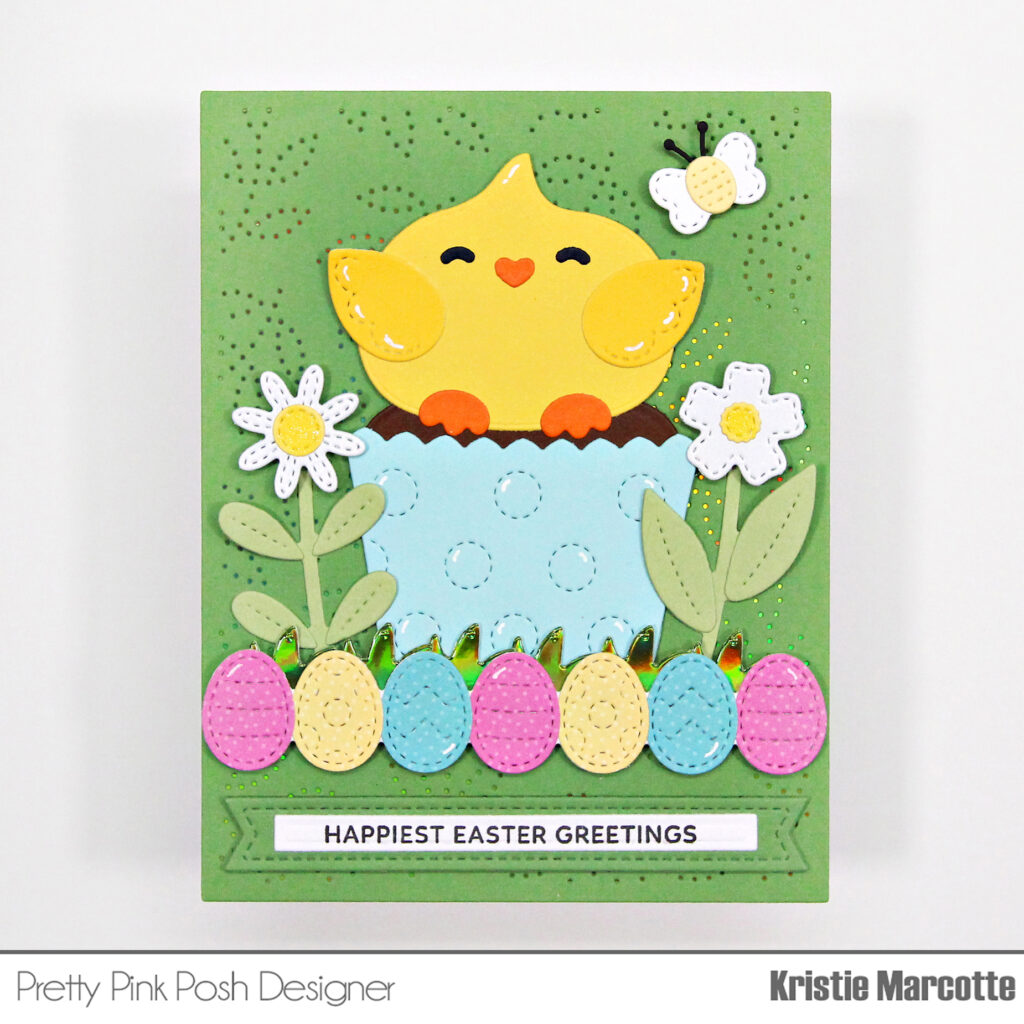
I glued all of the layering dies together and created a scene on the shelf piece of my box card with the eggs, butterflies and flowers. I love the softness of the eggs and bright pink of the flowers! I stamped my sentiment from the Decorative Butterflies stamp set onto my die cuts and added the sentiment to the front of the box card. My little bunny feet are sticking up above the sentiment and they’re my favorite part of the box card!

Pretty Pink Posh: Easter Box Card + Video

Box cards have been so fun to make and I love having my Valentine, St. Patrick’s Day and now Easter box cards on my desk! I’d love to know what I should make for May – probably something for Mother’s Day? What would you like to see?!

|

Chickie Easter Cupcake

Hello friends! It’s Kristie here and I’m having so much fun playing with the new spring and Easter products in Pretty Pink Posh’s latest release! My card today features the Big Easter Cupcake die set. I made a chocolate cupcake with yellow frosting decorated as a cute chick! So fun!

Pretty Pink Posh: Chickie Easter Cupcake

For the background of my card, I used the Pierced Leafy Vines Plate. For a little extra sparkle, I added a piece of green iridescent cardstock behind the pierced cardstock paper. The iridescent shine is visible through the pierced holes an adds a lovely detail. Especially when the light hits it just right.

Pretty Pink Posh: Chickie Easter Cupcake

As a base for the cupcake, I used the Easter Egg Border die. I added several small grass patches behind the border using more of the green iridescent cardstock. The sentiment is from the Sentiment Strips: Easter stamp set, and I cut it out using the Sentiment Strips die set.

Pretty Pink Posh: Chickie Easter Cupcake

For final touches, I added a little bee and a couple flowers using dies from the Spring Mug Additions set. This card was so fun to make! I love the cheerful colors! Perfect for an Easter card.

Thanks so much for featuring my card!
Kristie Marcotte

|

Two Spring Tags

Hello, friends! It’s Lindsey here, and I have two spring tags to share with you today that use the same design two ways.  

Pretty Pink Posh: Two Spring Tags

Easter is just around the corner, so first up is an Easter tag.  I pulled out the previously released Fall Basket Die and cut just the two main basket pieces. Then I filled the basket full of colorful stitched eggs. The Stitched Eggs Dies come in a variety of designs and a couple of them cut just the stitched outline, leaving lots of creative options.  On one of the solid eggs (the green egg), I added leaves using the Pierced Leafy Vines Plate

Pretty Pink Posh: Two Spring Tags

I embossed a sentiment from the Spring Jar stamp set onto a sign from the Big Easter Cupcake Dies, and then finished off the tag with a cute bow from the Birthday Treat Box Dies.

Pretty Pink Posh: Two Spring Tags

On my second tag, I repeated the same design, but made it suitable for lots of occasions. It would be great for Mother’s Day, birthdays, or even just to let someone know you care. 

Pretty Pink Posh: Two Spring Tags

I used the same dies and stamps, except I swapped out the eggs for the flowers in the Spring Mug Additions. I just love how the basket makes them look like fresh picked flowers.  

Pretty Pink Posh: Two Spring Tags

This time I opted to simply add a label to the basket instead of using the full sign and chose a different sentiment from the Spring Jar stamp set

Pretty Pink Posh: Two Spring Tags

Thanks so much for joining me today!  I had so much fun making these tags, and I hope that they’ve inspired you.

|

Pastel Bunny Cupcake

Hello crafty friends! This is Amanda from Twiddler’s Nook. I’m excited to be on the Pretty Pink Posh blog today sharing a card I created using the new March release of goodies, plus some previously released dies that I seem to reach for over and over again.

I started by stamping my bunny cupcake image from the Easter Cupcakes set using a brown copic-friendly ink. I colored the image and used the coordinating die to cut it out. Then I switched gears to stenciling my background panel. 

For that, I layered the Easter Words stencil over a piece of white cardstock and randomly inked it with light and bright spring colors. After I removed the stencil I went over the panel with the same color in all the different areas. This brings another layer to the words and colors in the white background at the same time. Once that was done I used the largest Wonky Stitched Rectangle die to cut the panel out. 

I cut a white tag and yellow circle using the Spring Circles coordinating dies and ink blended a yellow shadow on the white tag. I layered all my pieces with foam squares, then glued the tag to the stenciled panel with liquid glue. 

Then, I stamped a sentiment from the Easter Train set and cut it out with a Sentiment Strip die and popped it up below my cupcake. Before popping the whole thing up on a card base, I took a light orange ink pad and drug it across the edges for a textured inky look. 

For finishing touches I just added glossy accents to the bunny’s nose and eyes. 

Are you ready for Easter yet? We’re excited at my house! I appreciate you sharing your time with me. Have a fabulous day!         

|

Layered Butterfly Floral Card Duo

Hello everyone! Leanne here and I’m thrilled to be guest on the blog today. I have a duo of butterfly cards to share. Both my cards feature a stenciled background and die cut layered butterflies. I created the backgrounds for my cards with the new Layered Butterfly Floral Stencil Set. Trust me when I say this stencil set is very addictive. I could not stop playing with it! I kept wanting to try out different color palettes.  I’m sharing a couple favorites from my stenciling session.  

I have trimmed my stenciled panels down so they fit onto an A2 size card base.  The length of these panels is 4 7/8″ inches.  I wanted them to be a bit shorter than A2 length so I could add a strip of card stock at the bottom.  I thought this would help draw attention to the sentiment.  The sentiments I used come from two new stamp sets… Decorative Butterflies and Sentiment Strips: Easter.  I used a die from the Sentiment Strips dies to create the stitched scalloped pieces I’ve adhered my sentiments to.  

For each card I have added two layered butterflies.  There’s many sizes to pick from in the new Stitched Butterflies die set. I chose four different ones. I die cut the back layer from vellum. The top layers are die cut from card stock to match my stenciled color palettes. I lightly inked the bottom edge of each card stock butterfly just to add some subtle shading.  I adhered the layers together with thin foam tape. This gives a nice little bit of separation from the two layers and adds some dimension. 

To finish off these cards, I added a scattering of Sparkling Clear Sequins. These are my go to embellishments when I want to add a little bling but not distract from the main elements on the card.  

This card design is quick, easy, and definitely fun to make. It would be perfect for mass producing to make gift sets of note cards.  The butterfly theme can go for many occasions just by switching up the colors and sentiments.  I have a feeling I’ll be reaching for these new butterfly dies and stencils often this spring and summer. 

| |

Big Bunny Cupcake

Hi crafty friends! It’s Lisa Mears on the blog today. My card features an adorable Easter bunny cupcake. I used products from the new Easter and spring release to make my card.

Watch the video above  I  Watch the video in HD on YouTube

Pretty Pink Posh: Big Bunny Cupcake

For the background of my card, I used the Easter Words Stencil. This stencil is perfect for Easter cards with words such as “Spring,” “Happy Easter,” and “Hop, Hop, Hop.” I inked the stencil with Scrapbook.com Pink Lemonade ink. I chose this ink because it closely matches the pink cardstock I used for the bunny’s ears.

Pretty Pink Posh: Big Bunny Cupcake

I used the Bunny Face Shaker dies for the Easter bunny face. This die set can be used to make a bunny face shaker, but I didn’t use it as a shaker for my card. I love how it fits perfectly on top of the cupcake wrapper from the Big Easter Cupcake dies.

Pretty Pink Posh: Big Bunny Cupcake

I added flowers above the Easter bunny’s head using the Spring Foliage Dies. I added two Easter eggs and a carrot from the Big Easter Cupcake. I topped it off with a sentiment from the Sentiment Strips: Easter stamp set and coordinating dies.

Pretty Pink Posh: Big Bunny Cupcake

Thank you so much for stopping by today. Have a great day!
Lisa Mears

| |

Day 3: March Blog Hop + New Release Now Available

Day 3: March Blog Hop + New Release Now Available

If you missed Day 1 CLICK HERE //  If you missed Day 2 CLICK HERE

Hello, friends. Barbara here on the Pretty Pink Posh blog and I am so happy to share a project I made using some of the brand new products.

Day 3: March Blog Hop + New Release Now Available

I have made a fun shaker card using the new Bunny Face Shaker die. I made this card using an A2 size card base cut from smooth white cardstock. I then trimmed down another piece of white cardstock to leave a bit of a white border. I then placed the new Easter Words stencil over the white panel and added distress ink over the stencil. I then removed the stencil and ink blended a bit lighter using the same distress inks.

Day 3: March Blog Hop + New Release Now Available

Using a paintbrush, I flicked some distress ink over the stenciled background for some interest. I then die cut the Bunny Face Shaker from white cardstock and added a piece of acetate to the back of the bunny face. I flipped over the bunny face and added the shaker elements to the inside of the bunny and also some foam tape to adhere the piece of white cardstock behind the bunny face to enclose the shaker bits. I trimmed it down and adhered it to the center of the stenciled panel. I then die cut and ink blended the carrots from the new Big Easter Cupcake die set and added them to the bottom of the card.

Day 3: March Blog Hop + New Release Now Available

Last, I die cut a banner from the Love From Afar die set and stamped and heat embossed a sentiment from the Sentiment Strips: Easter stamps.

PRIZES: be sure to leave comments on each stop. We are giving away 3 $30 gift certificates to three random comments (1 winner each day) left before March 13, 2024 at 11:59 PM PST. I’ll be announcing the winners next week, so be sure to return and see if you are one of the winners.

Pretty Pink Posh blog << you are here
Amanda Wilcox
Dana Kirby
Annette Allen
Zsofia Molnar
Jeanne Jachna
Heather Hoffman
Gemma Campbell

We hope you were inspired by the three days of blog hop! Join us next week for more inspiration and we’ll be having FOUR days of Instagram hops!

| |

Day 2: March Blog Hop + New Release Now Available

Day 2: March Blog Hop + New Release Now Available

If you missed Day 1 CLICK HERE 

Hello crafty friends, Marine here. I’m super happy to share with you this lovely card that features some of the brand new products from the March 2024 Release: the Spring Mug Additions die set and the Layered Floral Vines stencils. Love how both items match so beautifully, such a great duo!

Day 2: March Blog Hop + New Release Now Available

First thing I created was the background. I cut a 5,5 x 4,25 inches Strathmore bristol smooth panel, and started off by covering the piece of paper with spun sugar oxide ink to get a nice soft base. Next I used the Layered Floral Vines stencils to add flowers and greenery to this light pink background. For the flowers I applied worn lipstick oxide ink that I blended in with spun sugar oxide ink, and used worn lipstick again for the center of the flowers. And for the greenery I applied rustic wilderness oxide ink that I blended in with mowed lawn oxide ink.

Day 2: March Blog Hop + New Release Now Available

Every time I create an ink blended background, I like to add texture to make it more interesting. So I first splattered some water all over the panel that I dried using a paper towel. Next I mixed some white ink with water and used a small brush to add more splatters to my panel, and then did the same with black soot oxide ink.

While my panel was drying, I cut all the bits and pieces out of colored cardstock. I used most of the Spring Mug Additions dies to cut everything, but also used the mug and the beverage dies from Winter Mug, as well as the sign die from Big Easter Cupcake to complete my little scene. I cut the bees’ wings out of pearlescent vellum, added black stripes to their bodies using a black marker, and white heat embossed my “Happy Spring” greeting from Easter Signs on the sign.

Day 2: March Blog Hop + New Release Now Available

I assembled and attached everything on my Layered Floral Vines panel using 1mm and 2mm foam squares, and added highlights and details using a white gel pen. And that’s it! It’s definitely springtime on a card, I love those beautiful flowers and cute bees! I hope you like them, too.

PRIZES: be sure to leave comments on each stop. We are giving away 3 $30 gift certificates to three random comments (1 winner each day) left before March 13, 2024 at 11:59 PM PST. I’ll be announcing the winners next week, so be sure to return and see if you are one of the winners.

Pretty Pink Posh blog << you are here
Wanda Guess
Carissa Wiley
Hanh Nguyen
Leanne West
Rebecca Keppel
Mindy Eggen
Sindhu Prajay
Lisa Mears
Lauren Taylor

We hope you were inspired by today’s projects. Thanks for stopping by, we’ll see you again tomorrow!

| | |

Day 1: March Blog Hop + New Release Now Available

The March 2024 Release is now available in the Pretty Pink Posh Shop and select retailers that carry our products. If you missed our post yesterday, we revealed all of the products in picture form, but if you would like to see them in a video, Mindy has that for you today!

Watch the video above  I  Watch the video in HD on YouTube

Hi crafty friends! It’s Dana here today and I am back with a fun Springtime card to share with you all. 

I started my card by die cutting my butterflies with the Stitched Butterflies die set. I attached the butterflies to a soft gray card panel with foam adhesive. Next, I used the Spring Mug Additions die set to die cut my small stitched circles and the Big Easter Cupcake die set to die cut the small flowers (which actually can be used as a bunny tail). I then attached the small flowers and stitched dots to fill in my panel in a random pattern. 

Lastly, I used the Sentiment Strips: Easter stamp set to stamp my sentiment. Although I made a springtime/Easter card I think this same design will work great for a birthday card or even to welcome a new baby. The color combinations are endless! I hope I inspired you to create a similar card of your own.

PRIZES: be sure to leave comments on each stop. We are giving away 3 $30 gift certificates to three random comments (1 winner each day) left before March 13, 2024 at 11:59 PM PST. I’ll be announcing the winners next week, so be sure to return and see if you are one of the winners.

Pretty Pink Posh blog << you are here
Nichol Spohr
Amy Rysavy
Marine Simon
Barbara Tarayao
Lindsey Larsen
Kristie Marcotte
Lea Lawson
Carly Minner
Davina Cantrell

Be sure to leave comments on all the stops- we’ll be randomly picking comments to win gift certificates. Thanks for joining us!

March 2024 Product Reveal + Bundles

Hello friends! It’s time to reveal all of the products that are part of the March 6th release.

Here’s a look at the five new stamp sets that will be available for purchase: Sentiment Strips: Easter, Easter Train, Daisies, Decorative Butterflies and Easter Cupcakes.

Here are the individual die sets that will be available: Spring Script, Bunny Face Shaker, Butterfly Cover Plate, Easter Egg Border, Eyelet Circles, Spring Mug Additions (designed to be used with the popular Winter Mug dies)., Pierced Leafy Vines Plate, Big Easter Cupcake, Stitched Butterflies and Stitched Eggs.

This month we have five new stencils: Easter Words, Layered Butterfly Floral (4 layer)Layered Butterfly Lattice (2 layer), Layered Bunny Faces (3 layer) and Layered Floral Vines (3 layer).

There are five new embellishments this month: Spring Butterflies clay confetti, Easter Bunnies clay confetti, Cotton Candy clay confetti, Pastel Party shaker beads and Springtime shaker beads.

We have a limited amount of bundles available where you can buy this release in one easy click. Plus, you’ll save 15% off when you buy it all together.

We will see you tomorrow as we show you the new products in a video and the products go live individually. Plus, we’ll kick off our three day blog hop!