Giveaway

| |

Pretty Pink Posh + Therm O Web Collaboration Day 7

Pretty Pink Posh + Therm O Web Collaboration Day 7

Hello, Jeanne here for the last day of the Thermoweb collaboration week.

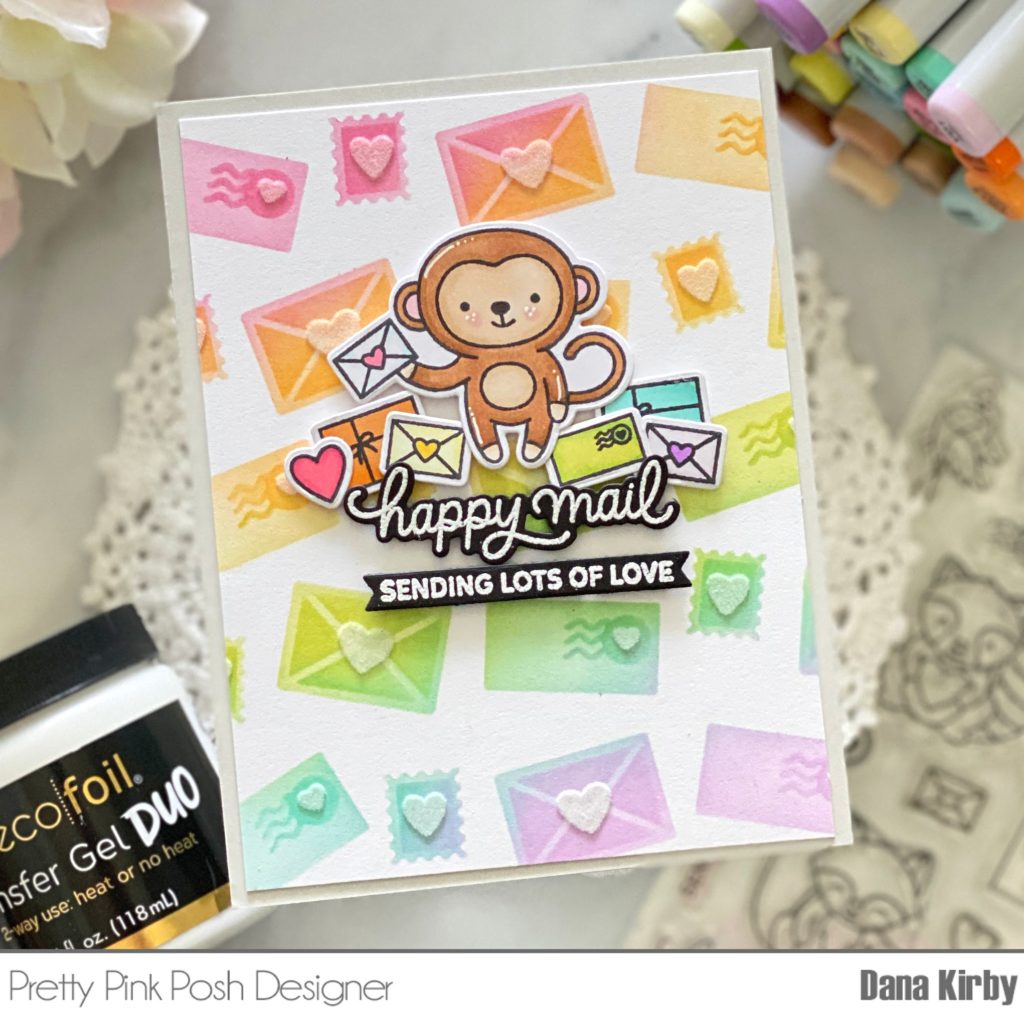
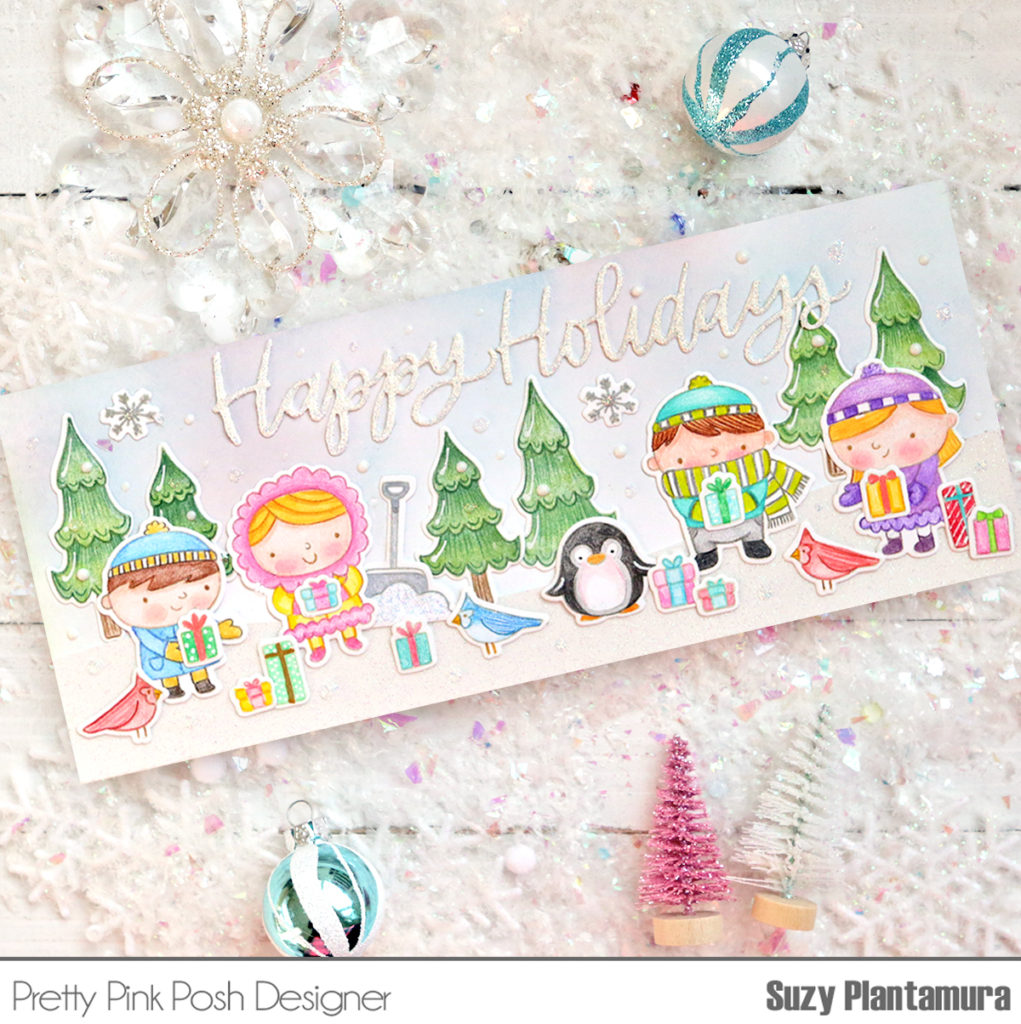
I just love to select stamp sets and dies that make my heart happy so I can send smiles across the miles. Today I wanted to demonstrate that behind all the cute images and detailed dies there’s great adhesives and bling that make every detail just right. This week we’re collaborating with Thermoweb and sharing a little “behind the image” products that can make your crafting time easier and more satisfying. 

Affiliate links are used for products that are not sold in the Pretty Pink Posh Shop.

Pretty Pink Posh + Therm O Web Collaboration Day 7

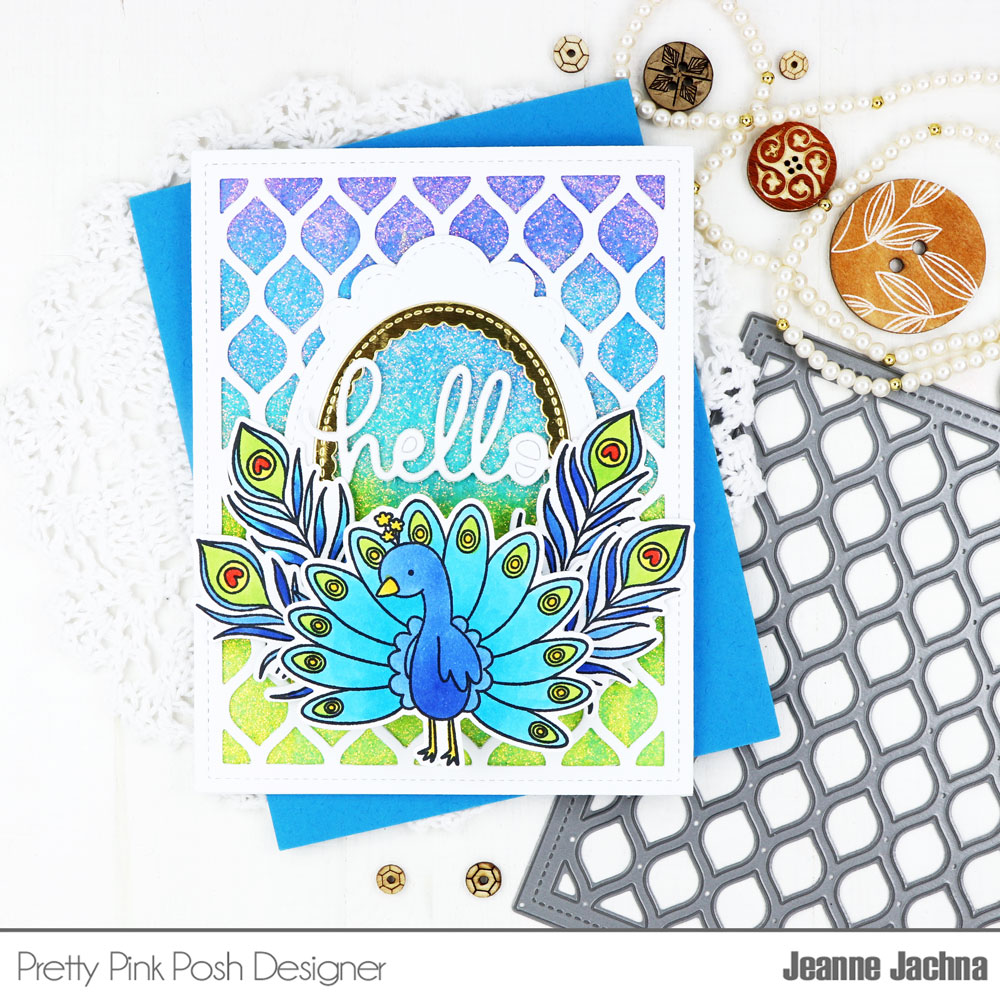
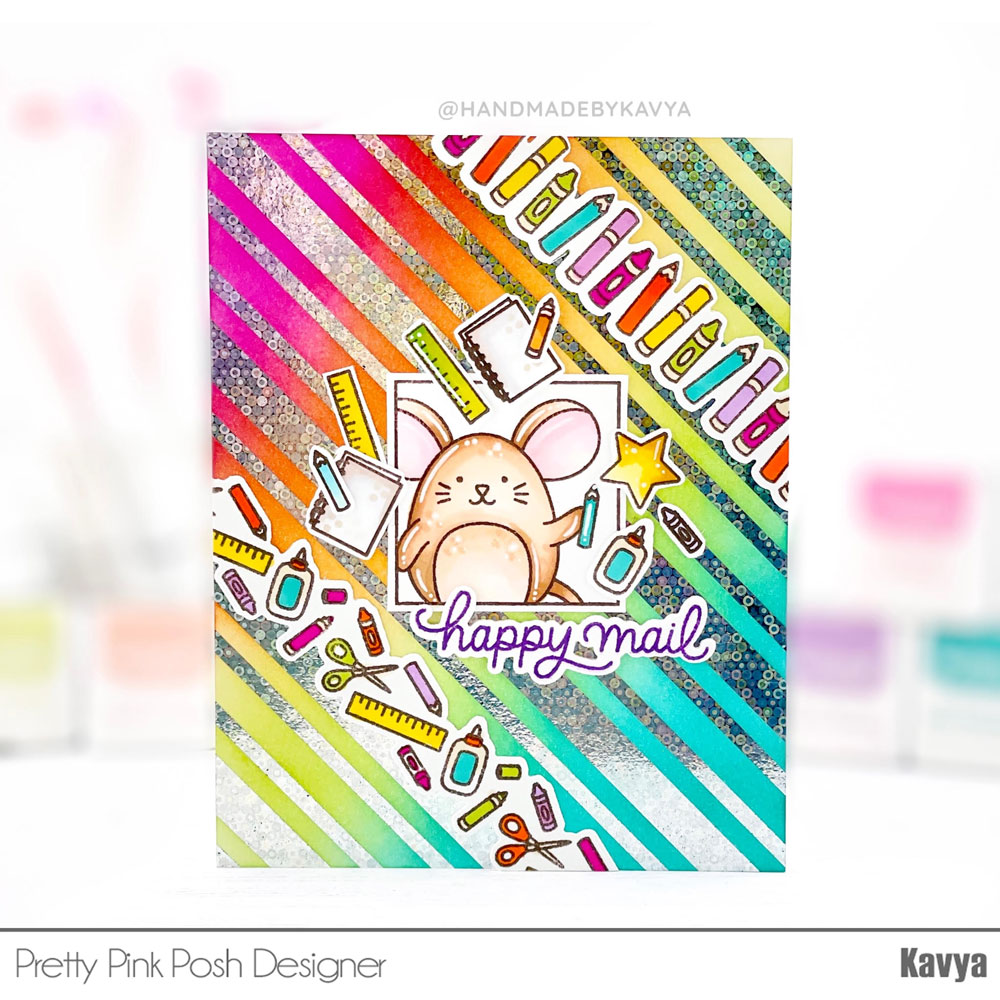
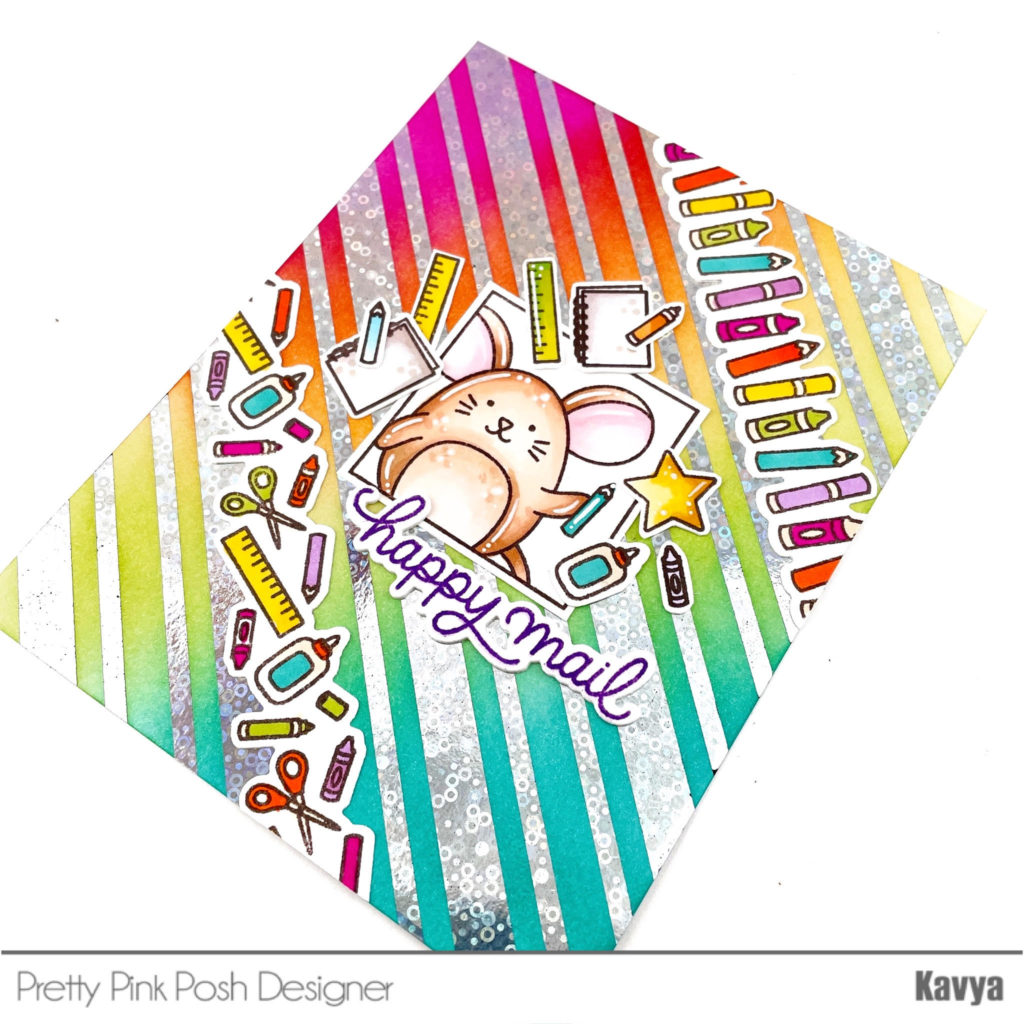
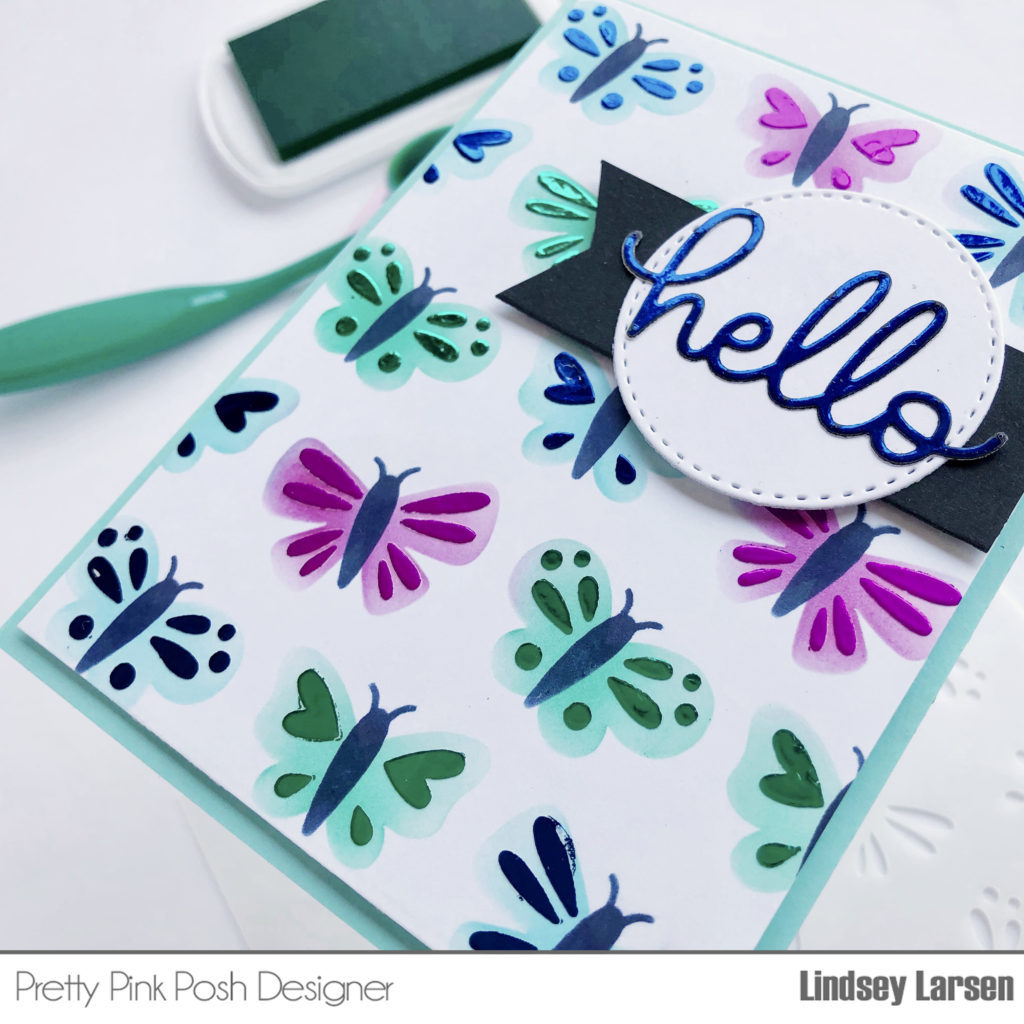
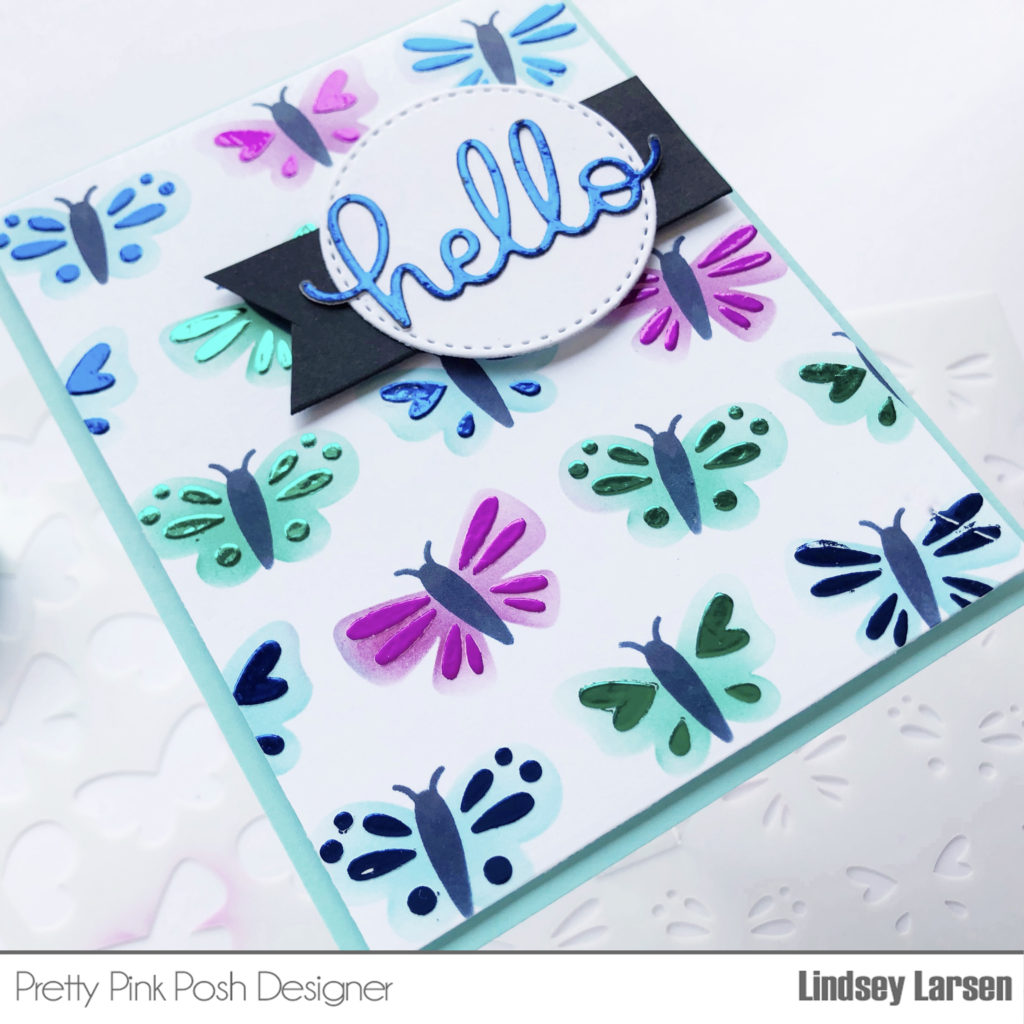
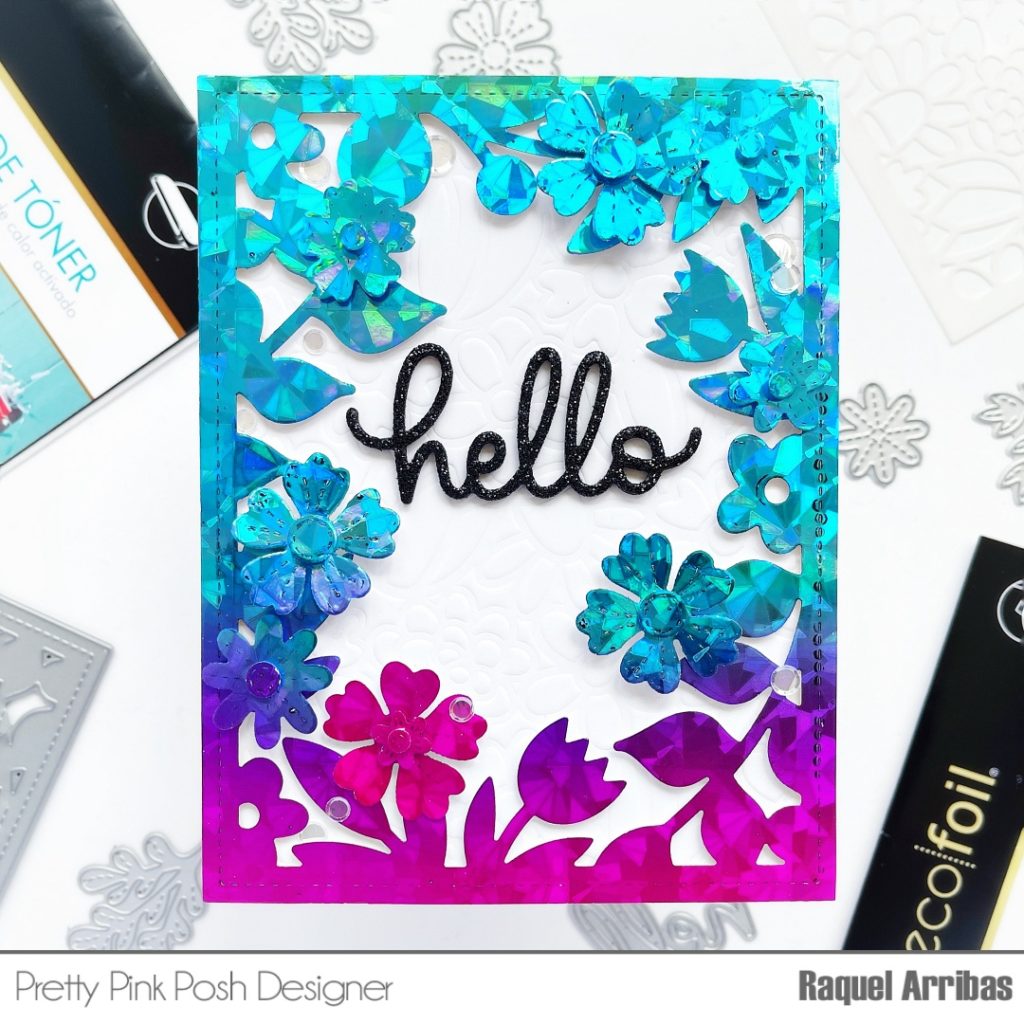
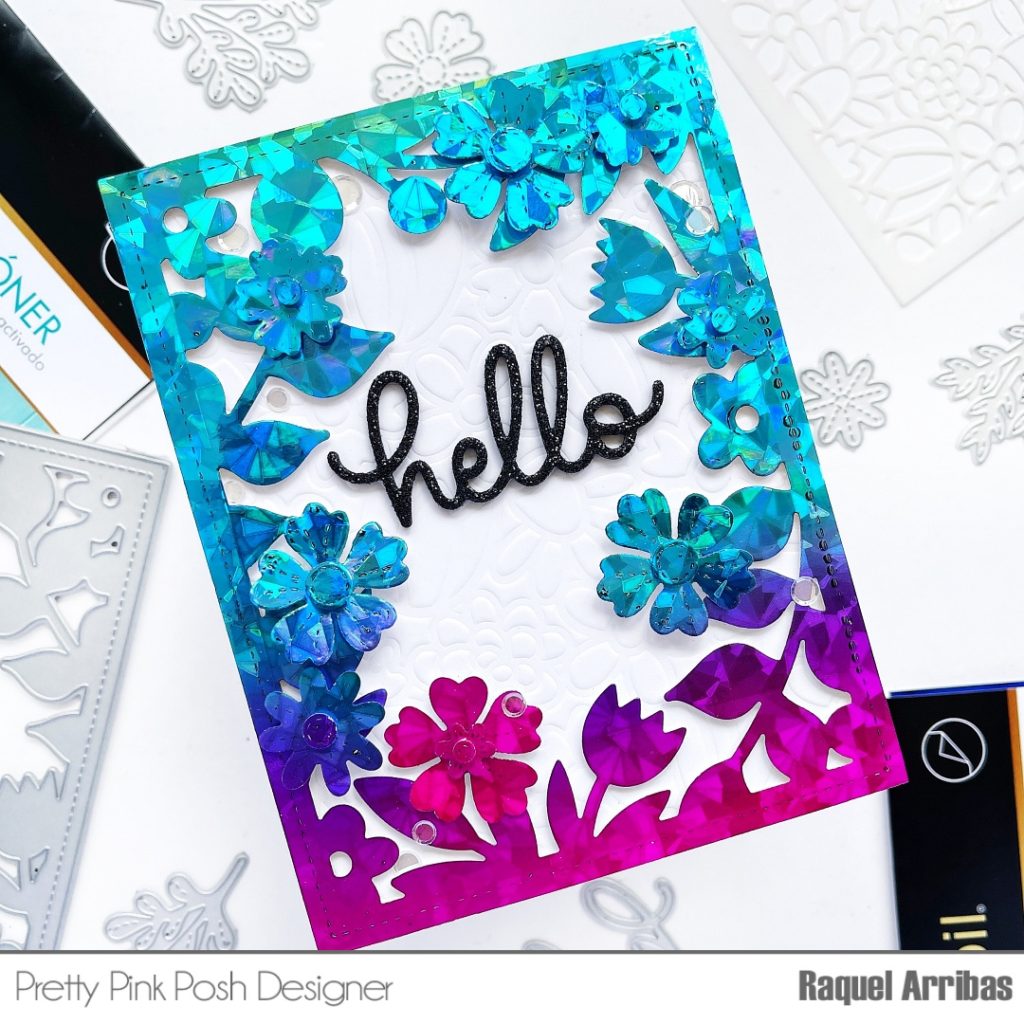
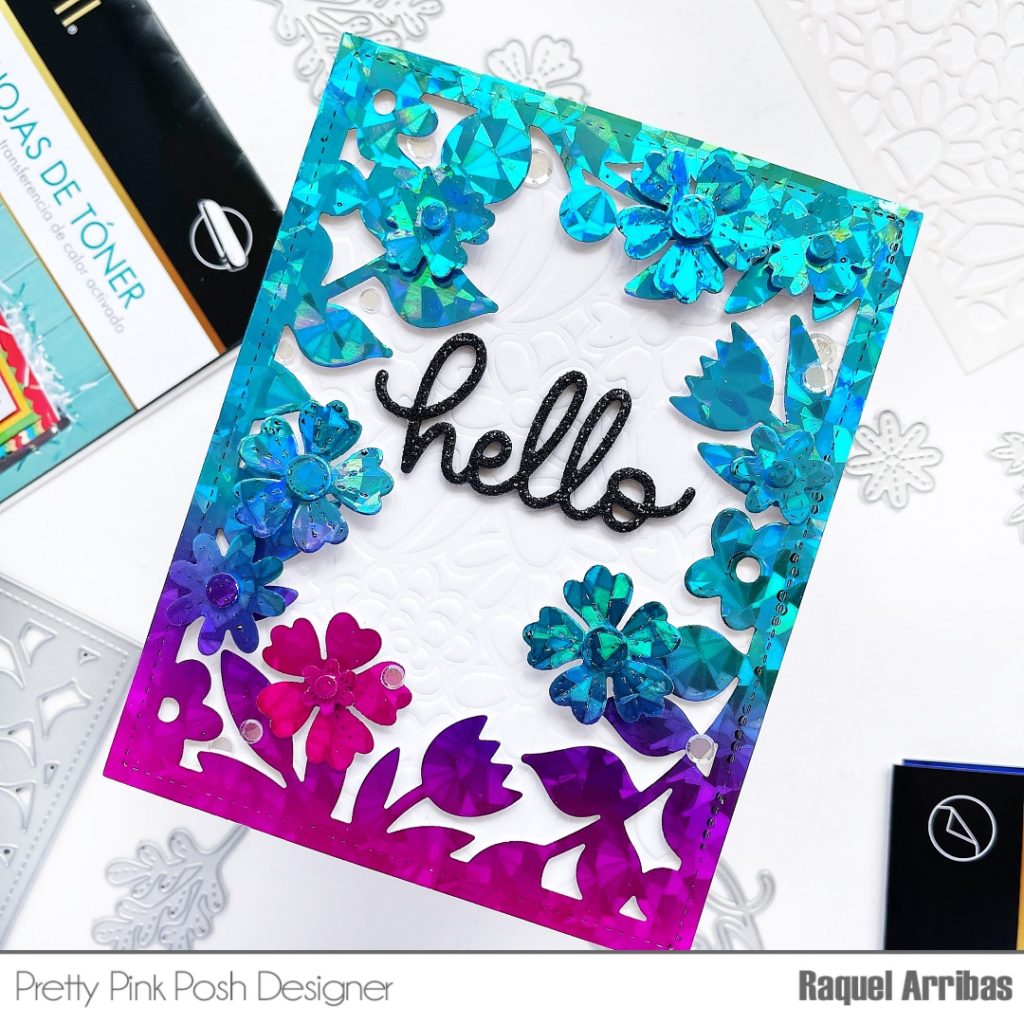
This card starts with a Distress Oxide inky panel in shades of blues and greens and that would be gorgeous alone… but how about kicking it up a notch? I applied Gina K Glitz Gel in Iridescent over the entire panel for a glamourous glittery upgrade.  I love to use iridescent because I can smear it over any solid color background… ink or colored cardstock for some added sparkle. 

Pretty Pink Posh + Therm O Web Collaboration Day 7

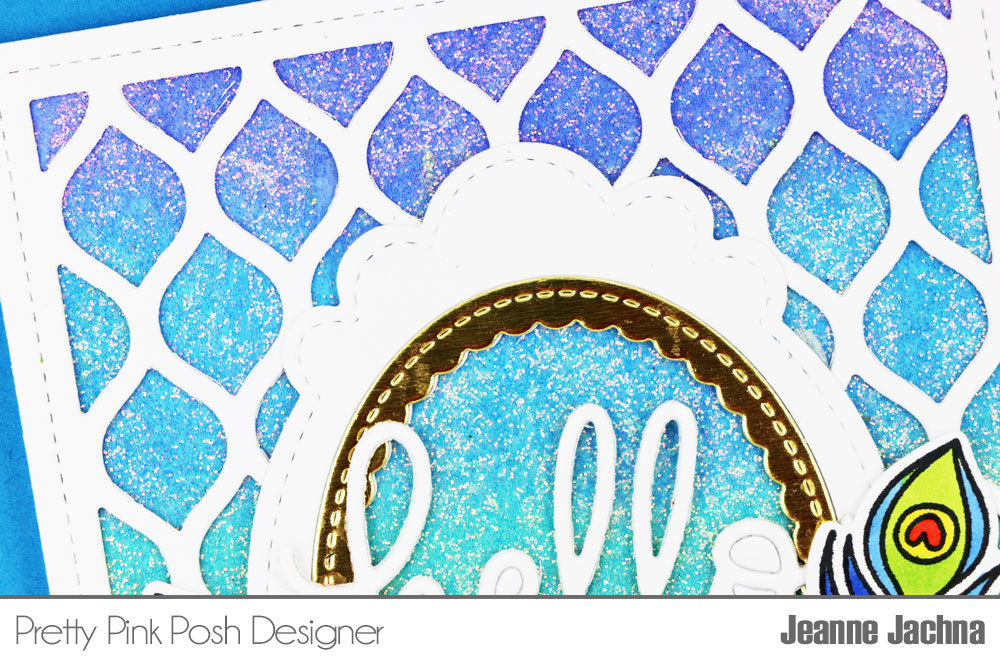
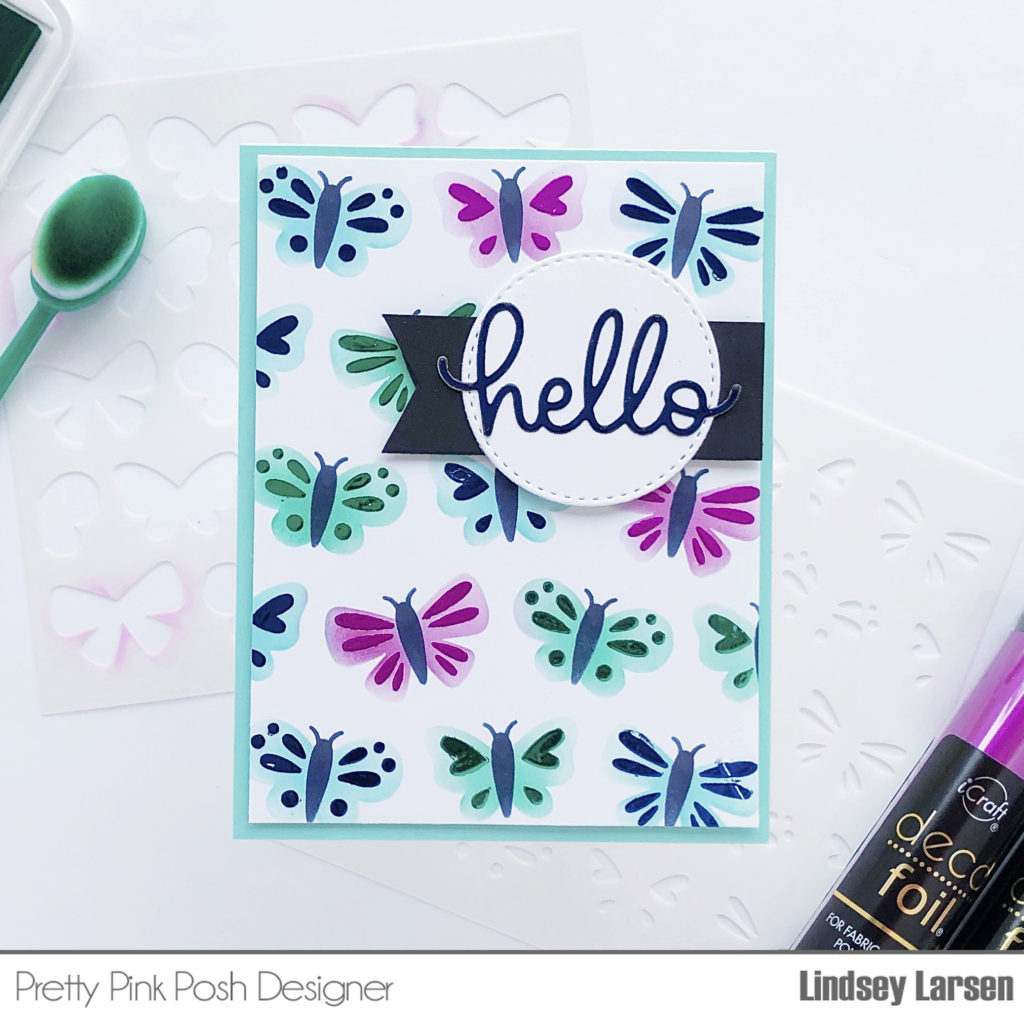
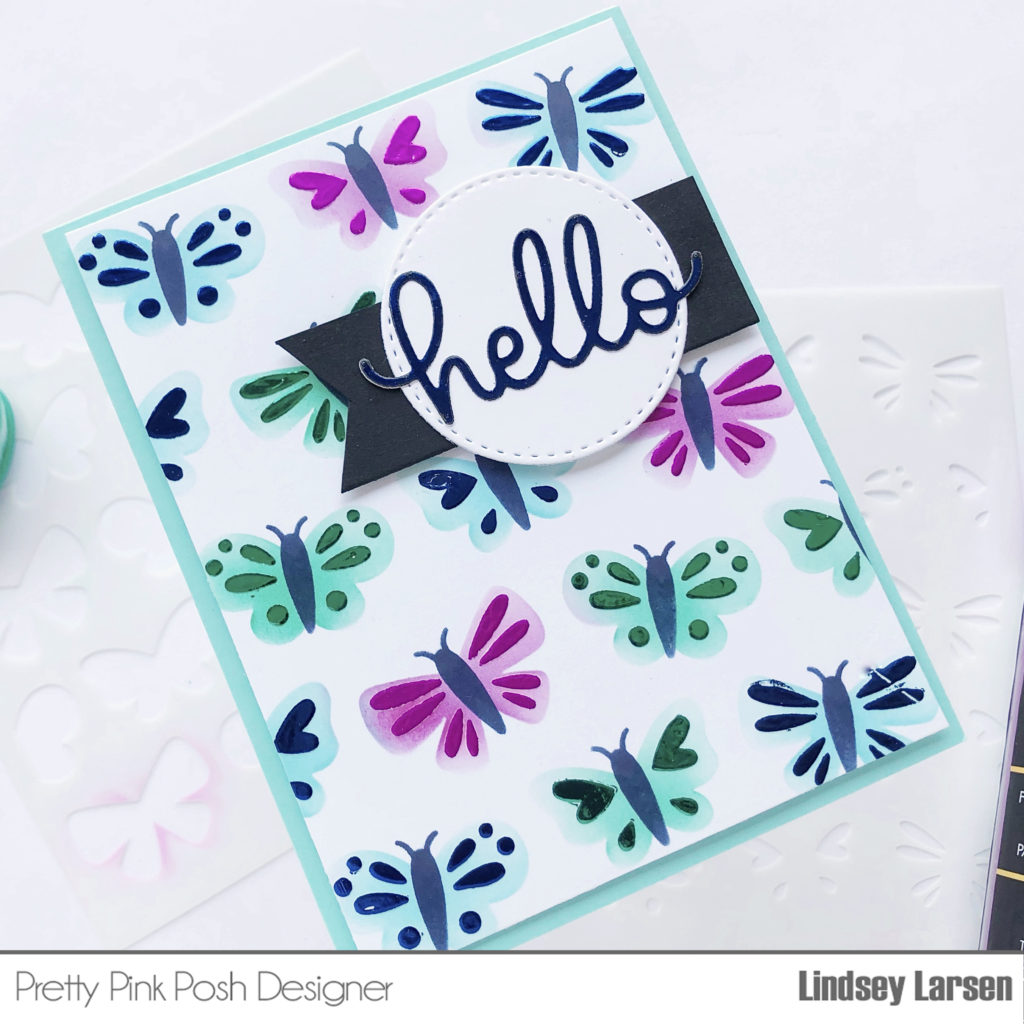
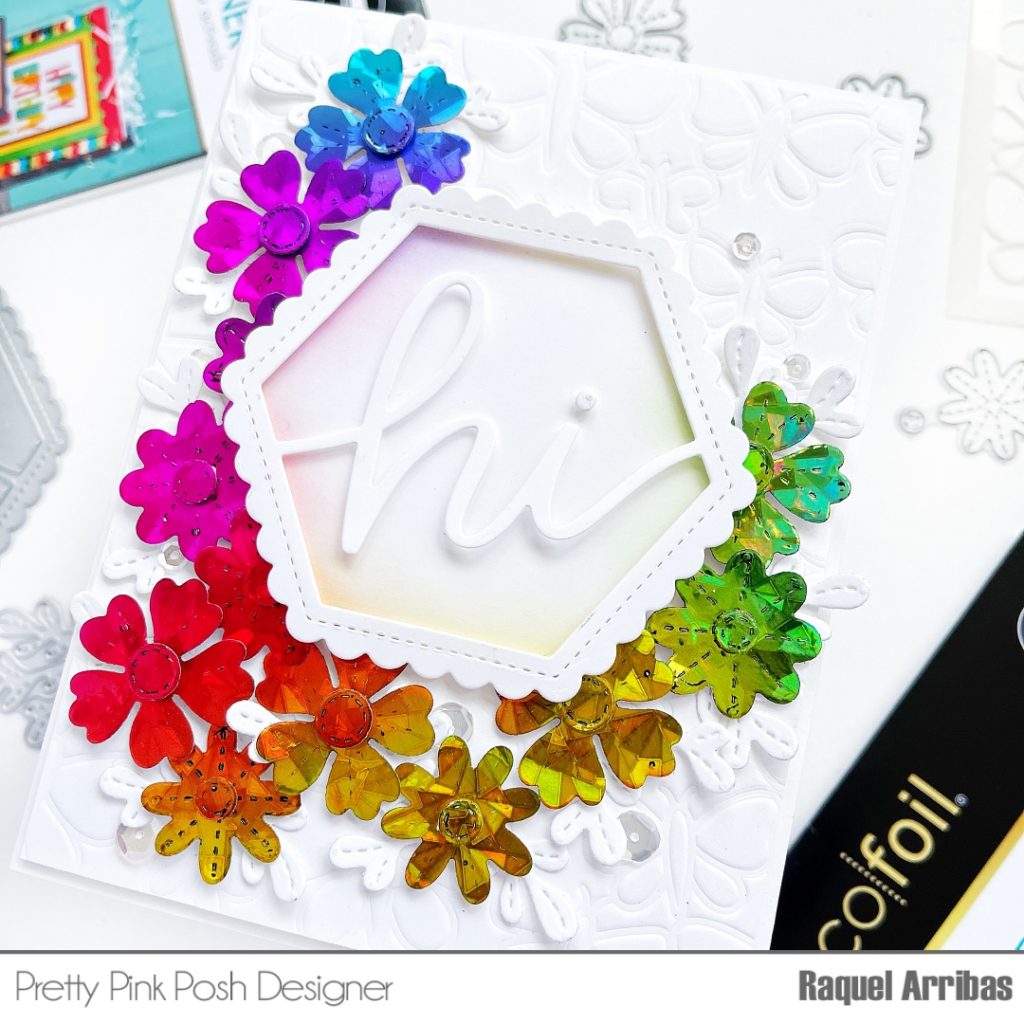
I topped the sparkly panel with a Pretty Petals cover die using Mixed Media Multi-Purpose Adhesive. Liquid adhesive is great because you have a little “wiggle room” allowing you to adjust the die cut  before it dries for perfect positioning every time. I cut a window in the center of the cover panel using the oval shape from the Decorative Tag 1 set

Pretty Pink Posh + Therm O Web Collaboration Day 7

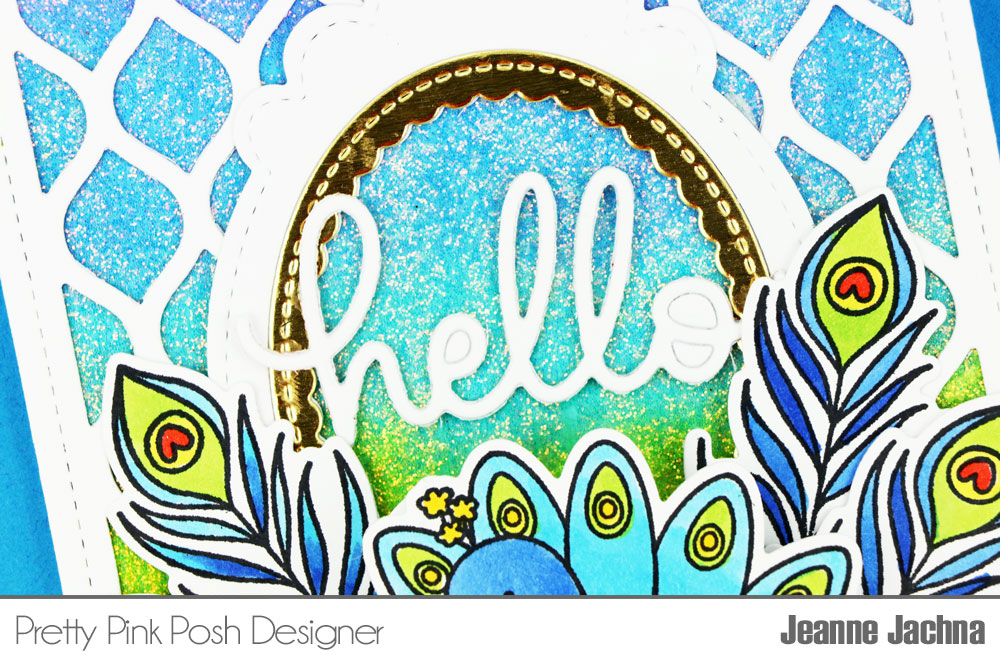
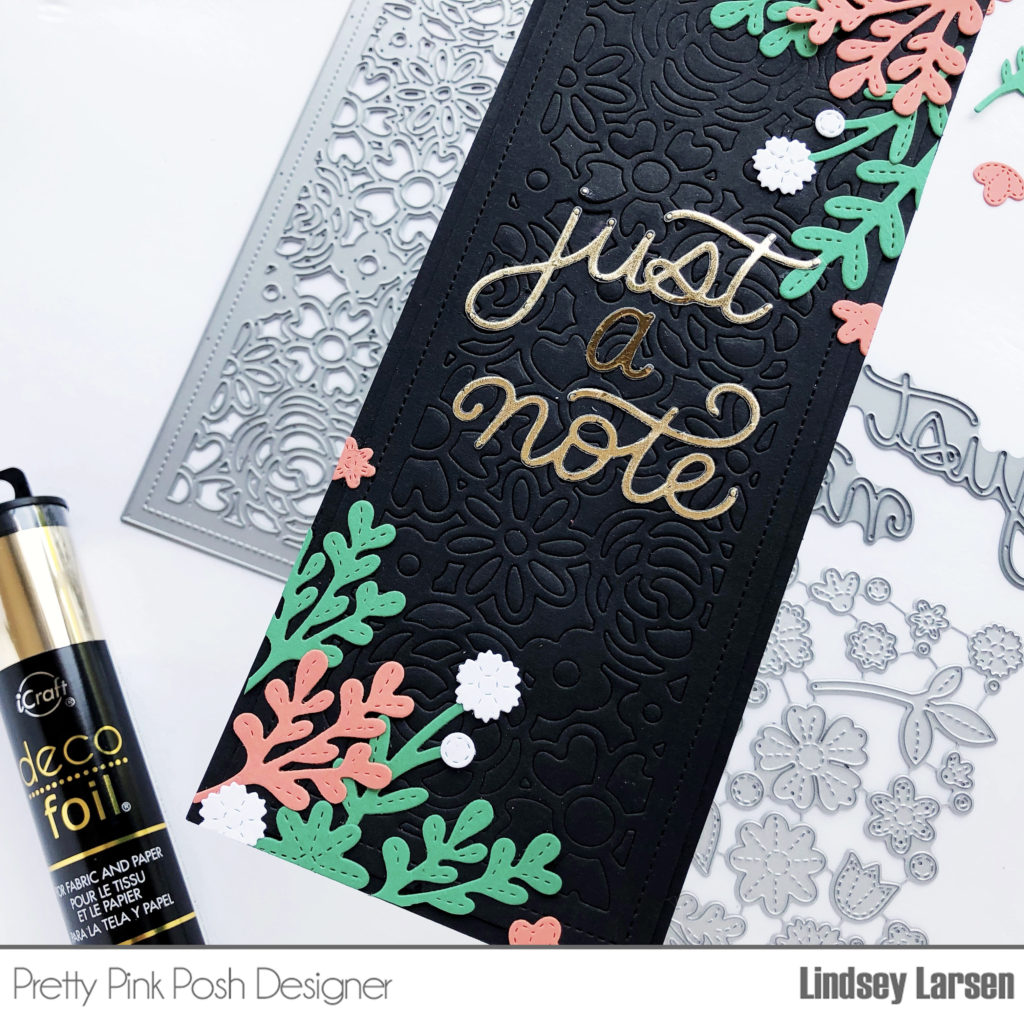
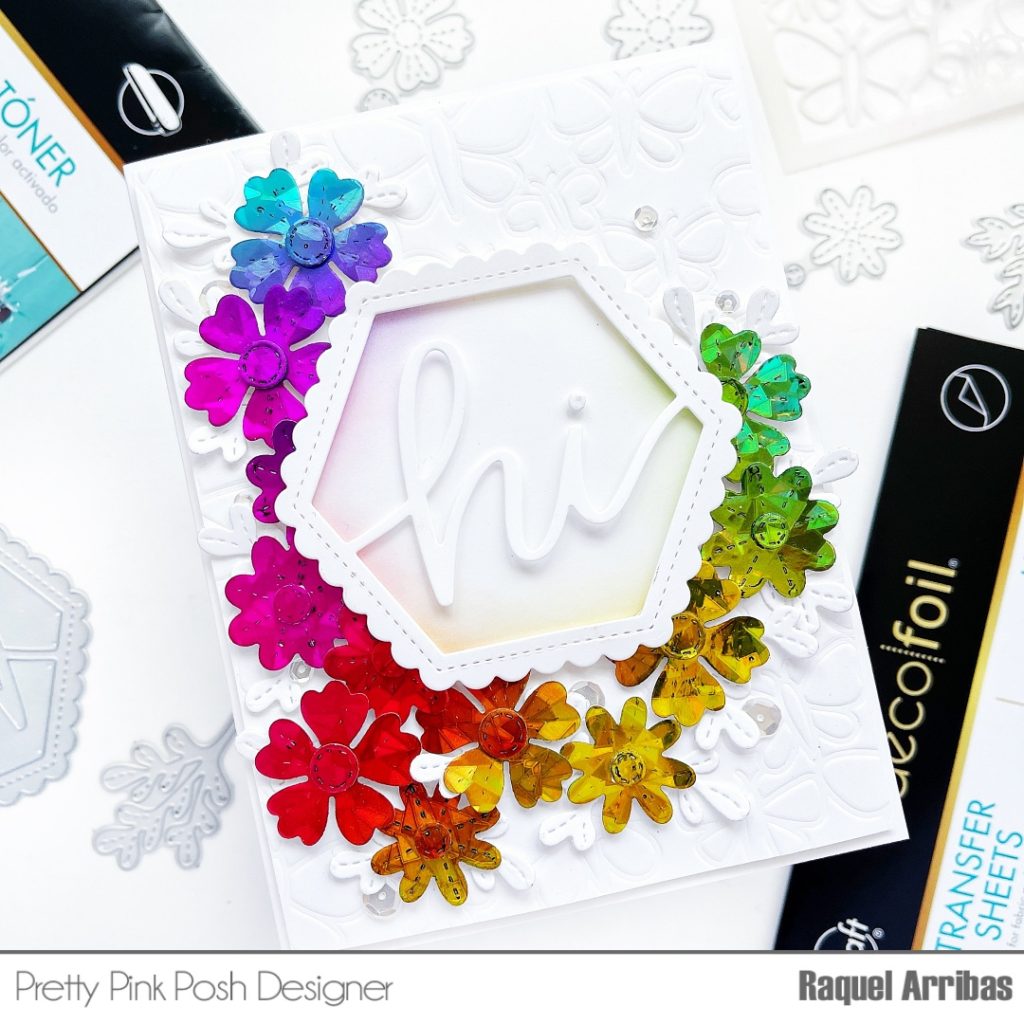
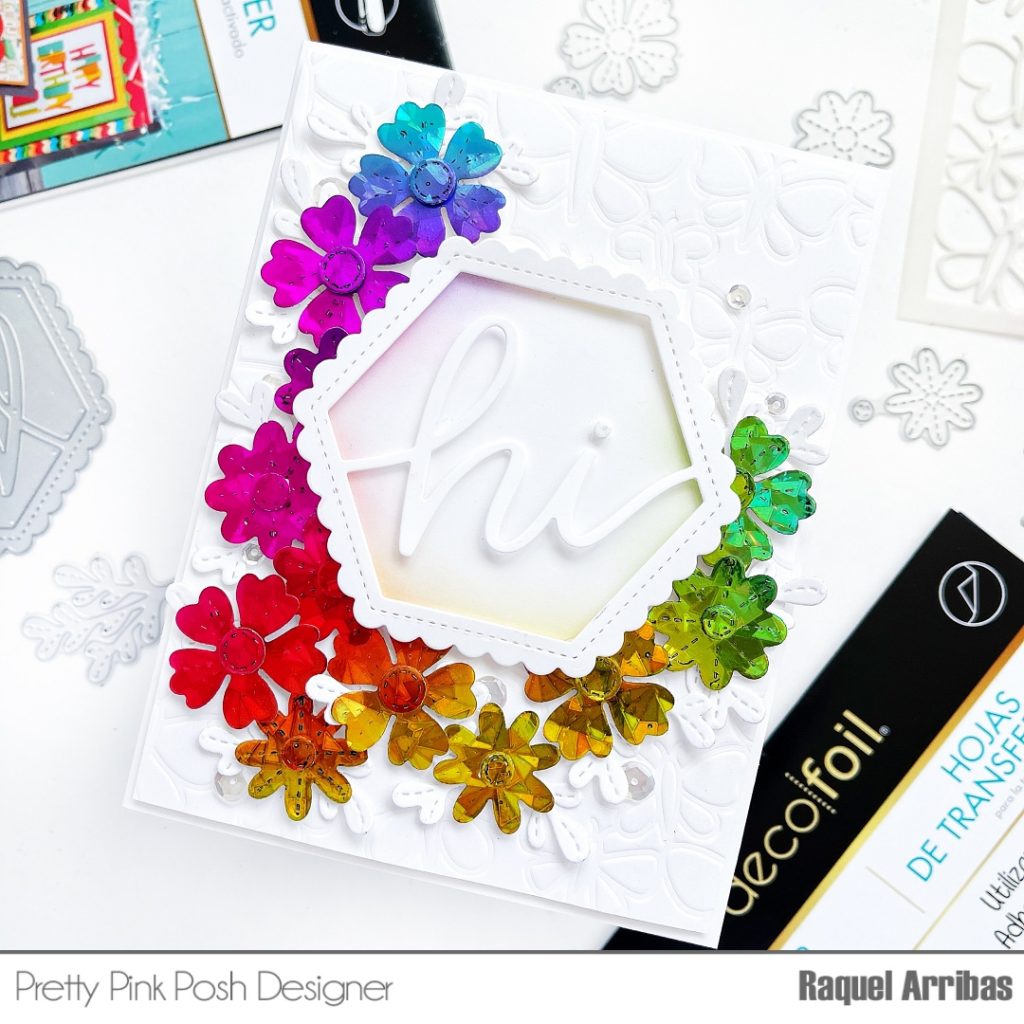
Did you know you can add foil to your projects without having a foiler machine? To add gold to the oval insert on the frame I cut a piece Deco Foil Foam Adhesive Sheets, peeled the coating off one side and adhered some gold Deco Foil and then ran the piece through my die cut machine. I recommend applying the foil BEFORE you cut your die because the pressure from the die cut machine gives a smooth finish to the gold foil. 

Pretty Pink Posh + Therm O Web Collaboration Day 7

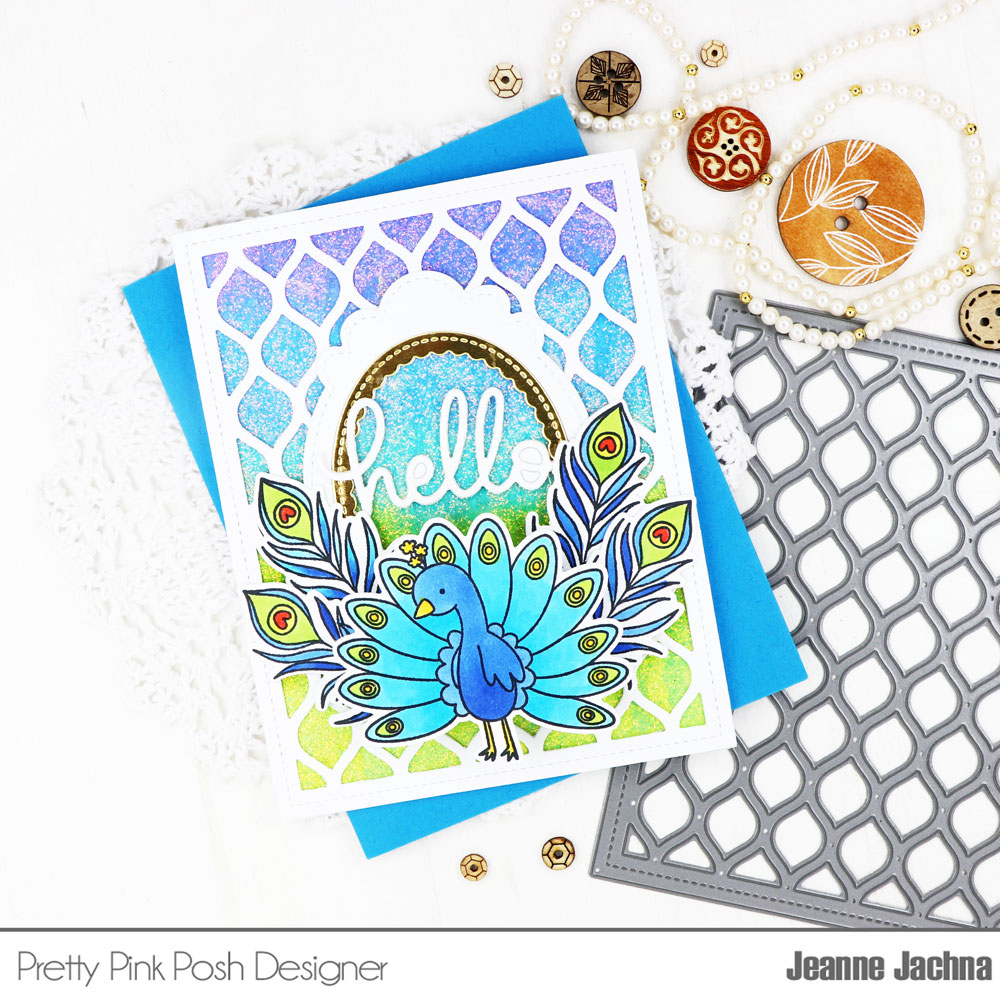
The finished assembled background is elegant and sparkly perfect for a proud peacock. Remember that behind every beautiful project you’ll find reliable Thermoweb adhesives and elegant bling.  

Thank you for joining us this week for a fun collaboration. We hope you’ve been inspired by all the projects featuring Pretty Pink Posh + Therm O Web!

| |

Pretty Pink Posh + Therm O Web Collaboration Day 6

Pretty Pink Posh + Therm O Web Collaboration Day 6

Hello, Kavya here and welcome to another day of the Pretty Pink Posh + Thermoweb collaboration!

Foiling is the new fad in cardmaking and I am all for it! If you like critters like me, it can be a bit difficult to incorporate foiling into cardmaking. One easy way to do so is to add foiled backgrounds!  

Affiliate links are used for products that are not sold in the Pretty Pink Posh Shop.

Pretty Pink Posh + Therm O Web Collaboration Day 6

Thermoweb has a bunch of toner card fronts in simple designs that make it super easy to foil. For today’s card, I used the Candy Stripes toner card front with their stunning Fancy Foils Silver Sequins foil that has a beautiful rainbow glimmer when viewed from the side! After foiling it using my minc (heat seating 3), I ink blended the background using dye inks in shades of pink, orange, yellow, green and teal.

Finally, I stamped and colored images from Pretty Pink Posh’s Crafty Days and Sending Love sets and adhered them on the foiled background to create a fun card for a crafty best friend!

Pretty Pink Posh + Therm O Web Collaboration Day 6

I hope this card inspires you to try out foiling with some critters! 

Happy crafting, Kavya 

Be sure to stop by the Therm O Web blog as well for inspiration using both companies and a chance for a mini shopping sprees by leaving comments!

| |

Pretty Pink Posh + Therm O Web Collaboration Day 5

Pretty Pink Posh + Therm O Web Collaboration Day 5

Hello, Gemma here today to share a fun foiled birthday card featuring Pretty Pink Posh and ThermoWeb products. I’m a huge fan of foiling. I think it adds an extra special touch to a card and a wow factor for the recipient.

Affiliate links are used for products that are not sold in the Pretty Pink Posh Shop.

Pretty Pink Posh + Therm O Web Collaboration Day 5

For my foiled background, I used a ‘Lots of Dots’ Deco Foil Toner Card Front. These are A2 sized and come in a pack of 8. There are lots of other fun design packs to choose from, perfect for quick foiled backgrounds.

I covered the card front with a sheet of Deco Transfer Gold Foil, then placed them both inside a piece of folded parchment paper. I ran them through my laminator, following the instructions on the card fronts packet. The results are beautiful – it’s difficult to capture the full effect on camera.

Pretty Pink Posh + Therm O Web Collaboration Day 5

Next, I stamped images from the Pretty Pink Posh Build a Cupcake stamp set. This is a great set for creating different styles of cupcakes. I used copic markers to colour them and die cut them with the coordinating dies.

I added the foiled card front to an A2 card base, then added the cupcakes popped up with foam tape. The sentiment is also from the Build a Cupcake stamp set. I added extra die cut layers behind the word, which I find is the easiest way to add dimension.

To finish, I added some white gel pen highlight details to the cupcakes.

Pretty Pink Posh + Therm O Web Collaboration Day 5

Be sure to stop by the Therm O Web blog as well for inspiration using both companies and a chance for a mini shopping sprees by leaving comments!

| |

Pretty Pink Posh + Therm O Web Collaboration Day 3

Good morning! It’s Lindsey here today with a fun project combining some fabulous products from Pretty Pink Posh and Thermoweb. Using Deco Foil Transfer Sheets really adds a fun “wow” factor to this otherwise simple card.

Affiliate links are used for products that are not sold in the Pretty Pink Posh Shop.

Pretty Pink Posh + Therm O Web Collaboration Day 3

For my project I used the Deco Foil Transfer Sheets in Jade, Deep Blue, and Magenta. I pulled out my ink pads, found matching colors, and then lightly blended on the ink using the Layered Butterfly Stencils. I blended ink on just the first two stencil layers and on the third and final layer, I used Deco Foil Transer Gel Blanco. This layer shows the details on the butterfly wings. The Transfer Gel takes about an hour to dry, so while I waited I worked on a second foiling project. (More on that to come!)

Pretty Pink Posh + Therm O Web Collaboration Day 3

Once the gel was dry, I cut small squares of the Jade, Deep Blue, and Magenta transfer sheets and laid them on top of the dried gel.  Next, I placed the entire card inside a folded piece of parchment paper and ran it through my laminating machine.  You don’t have to have a fancy laminator for this.  Mine is “as old as the hills” as my grandma would say (I think it’s about 15 years old!), and it did the trick just fine to adhere the foil to my card. 

Pretty Pink Posh + Therm O Web Collaboration Day 3

I kept the card layout simple, so the background could really shine…hee hee (pun intended ;) ). I simply placed my butterfly background on top of a light blue card base, trimmed a flag to ground the sentiment, and cut a circle using the Birthday Circles Coordinating Dies

I added just a touch more foiling to my card by cutting the Hello Script die out of Deco Foil Peel and Stick Toner Sheets and running it through the laminator with a Deep Blue Deco Foil Transfer Sheet. It adds a beautiful shine that compliments the background nicely.

Pretty Pink Posh + Therm O Web Collaboration Day 3

And that’s it my friends!  These products were so easy and fun to work with, and I can’t stop smiling at the beautiful shine on my card.  I hope you’ll give them a try!  

And if you are interested in seeing the second project I made while the Transfer Gel Blanco was drying, you can pop on over to my blog HERE.  I’ll give you a peek below. 

Pretty Pink Posh + Therm O Web Collaboration Day 3

Want to win a gift card to Pretty Pink Posh and Therm O Web? Enter below!

We’ll see you tomorrow for another day of inspiration using both companies. Thanks for stopping by! I hope you were inspired by my project.

| |

Pretty Pink Posh + Therm O Web Collaboration Day 2

Pretty Pink Posh + Therm O Web Collaboration Day 2

Hi friends! It’s Dana here today and I am so excited to be sharing a project for the Pretty Pink Posh and Therm O Web collaboration. My card uses the Flock Transfer Sheets from Therm O Web to add a fun texture to my card panel.

Affiliate links are used for products that are not sold in the Pretty Pink Posh Shop.

Pretty Pink Posh + Therm O Web Collaboration Day 2

I started my card by using the Layered Letters stencils and dye ink to create my card panel. I lightly sprayed the back of the stencils with Pixie Spray, and used a blending brush to lightly add ink to both stencil A and B. 

Pretty Pink Posh + Therm O Web Collaboration Day 2

Next, I used stencil C (the hearts) and added Deco Foil Transfer Gel across the stencil with a palette knife. I let the gel dry until it was clear and then ran it through my laminator with a Flock Transfer Sheet in White Latte. The flock adheres to the gel and you are left with a fun velvety texture on your card panel.

Pretty Pink Posh + Therm O Web Collaboration Day 2

Next, I used the Sending Love set for my stamped images and sentiment. I stamped the images, colored them with Copic markers and used the Sending Love coordinating dies to cut them out. I then attached the images and sentiments to my card panel with foam adhesive. I love that Therm O Web carries the jumbo rolls of foam adhesive in both white and black. The black is perfect to mount behind a sentiment strip so you don’t see the white edge. I have been using their foam adhesive for a little over a year now and I am very happy with its strength, dimension and price. 

Pretty Pink Posh + Therm O Web Collaboration Day 2

I hope I inspired you to try using some of the fun products that Therm O Web offers. Come back tomorrow for another day of inspiration!

Enjoy your day, Dana

Now for giveaway… To enter, all you need to do is leave a comment here and on the Therm O Web blog. Winners will be announced on June 26th. Good Luck!

| |

Pretty Pink Posh + Therm O Web Collaboration Day 1

Pretty Pink Posh + Therm O Web Collaboration Day 1

Hello Friends! Welcome to Pretty Pink Posh and Thermoweb Collaboration week. Raquel here and I’m so happy to create some projects combining products from these companies! 

The first item that came to my mind when I planned my projects was the Toner Sheets. These are simply perfect to create quick and easy die cuts with foil. I decided to create a colorful card with the Spring Frame die and the Deco Foil Transfer Sheets Rainbow Shattered Glass.

Affiliate links are used for products that are not sold in the Pretty Pink Posh Shop.

Pretty Pink Posh + Therm O Web Collaboration Day 1

First, I used the Spring Foliage die set and one of the Toner Sheets trimmed down to 4 ¼ and 5 ½ to die cut the frame. Then I turned on my Minc Machine and set it to temperature 3. 

Pretty Pink Posh + Therm O Web Collaboration Day 1

Once the machine light turned green, I prepared my sandwhich with one sheet of printer paper folded in half and a piece of 5 ½ x 5 ½ cardstock over which I place the diecut frame and a piece of deco foil piece cut to the same size with the pretty side up.

I run this sandwich through and just like that I got myself a gorgeous Spring Frame with this gradient colors.

Pretty Pink Posh + Therm O Web Collaboration Day 1

To add some volume to my project, I decided to die cut some more flowers using the Spring Foliage die set with toner sheets and the same deco Foil sheets. I also dry embossed an A2 panel with the Floral Background Stencil.

Finally, I added my sentiment. I used the Hello Script die with Black glitter cardstock and placed some Sparkling Clear Confetti Sequins.

Pretty Pink Posh + Therm O Web Collaboration Day 1

For my next project, I wanted to create a card filled with colorful flowers around a geometric sentiment. I instantly grabbed my Hi Shaker Die and die cut several pieces of this beautiful hexagon frame out of white cardstock.

Pretty Pink Posh + Therm O Web Collaboration Day 1

Then I die cut some more flowers out of some Toner Sheets using the Spring Foliage Die set.

I placed all these die cut toner flowers on my sandwhich and cut some deco foil pieces in diferents sections so each flower was different and making sure they followed the same gradient look of the Foil itself.

Then I used the Butterflies Background Stencil to dry embossed an A2 size panel.

Pretty Pink Posh + Therm O Web Collaboration Day 1

I decided to trim a hexagon that could filled the front Hi Shaker die, so the back of this front die cut piece was completely flat. My idea was to create a visible contrast between the background and the back of the sentiment. I wanted a smooth surface to add some color to this backdrop  

I arranged my flowers around the Hi Shaker die onto the A2 dry embossed piece and before adhering the sentiment, I ink blended the edges of the backdrop of my hexagon hi shaker front panel following the color pattern of my flowers.

Pretty Pink Posh + Therm O Web Collaboration Day 1

I also die cut some greenery out of white cardstock and placed some Sparkling Clear sequins here.

Hope you like these projects! I can assure you I had so much fun creating these cards using the Toner Sheets and the Deco Foil. I love to use my products in different ways and the products from Thermoweb were just gorgeous!

As always, I do hope I was able to inspire you. I also want to encourage you to check all the projects that will be shared on Pretty Pink Posh Blog. There will be tons of inspiration for you this week!

Happy crafting!

Raquel

|

Design Team Announcement + Gift Certificate Giveaway

Hello! Today it’s time to announce the team for the upcoming term. It’s always sad to say goodbye, especially those who have been with me for years! We are saying a very sad farewell to Lindsay and Suzy. Both of these gals will be greatly missed!

We do have some new faces on the team- both have been customers and fans from across the globe. Please welcome Elaine and Mona to the Pretty Pink Posh team!

 width=
Yana Yoonsun 
Yana Yana
Yana Yana


In honor of the new year, we are doing a big $100 gift certificate giveaway! Leave a comment on THIS post sharing your requests for future Pretty Pink Posh stamps, dies and stencils! One lucky comment left by January 8th will win a shopping spree. Congratulations to Neha Mahajan! You’re the lucky winner. I will email you with the prize information!

Pretty Pink Posh: Design Team Announcement + Gift Certificate Giveaway

Thanks for joining us today. Be sure to give lots of love to the designers!

5 Days of Christmas Giveaway Winners

It’s time to announce the winners from the 5 Days of Christmas Giveaways. It was so fun to read all of your comments sharing your favorites of the season, along with what you would like to see in 2020. One of my favorite things is getting to interact with each of you and this was a small way of me being able to give some fun crafty items to the wonderful readers of the blog. Ready to see the winners? Let’s take a look! 

5 Days of Christmas Giveaway Winners

Ladies, email me within 7 days with your name and address and I’ll get these items purchased and sent off to you directly! 

Thank you to everyone who left comments and participated in the 5 Days of Christmas Giveaways posts. I hope you were inspired by the projects!

| |

5 Days of Christmas Giveaways- Day 5

Hello crafty friends! It’s Yoonsun here to share my unique Christmas card with the Stitched Poinsettias dies along with the Happy Holidays Script die.

I started by die cutting several stitched poinsettias from kraft, red and white cardstock. And I also die cut the stitched leaves from pale green cardstock. I simply adhered poinsettias onto the top-left corner & bottom-right corner of the kraft panel using foam tape, and then lightly inked the centre of each poinsettia with Festive Berries Distress ink.

For the sentiment, I die cut the Happy Holidays from white cardstock, then added it to the centre of the card (as shown in the picture) using fine tip glue pen.

I spritzed opaque white ink splatters all over the panel, and then decorated the card with Sparkling Clear Snowflake Sequins & 4mm clear droplets.

GIVEAWAY

Today we are giving away a mega Pretty Pink Posh prize pack! All you have to do is leave a comment on this post sharing what you would like to see from us in 2020! For bonus entries, like the Pretty Pink Posh Facebook pagesubscribe to us on YouTube or follow us on Instagram.

a Rafflecopter giveaway

Christmas is just around the corner! I hope this card inspired you. If you haven’t already, be sure to visit the previous posts for those cards and giveaways!

Hugs,
Yoonsun

| |

5 Days of Christmas Giveaways- Day 4

Hi everyone! It’s Suzy here on the Pretty Pink Posh blog today with a card uses several older Pretty Pink Posh stamp sets including Winter Wonderland, Holiday Pals, and Christmas Friends.

Pretty Pink Posh: 5 Days of Christmas Giveaways- Day 4

I wanted to create a holiday scene using lots of images, so I made this card a slim-line, which measures 7” x 3.5”. I started by using Distress Inks on the background and cut some white glitter paper into a snow bank. 

Pretty Pink Posh: 5 Days of Christmas Giveaways- Day 4

I stamped images from the 3 stamp sets on white cardstock with a light color of ink. I colored in all of these with colored pencils. I like how they leave such a soft look and let you add texture and shading. I colored 6 trees from the Holiday Pals stamp set to use on the background of the card. I stamped the four cute little friends from the Christmas Friends stamp set and arranged them in front of the trees.

I added some of the little birds from the Christmas Friends stamp set and then gifts from all three of these stamp sets. I arranged all of these into a little Christmas scene. I used the Happy Holidays Script Die for the sentiment. I die-cut it out of white cardstock and then applied clear glitter glue to the top of it for texture. I finished the card with some glitter drops and white glossy drops around the elements for snow. I also added a couple of the snowflake stamps from the Holiday Pals stamp set

Pretty Pink Posh: 5 Days of Christmas Giveaways- Day 4

GIVEAWAY

For today’s giveaway we are giving away the popular 72 pack of Prismacolor colored pencils! All you have to do is leave a comment on this post sharing your favorite color medium (markers, colored pencils, watercolors, etc…) For bonus entries, like the Pretty Pink Posh Facebook pagesubscribe to us on YouTube or follow us on Instagram

a Rafflecopter giveaway

Thanks so much for visiting today and being part of the Pretty Pink Posh’s 5 Days of Christmas Giveaway Week celebration! Have a great holiday season friends!

Suzy