Pretty Pink Posh Shop

| |

Big Bunny Cupcake

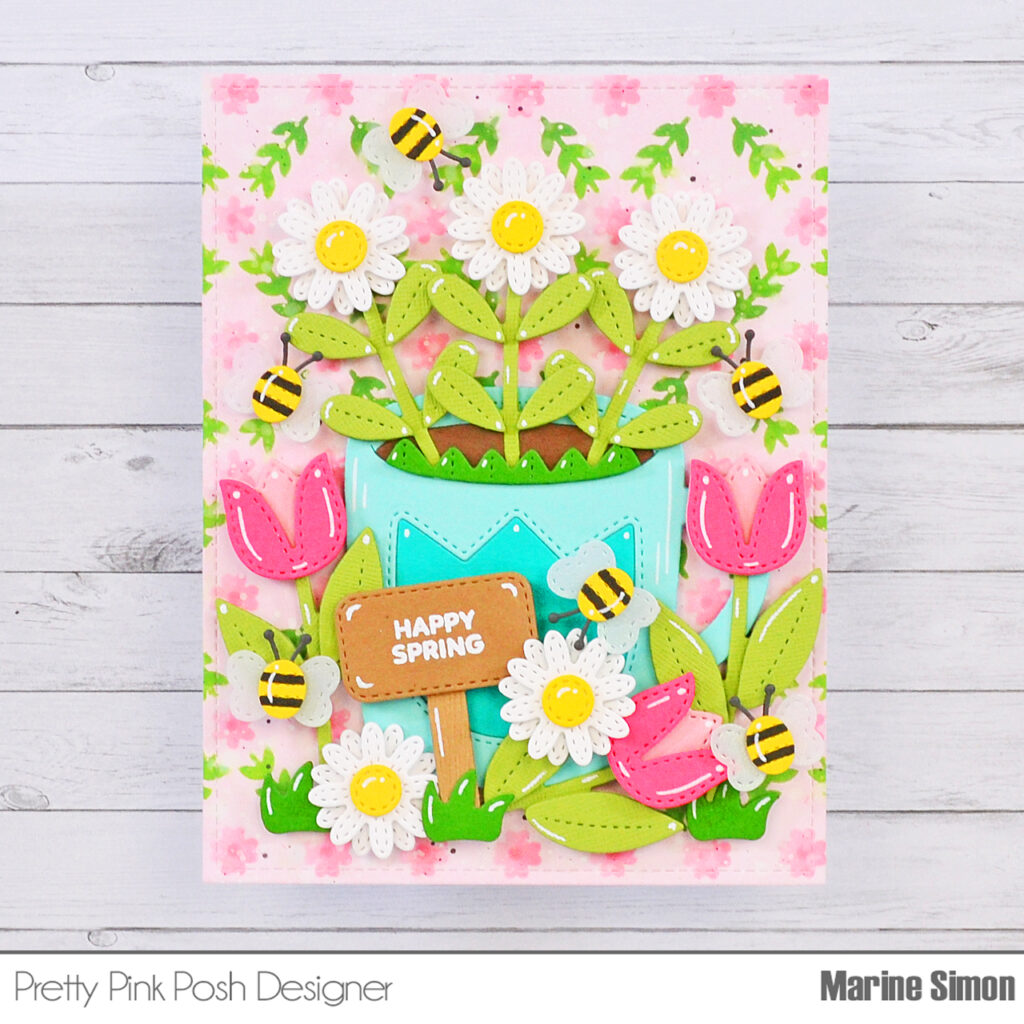
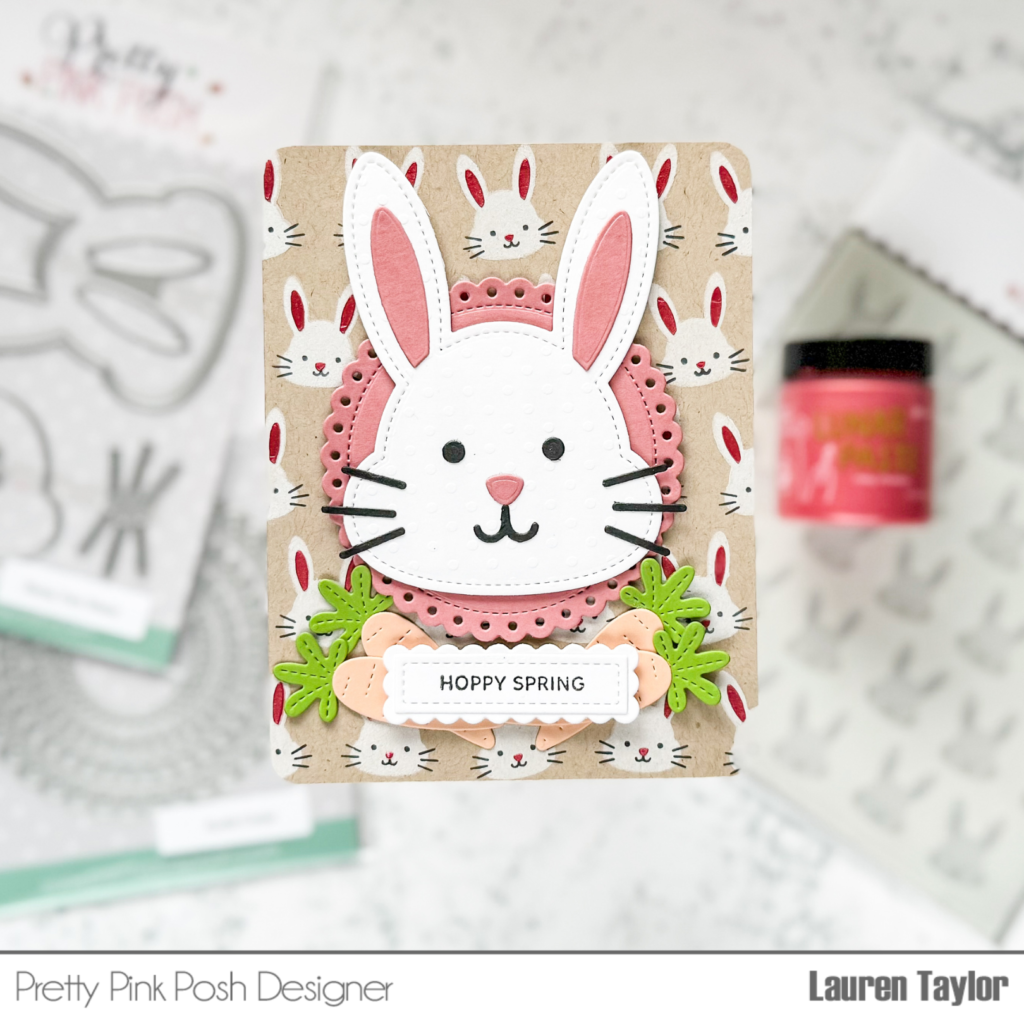
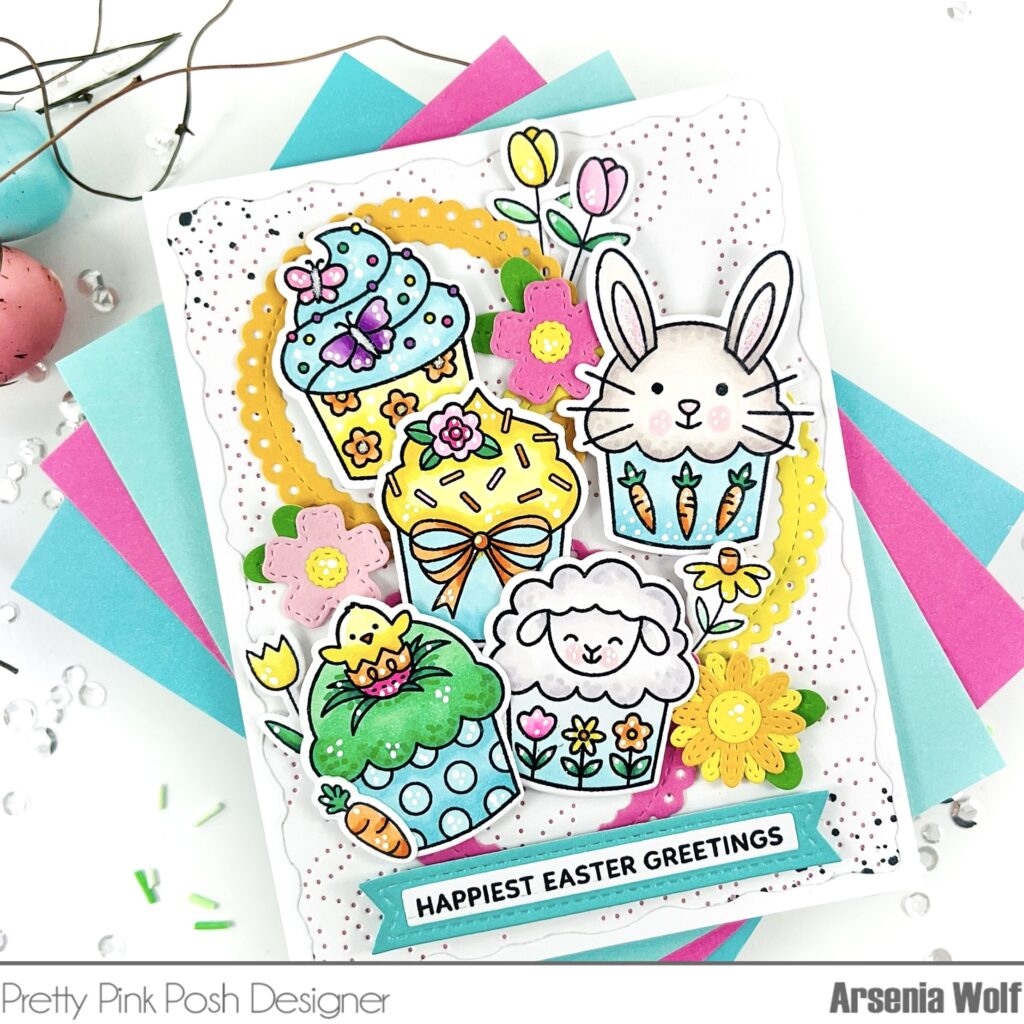
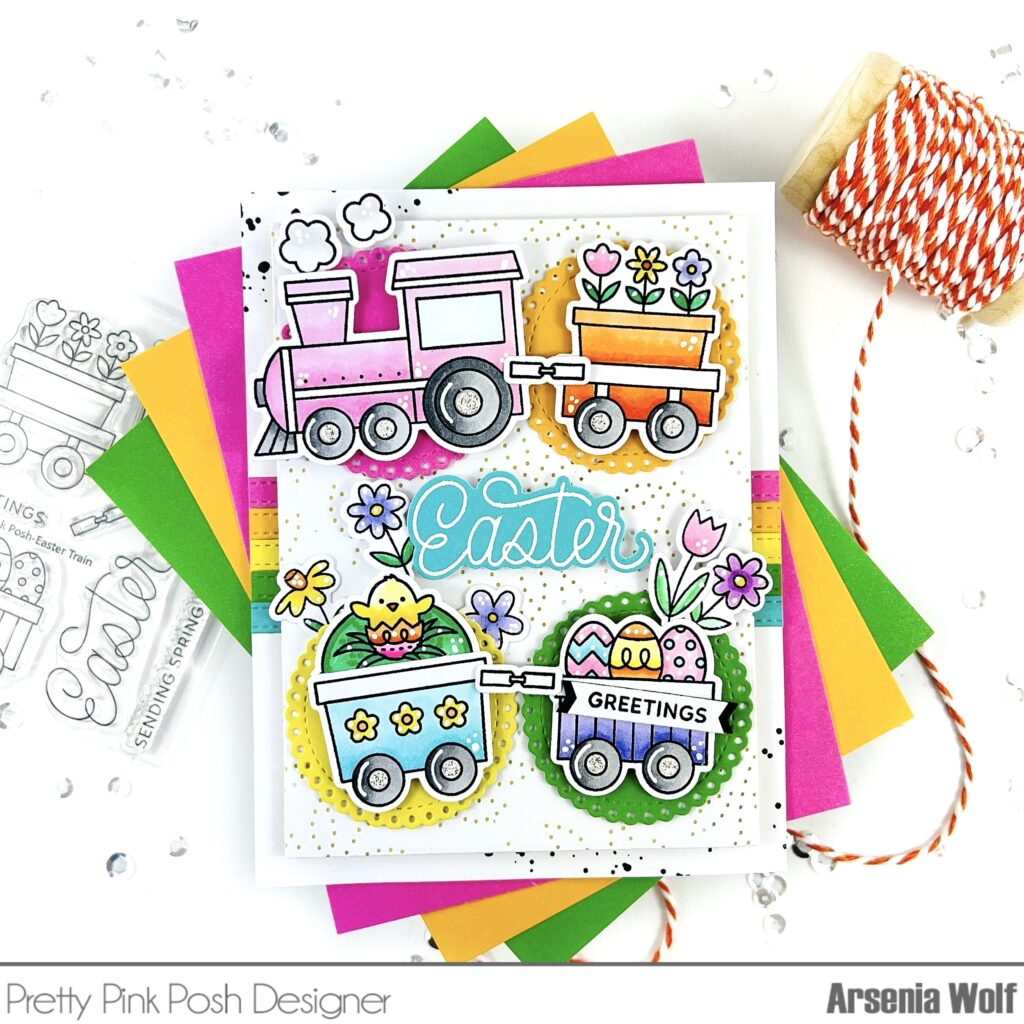
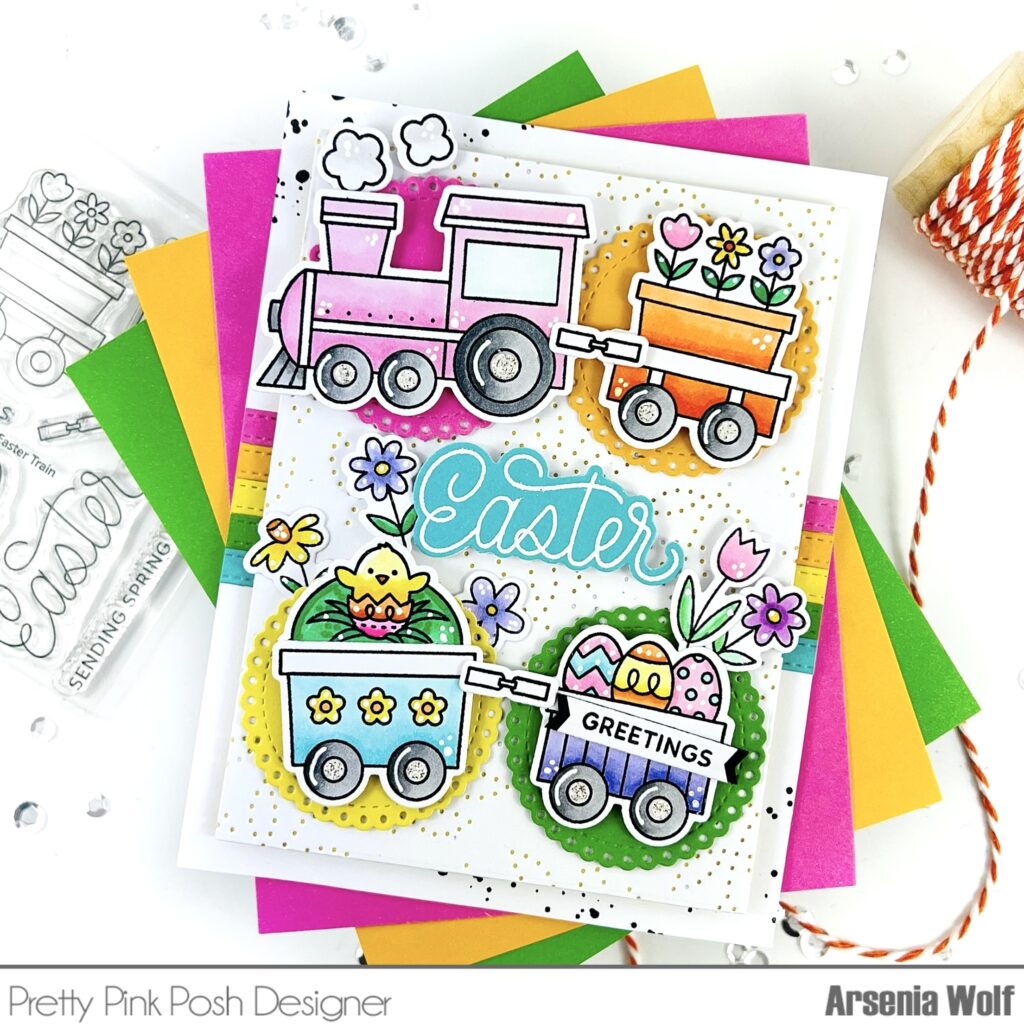
Hi crafty friends! It’s Lisa Mears on the blog today. My card features an adorable Easter bunny cupcake. I used products from the new Easter and spring release to make my card.

Watch the video above  I  Watch the video in HD on YouTube

Pretty Pink Posh: Big Bunny Cupcake

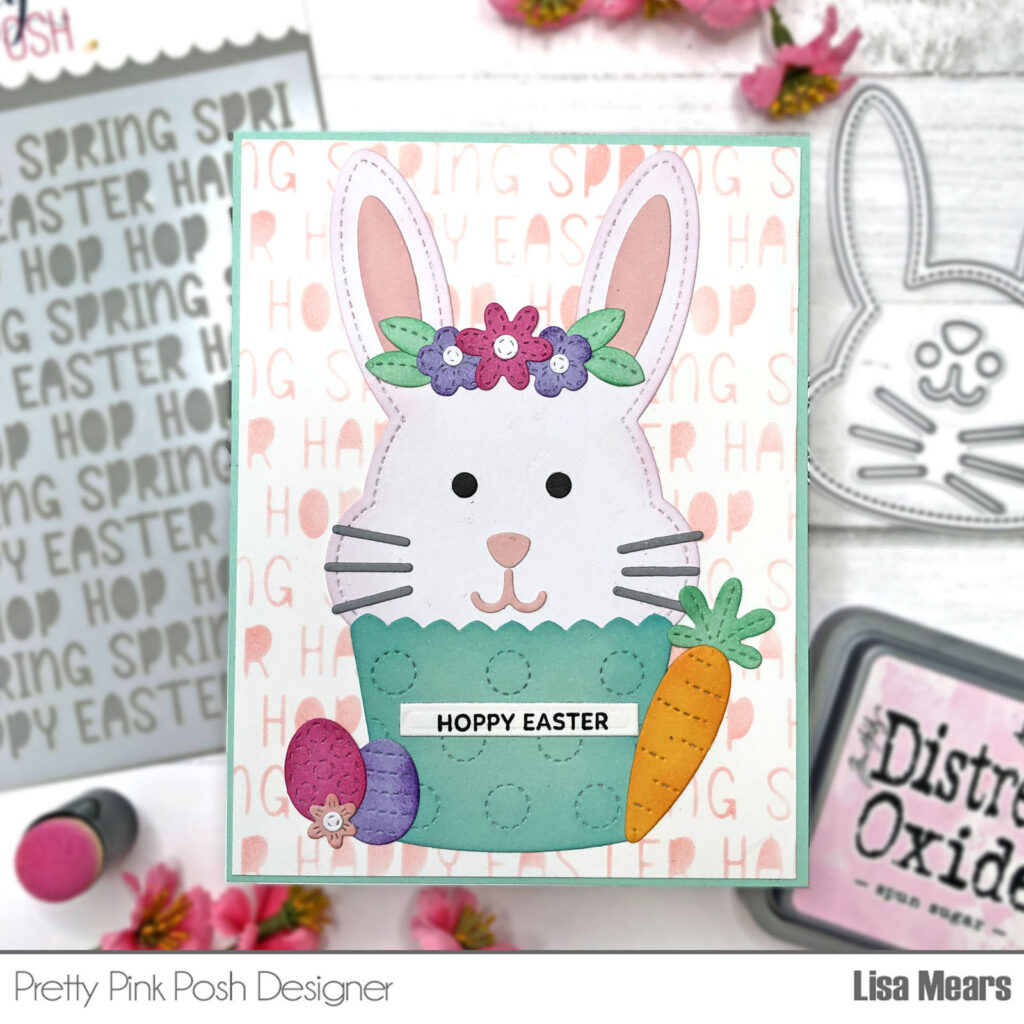
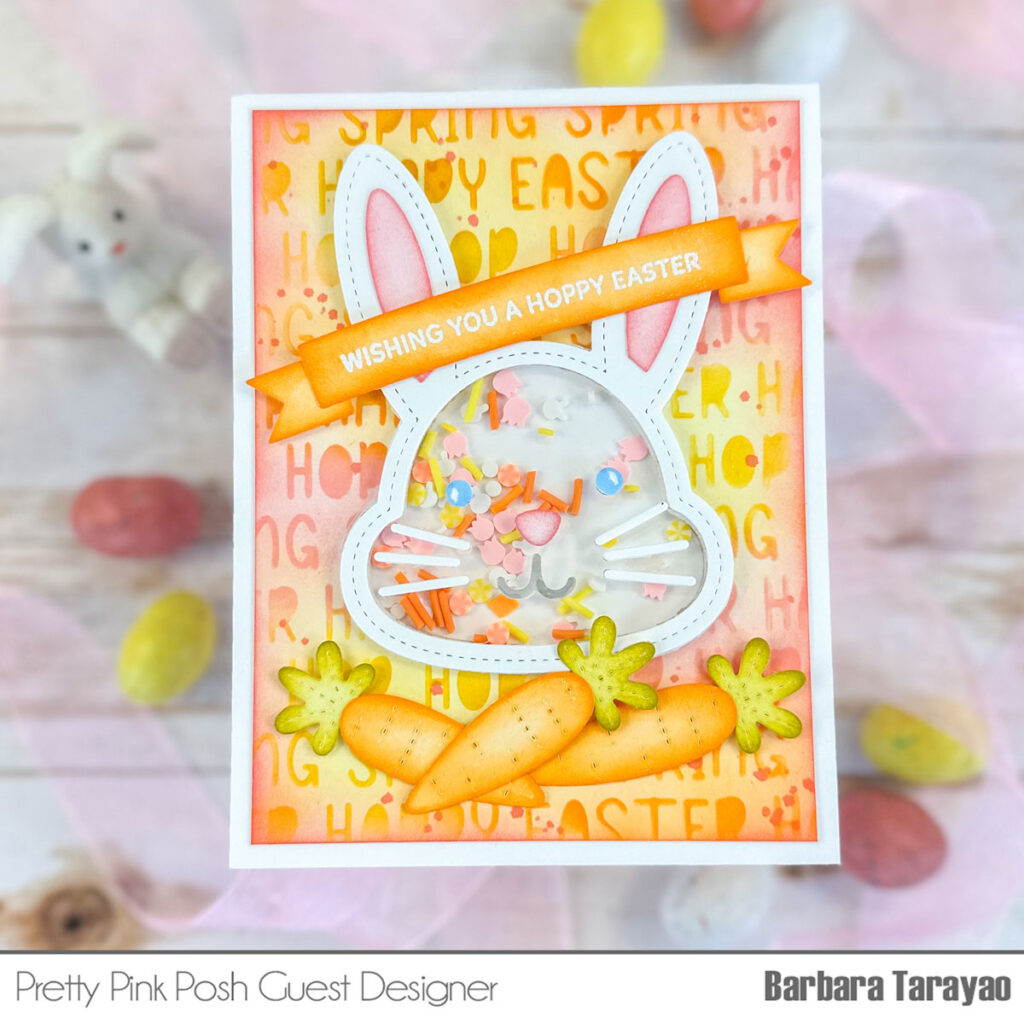
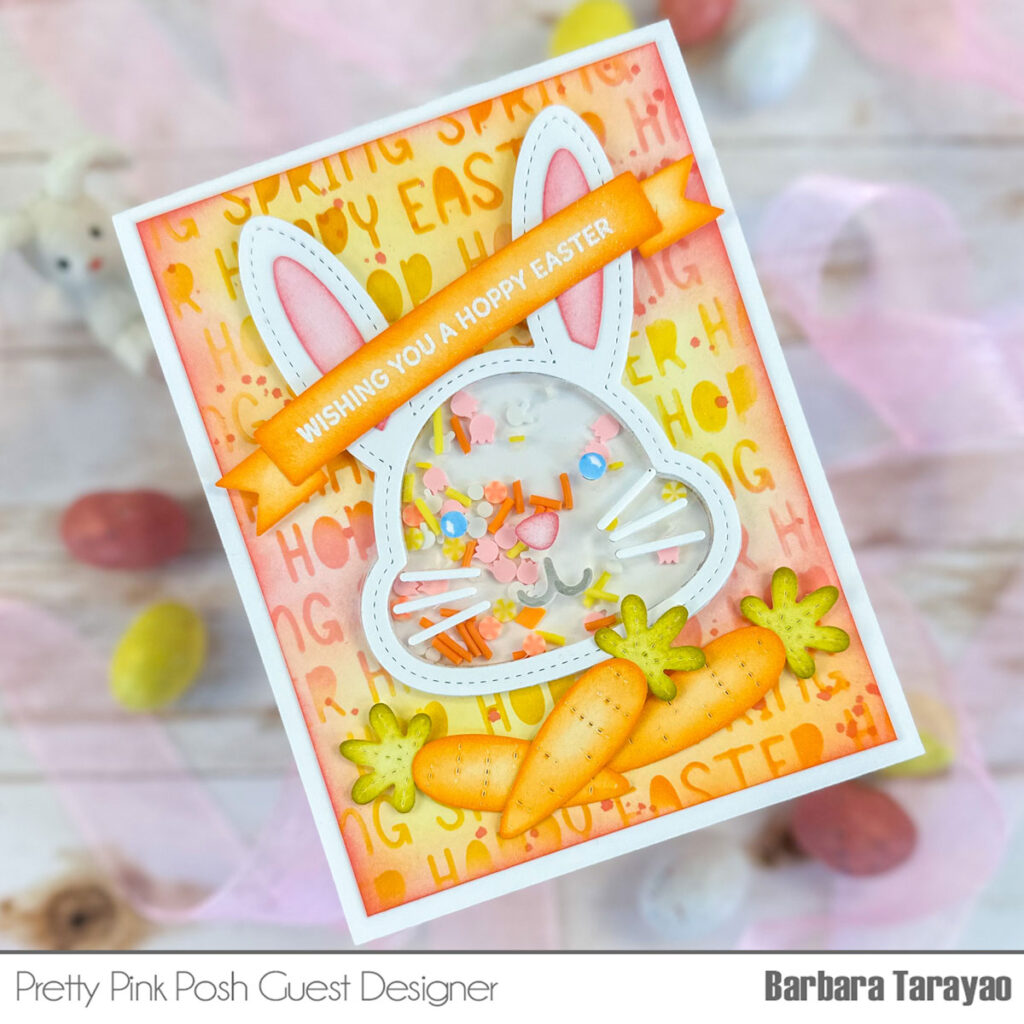
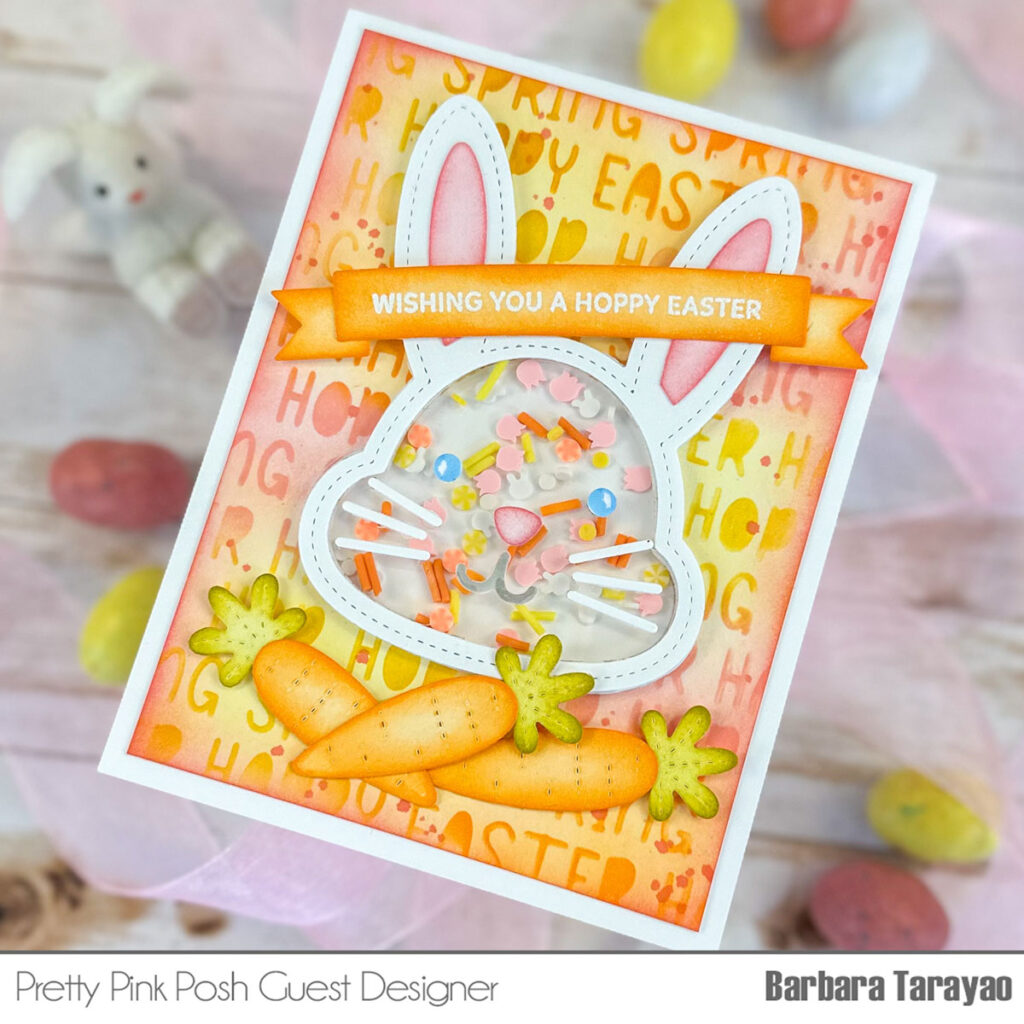
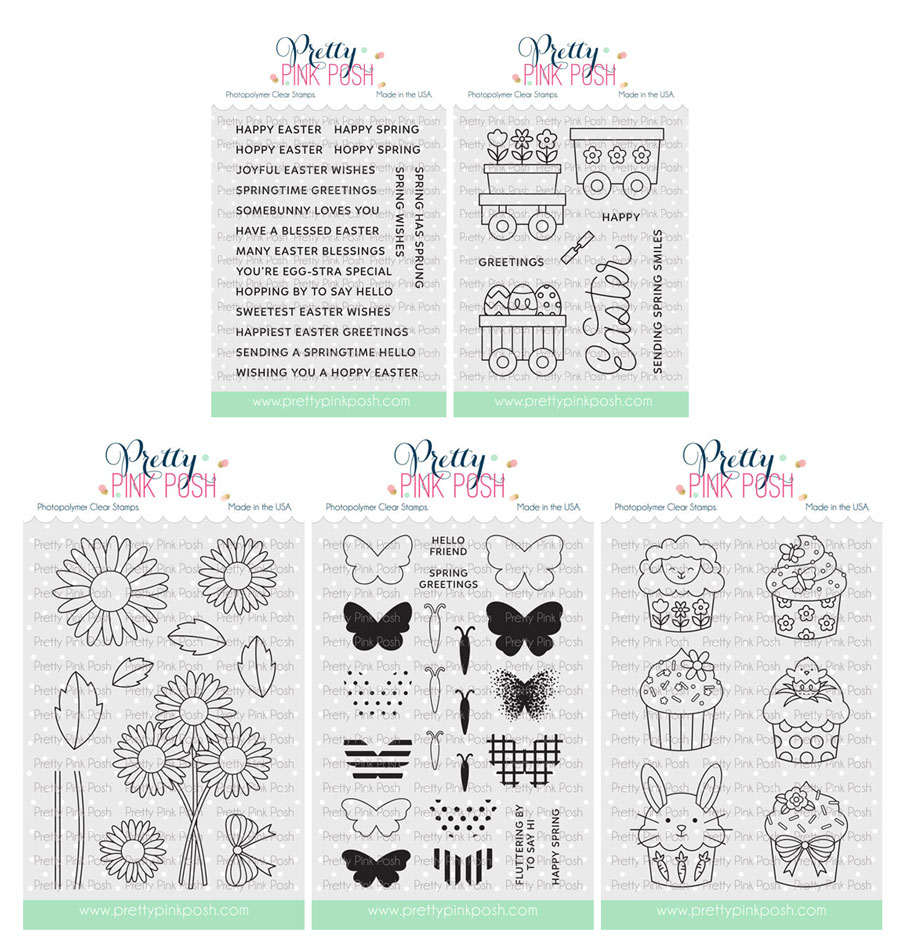
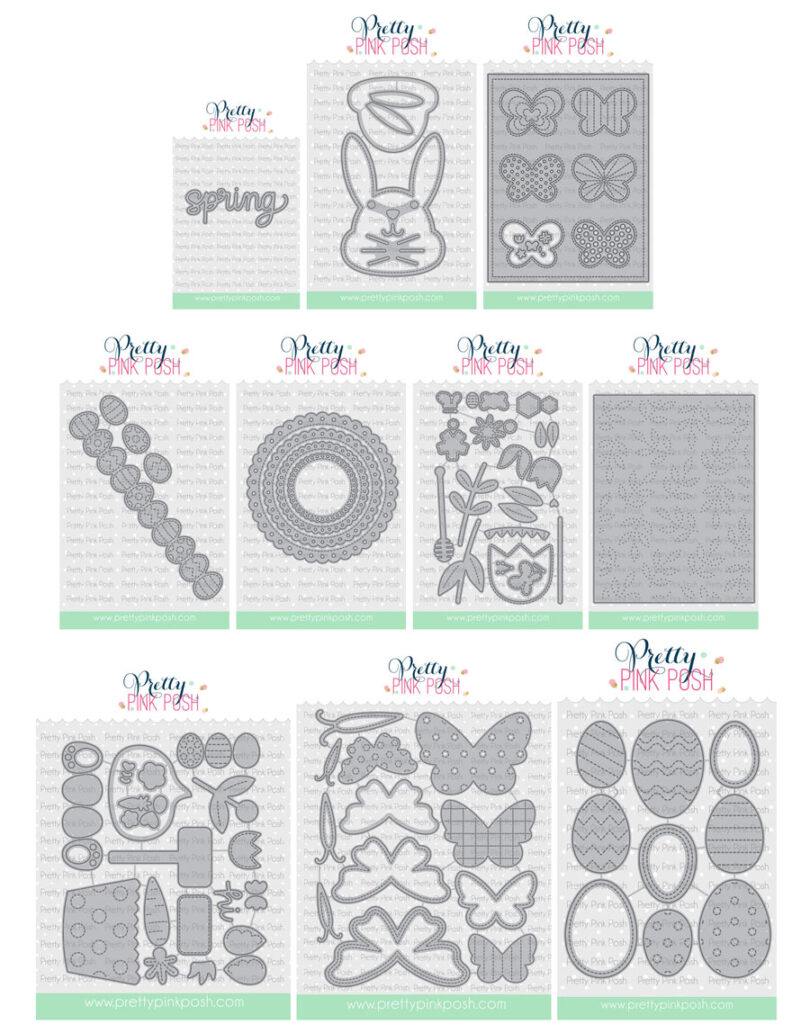
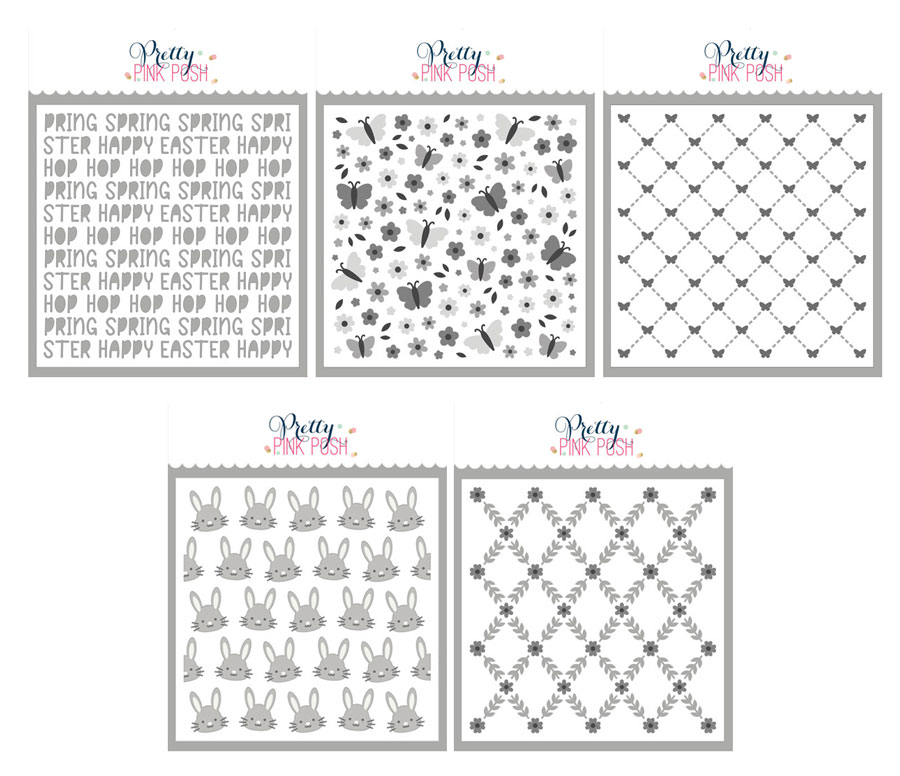
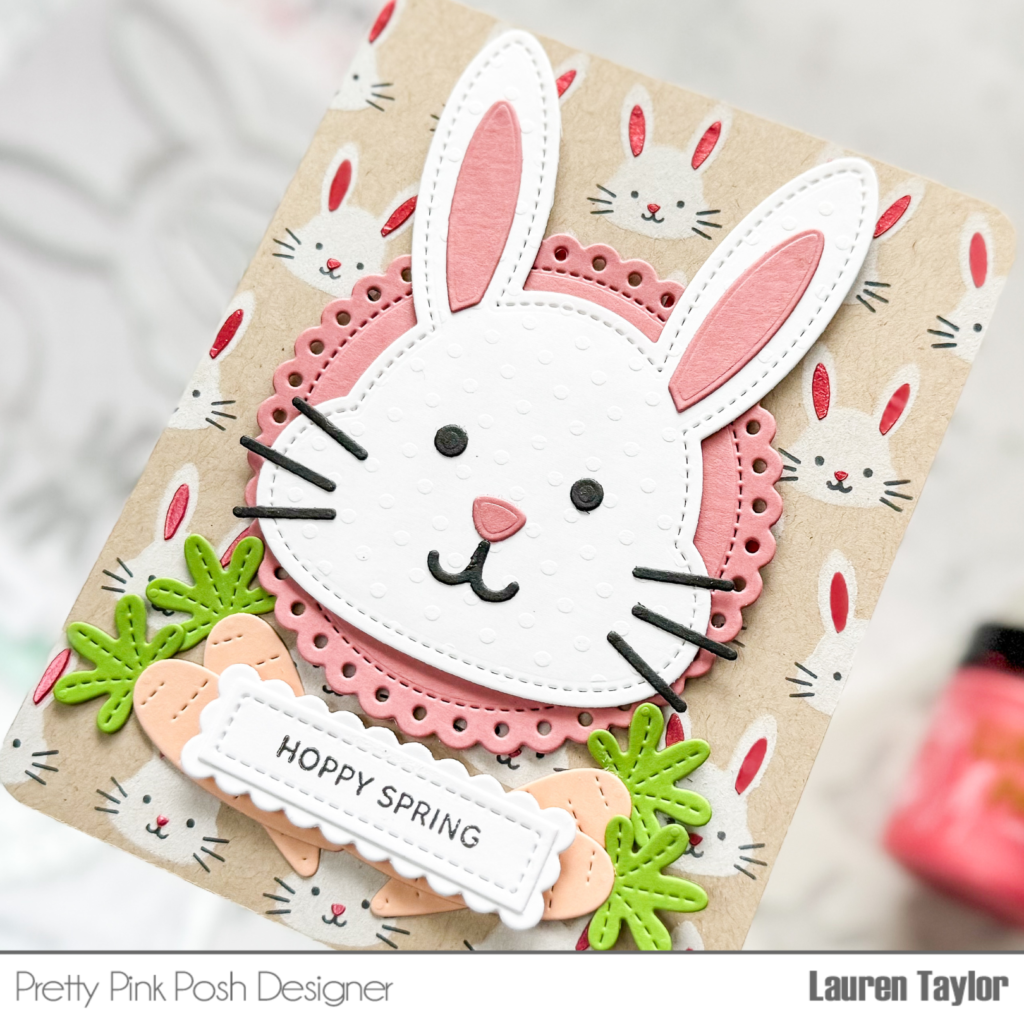
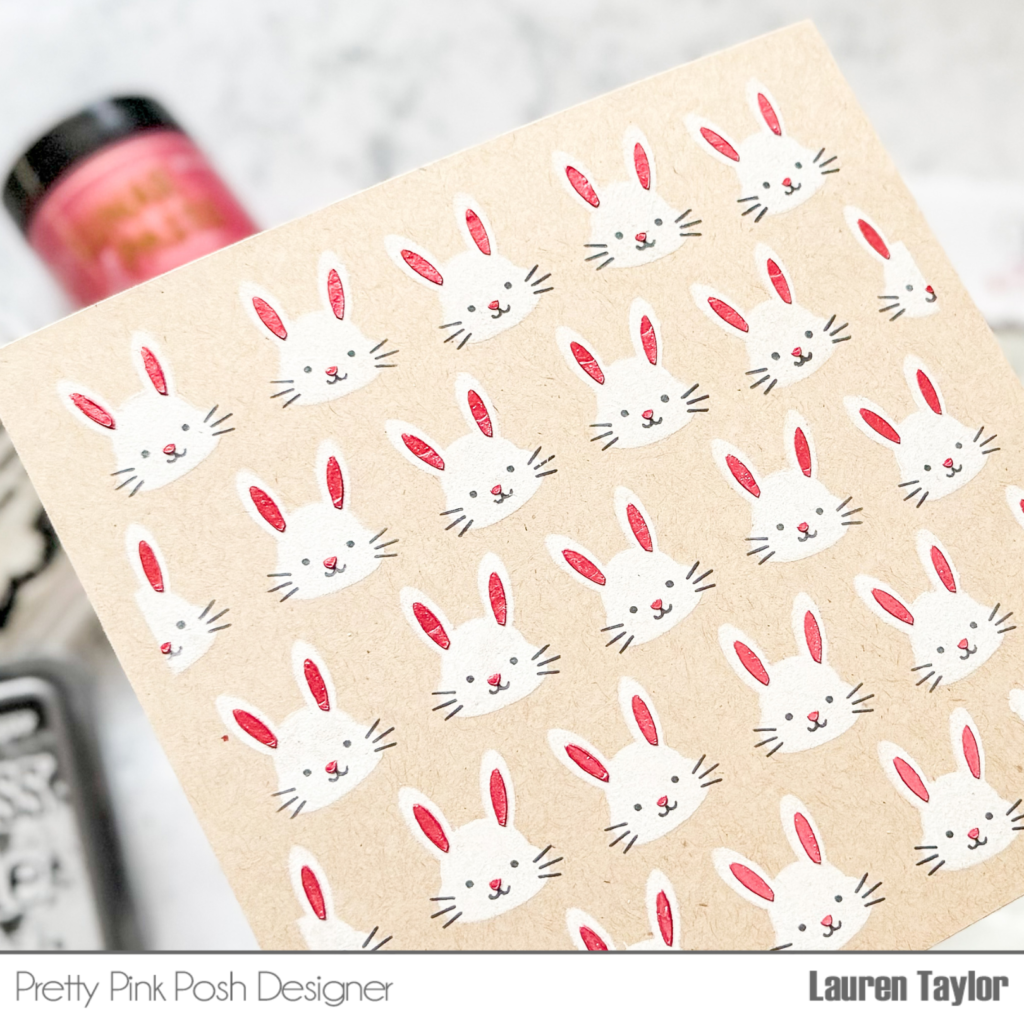
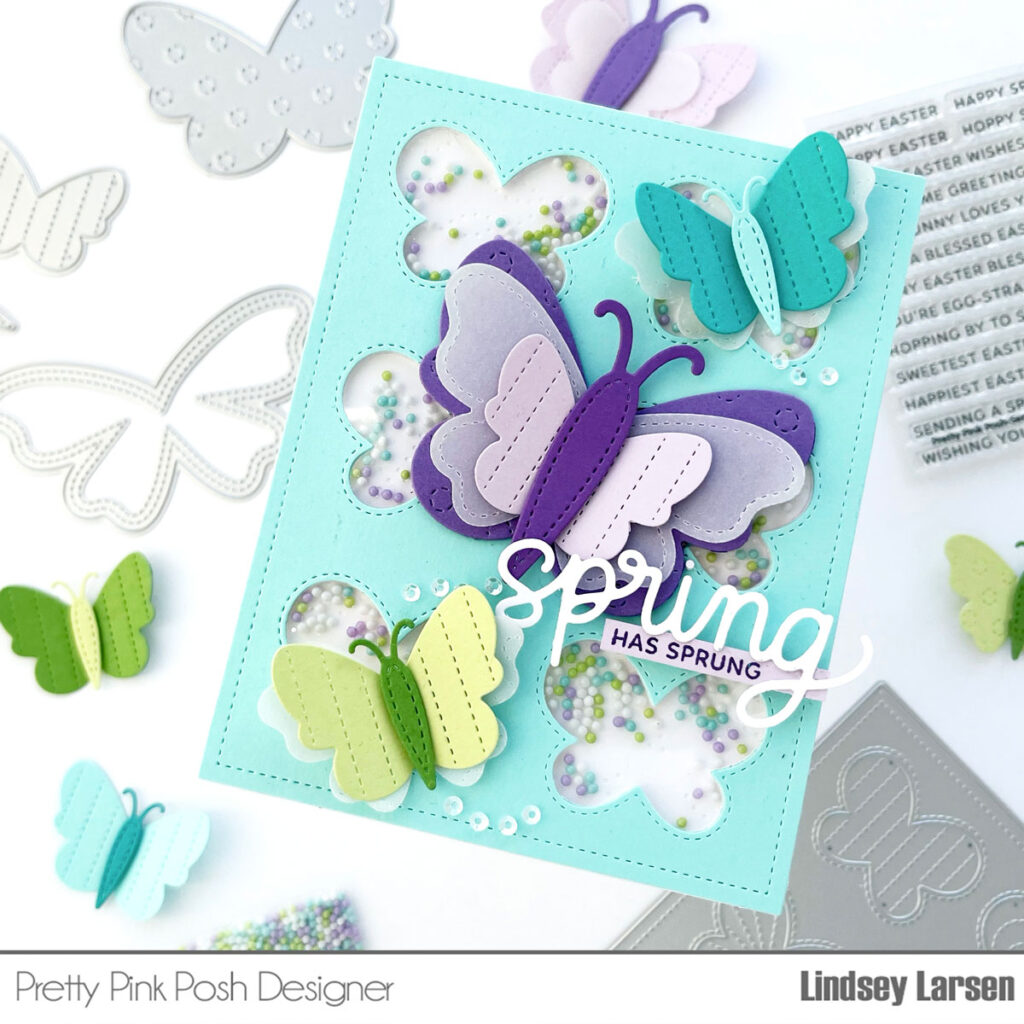
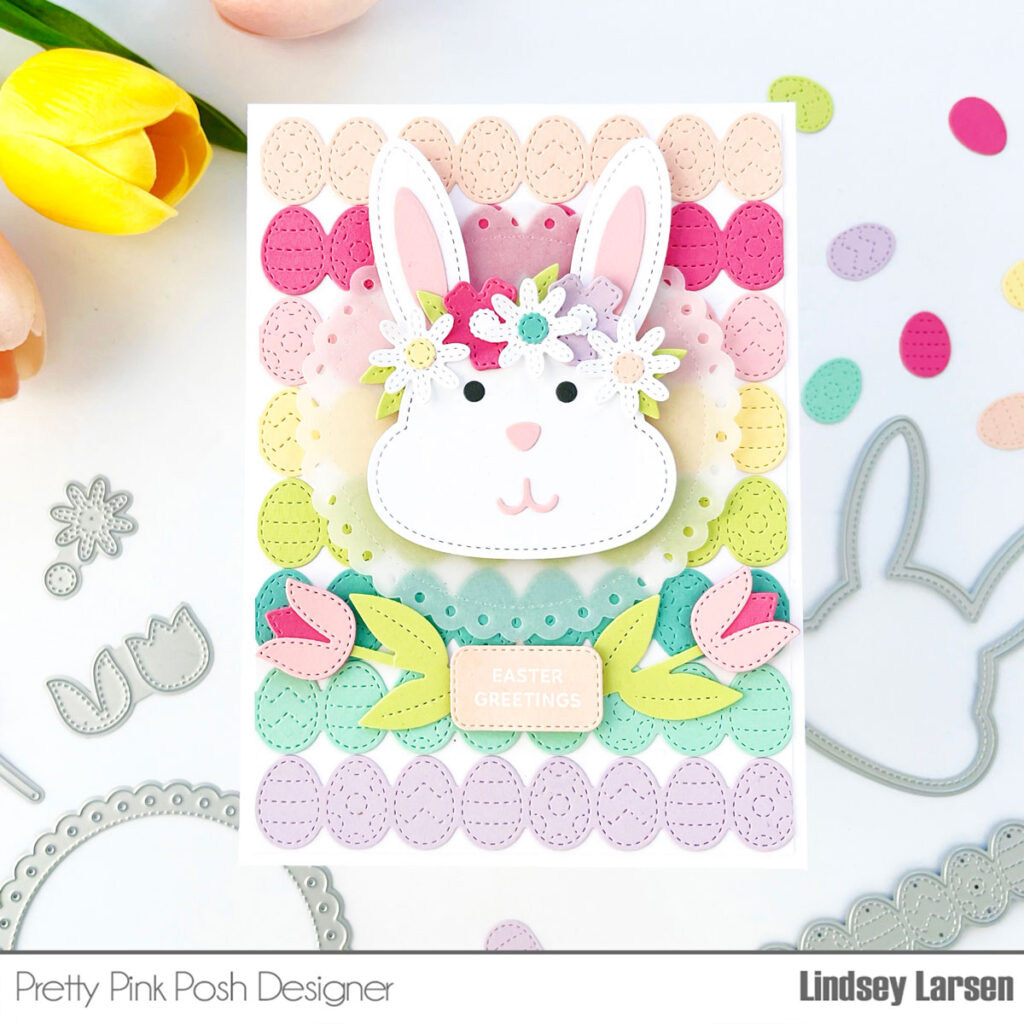
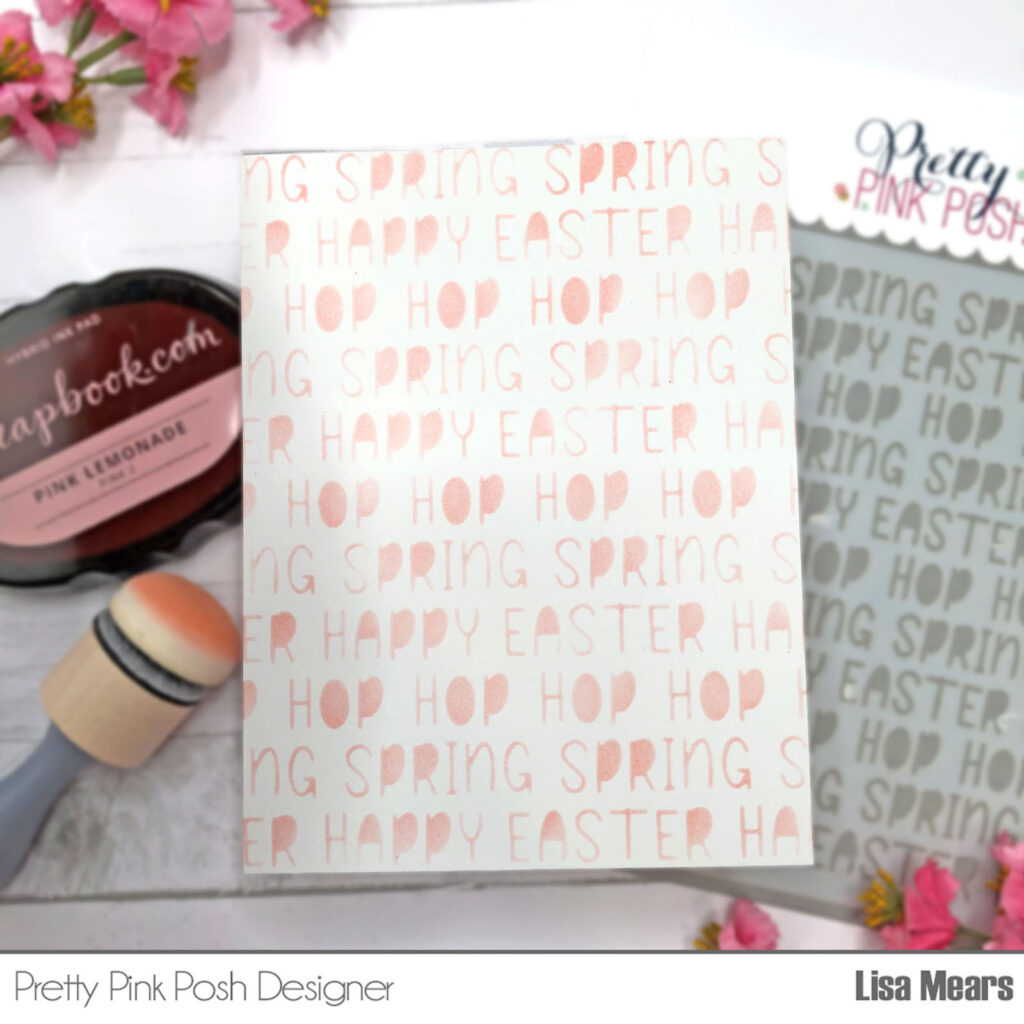
For the background of my card, I used the Easter Words Stencil. This stencil is perfect for Easter cards with words such as “Spring,” “Happy Easter,” and “Hop, Hop, Hop.” I inked the stencil with Scrapbook.com Pink Lemonade ink. I chose this ink because it closely matches the pink cardstock I used for the bunny’s ears.

Pretty Pink Posh: Big Bunny Cupcake

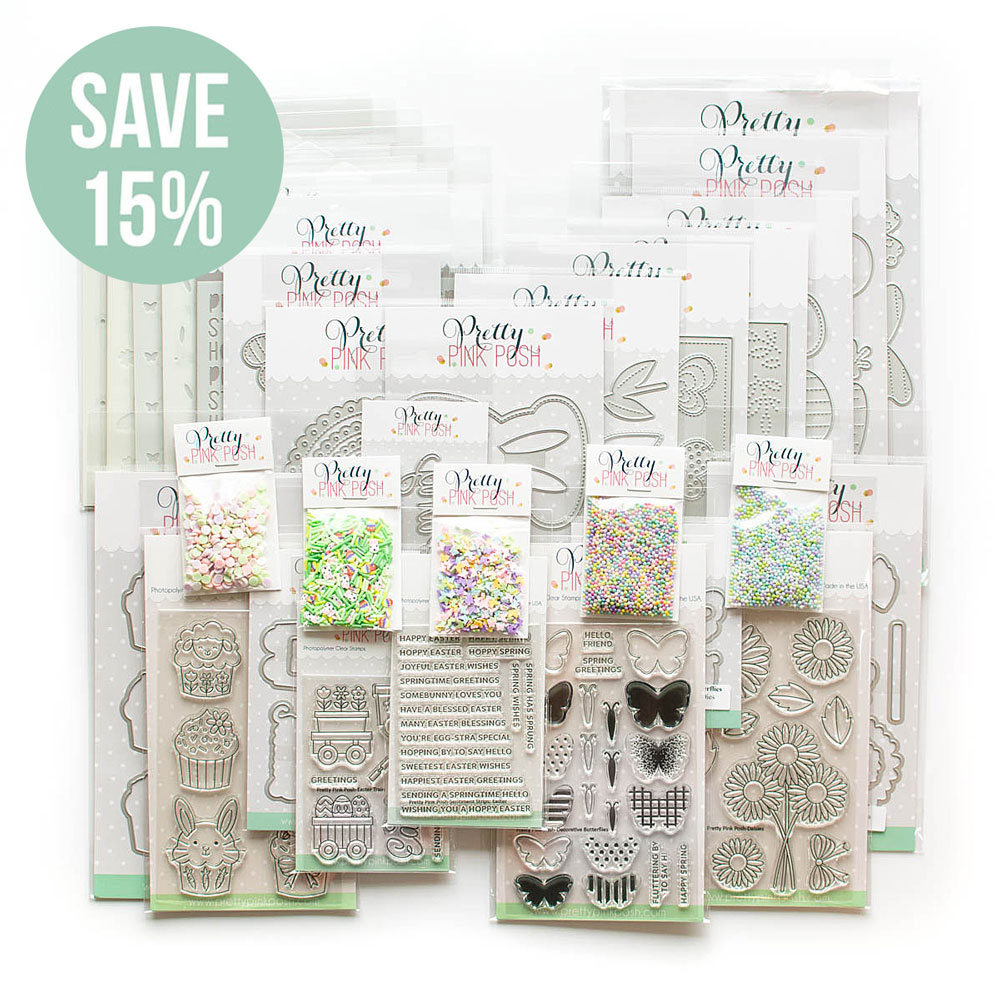
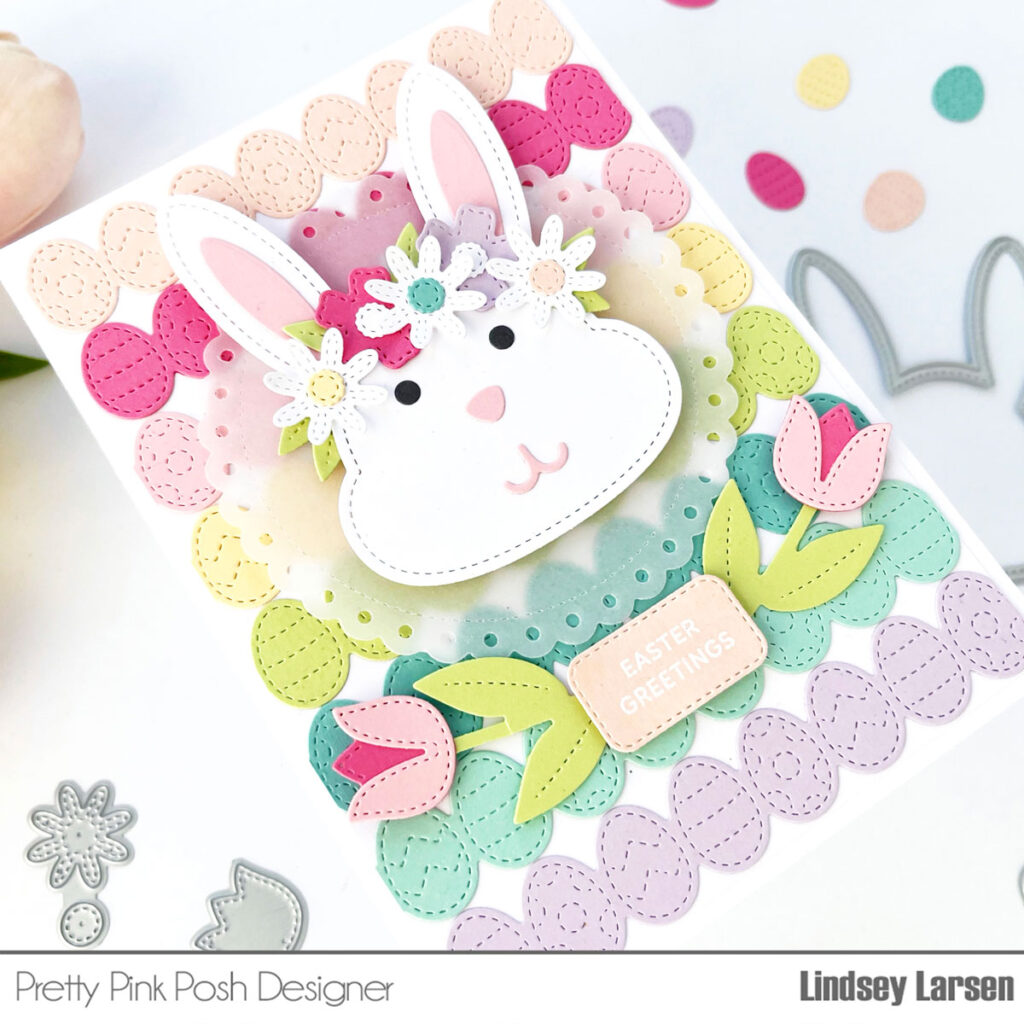
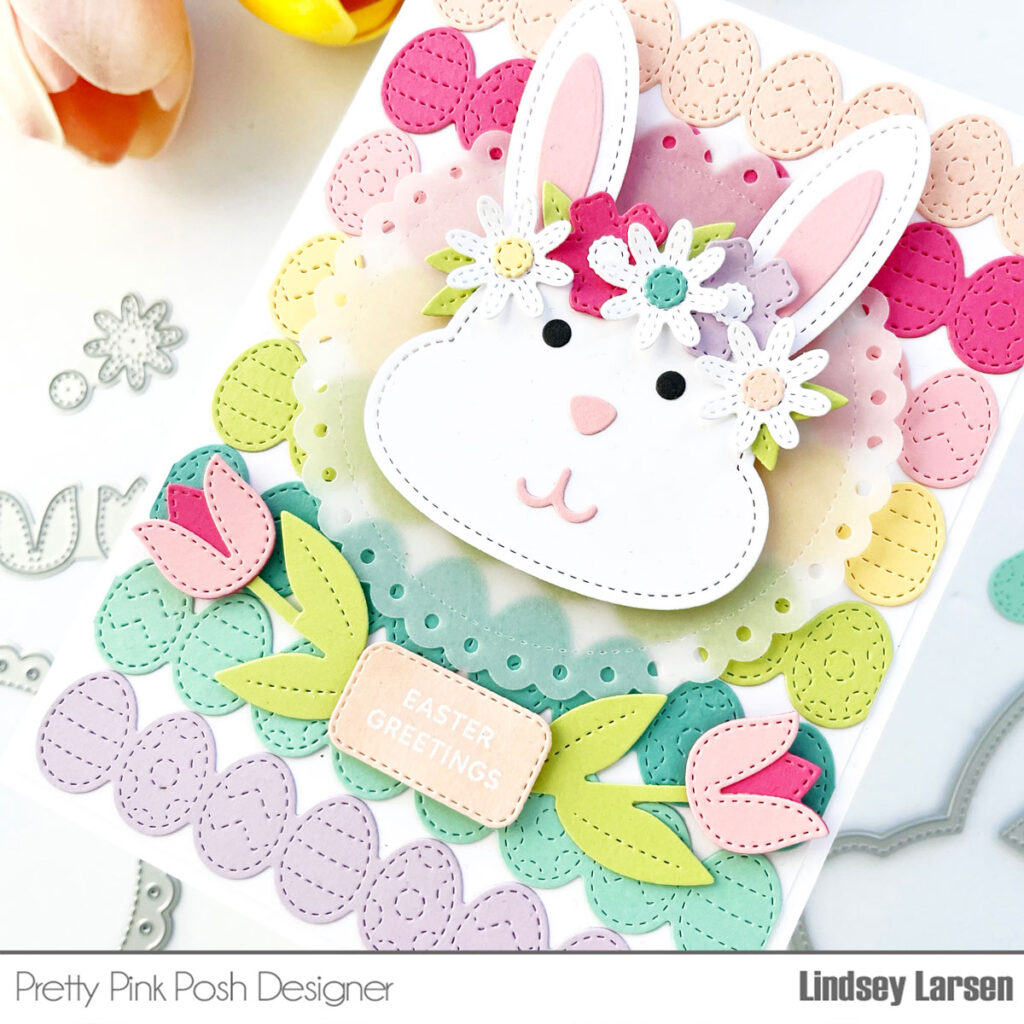
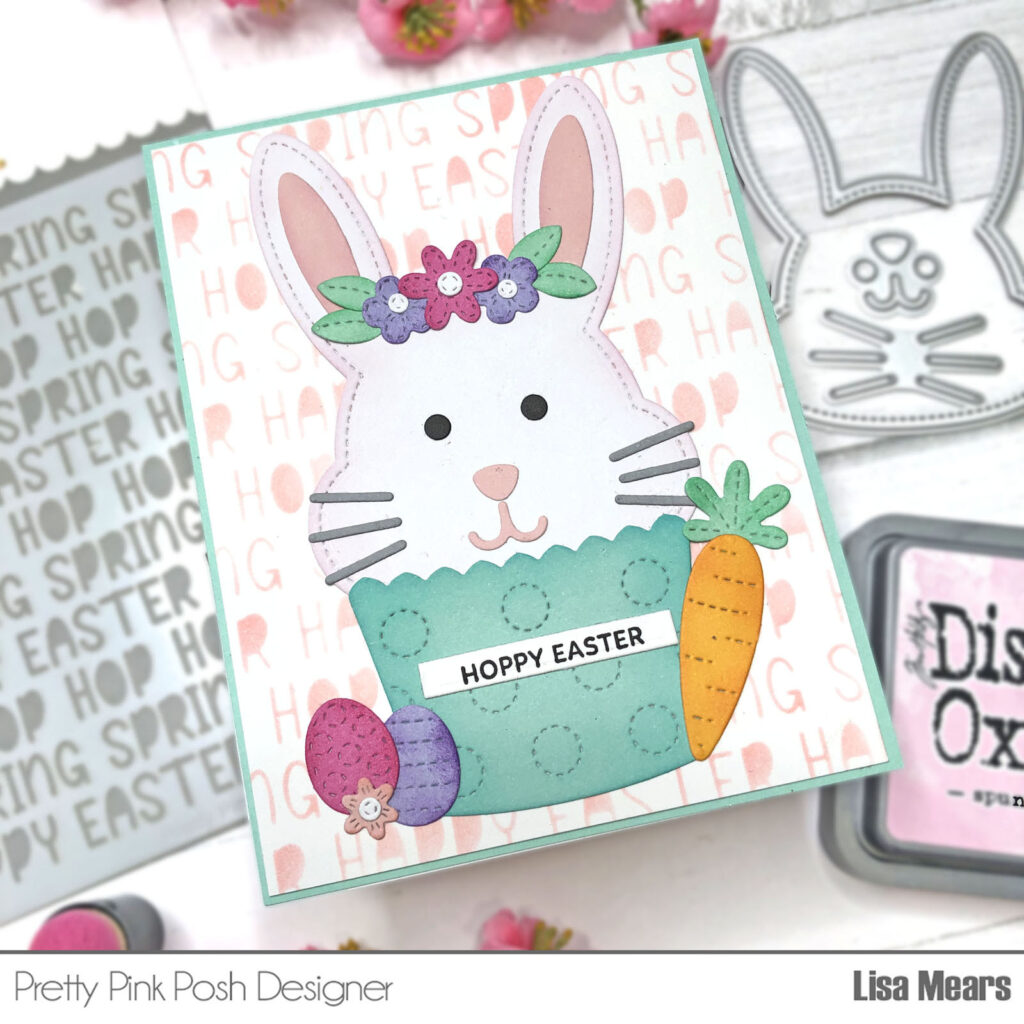
I used the Bunny Face Shaker dies for the Easter bunny face. This die set can be used to make a bunny face shaker, but I didn’t use it as a shaker for my card. I love how it fits perfectly on top of the cupcake wrapper from the Big Easter Cupcake dies.

Pretty Pink Posh: Big Bunny Cupcake

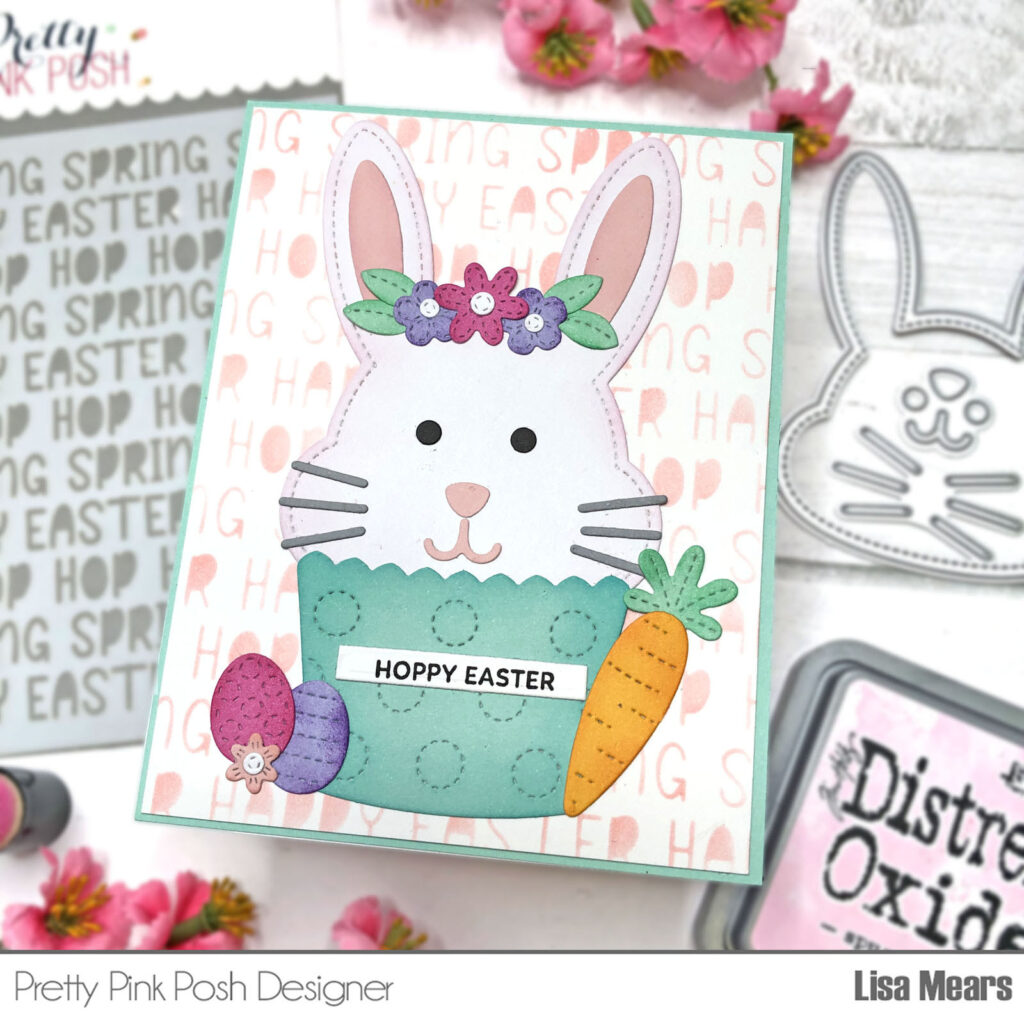
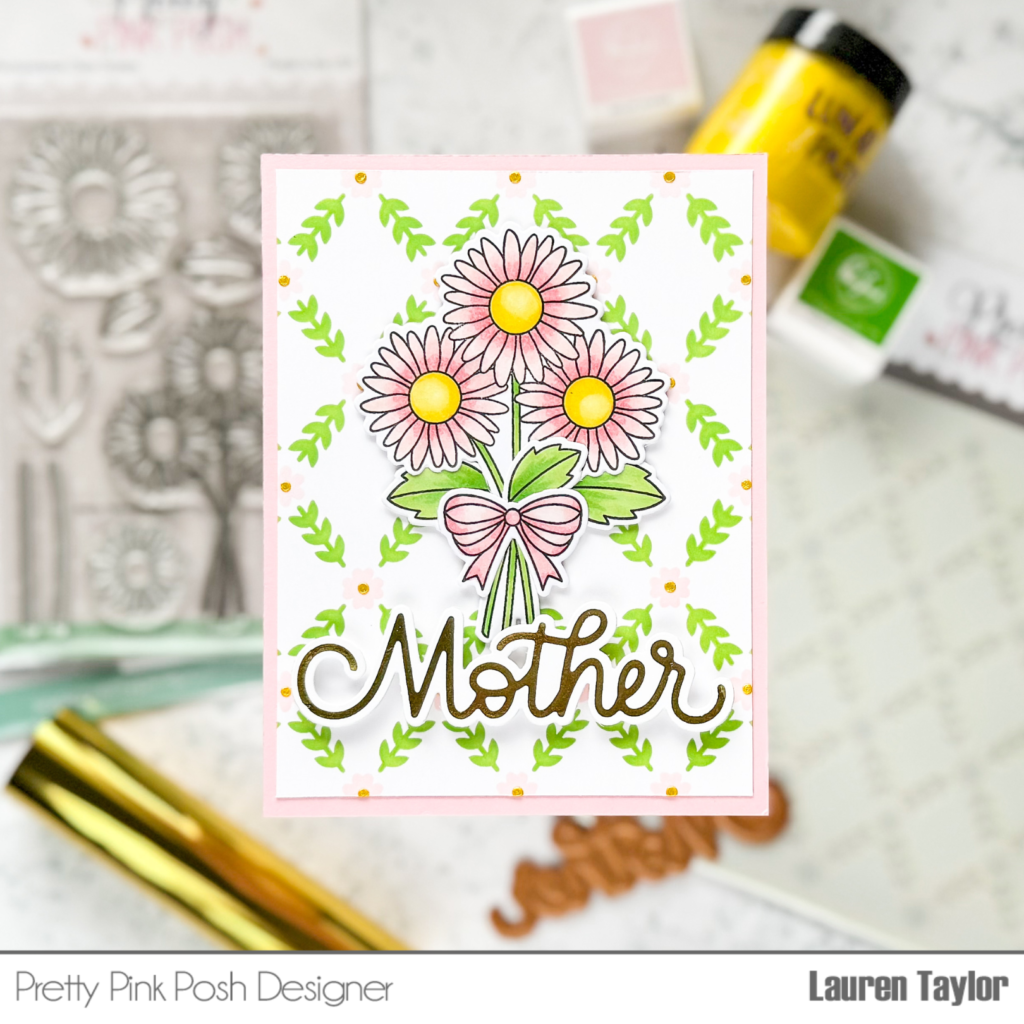
I added flowers above the Easter bunny’s head using the Spring Foliage Dies. I added two Easter eggs and a carrot from the Big Easter Cupcake. I topped it off with a sentiment from the Sentiment Strips: Easter stamp set and coordinating dies.

Pretty Pink Posh: Big Bunny Cupcake

Thank you so much for stopping by today. Have a great day!
Lisa Mears

| |

Day 3: March Blog Hop + New Release Now Available

Day 3: March Blog Hop + New Release Now Available

If you missed Day 1 CLICK HERE //  If you missed Day 2 CLICK HERE

Hello, friends. Barbara here on the Pretty Pink Posh blog and I am so happy to share a project I made using some of the brand new products.

Day 3: March Blog Hop + New Release Now Available

I have made a fun shaker card using the new Bunny Face Shaker die. I made this card using an A2 size card base cut from smooth white cardstock. I then trimmed down another piece of white cardstock to leave a bit of a white border. I then placed the new Easter Words stencil over the white panel and added distress ink over the stencil. I then removed the stencil and ink blended a bit lighter using the same distress inks.

Day 3: March Blog Hop + New Release Now Available

Using a paintbrush, I flicked some distress ink over the stenciled background for some interest. I then die cut the Bunny Face Shaker from white cardstock and added a piece of acetate to the back of the bunny face. I flipped over the bunny face and added the shaker elements to the inside of the bunny and also some foam tape to adhere the piece of white cardstock behind the bunny face to enclose the shaker bits. I trimmed it down and adhered it to the center of the stenciled panel. I then die cut and ink blended the carrots from the new Big Easter Cupcake die set and added them to the bottom of the card.

Day 3: March Blog Hop + New Release Now Available

Last, I die cut a banner from the Love From Afar die set and stamped and heat embossed a sentiment from the Sentiment Strips: Easter stamps.

PRIZES: be sure to leave comments on each stop. We are giving away 3 $30 gift certificates to three random comments (1 winner each day) left before March 13, 2024 at 11:59 PM PST. I’ll be announcing the winners next week, so be sure to return and see if you are one of the winners.

Pretty Pink Posh blog << you are here
Amanda Wilcox
Dana Kirby
Annette Allen
Zsofia Molnar
Jeanne Jachna
Heather Hoffman
Gemma Campbell

We hope you were inspired by the three days of blog hop! Join us next week for more inspiration and we’ll be having FOUR days of Instagram hops!

| |

Day 2: March Blog Hop + New Release Now Available

Day 2: March Blog Hop + New Release Now Available

If you missed Day 1 CLICK HERE 

Hello crafty friends, Marine here. I’m super happy to share with you this lovely card that features some of the brand new products from the March 2024 Release: the Spring Mug Additions die set and the Layered Floral Vines stencils. Love how both items match so beautifully, such a great duo!

Day 2: March Blog Hop + New Release Now Available

First thing I created was the background. I cut a 5,5 x 4,25 inches Strathmore bristol smooth panel, and started off by covering the piece of paper with spun sugar oxide ink to get a nice soft base. Next I used the Layered Floral Vines stencils to add flowers and greenery to this light pink background. For the flowers I applied worn lipstick oxide ink that I blended in with spun sugar oxide ink, and used worn lipstick again for the center of the flowers. And for the greenery I applied rustic wilderness oxide ink that I blended in with mowed lawn oxide ink.

Day 2: March Blog Hop + New Release Now Available

Every time I create an ink blended background, I like to add texture to make it more interesting. So I first splattered some water all over the panel that I dried using a paper towel. Next I mixed some white ink with water and used a small brush to add more splatters to my panel, and then did the same with black soot oxide ink.

While my panel was drying, I cut all the bits and pieces out of colored cardstock. I used most of the Spring Mug Additions dies to cut everything, but also used the mug and the beverage dies from Winter Mug, as well as the sign die from Big Easter Cupcake to complete my little scene. I cut the bees’ wings out of pearlescent vellum, added black stripes to their bodies using a black marker, and white heat embossed my “Happy Spring” greeting from Easter Signs on the sign.

Day 2: March Blog Hop + New Release Now Available

I assembled and attached everything on my Layered Floral Vines panel using 1mm and 2mm foam squares, and added highlights and details using a white gel pen. And that’s it! It’s definitely springtime on a card, I love those beautiful flowers and cute bees! I hope you like them, too.

PRIZES: be sure to leave comments on each stop. We are giving away 3 $30 gift certificates to three random comments (1 winner each day) left before March 13, 2024 at 11:59 PM PST. I’ll be announcing the winners next week, so be sure to return and see if you are one of the winners.

Pretty Pink Posh blog << you are here
Wanda Guess
Carissa Wiley
Hanh Nguyen
Leanne West
Rebecca Keppel
Mindy Eggen
Sindhu Prajay
Lisa Mears
Lauren Taylor

We hope you were inspired by today’s projects. Thanks for stopping by, we’ll see you again tomorrow!

| | |

Day 1: March Blog Hop + New Release Now Available

The March 2024 Release is now available in the Pretty Pink Posh Shop and select retailers that carry our products. If you missed our post yesterday, we revealed all of the products in picture form, but if you would like to see them in a video, Mindy has that for you today!

Watch the video above  I  Watch the video in HD on YouTube

Hi crafty friends! It’s Dana here today and I am back with a fun Springtime card to share with you all. 

I started my card by die cutting my butterflies with the Stitched Butterflies die set. I attached the butterflies to a soft gray card panel with foam adhesive. Next, I used the Spring Mug Additions die set to die cut my small stitched circles and the Big Easter Cupcake die set to die cut the small flowers (which actually can be used as a bunny tail). I then attached the small flowers and stitched dots to fill in my panel in a random pattern. 

Lastly, I used the Sentiment Strips: Easter stamp set to stamp my sentiment. Although I made a springtime/Easter card I think this same design will work great for a birthday card or even to welcome a new baby. The color combinations are endless! I hope I inspired you to create a similar card of your own.

PRIZES: be sure to leave comments on each stop. We are giving away 3 $30 gift certificates to three random comments (1 winner each day) left before March 13, 2024 at 11:59 PM PST. I’ll be announcing the winners next week, so be sure to return and see if you are one of the winners.

Pretty Pink Posh blog << you are here
Nichol Spohr
Amy Rysavy
Marine Simon
Barbara Tarayao
Lindsey Larsen
Kristie Marcotte
Lea Lawson
Carly Minner
Davina Cantrell

Be sure to leave comments on all the stops- we’ll be randomly picking comments to win gift certificates. Thanks for joining us!

March 2024 Product Reveal + Bundles

Hello friends! It’s time to reveal all of the products that are part of the March 6th release.

Here’s a look at the five new stamp sets that will be available for purchase: Sentiment Strips: Easter, Easter Train, Daisies, Decorative Butterflies and Easter Cupcakes.

Here are the individual die sets that will be available: Spring Script, Bunny Face Shaker, Butterfly Cover Plate, Easter Egg Border, Eyelet Circles, Spring Mug Additions (designed to be used with the popular Winter Mug dies)., Pierced Leafy Vines Plate, Big Easter Cupcake, Stitched Butterflies and Stitched Eggs.

This month we have five new stencils: Easter Words, Layered Butterfly Floral (4 layer)Layered Butterfly Lattice (2 layer), Layered Bunny Faces (3 layer) and Layered Floral Vines (3 layer).

There are five new embellishments this month: Spring Butterflies clay confetti, Easter Bunnies clay confetti, Cotton Candy clay confetti, Pastel Party shaker beads and Springtime shaker beads.

We have a limited amount of bundles available where you can buy this release in one easy click. Plus, you’ll save 15% off when you buy it all together.

We will see you tomorrow as we show you the new products in a video and the products go live individually. Plus, we’ll kick off our three day blog hop!

| |

Sneak Peek: March 2024 Stencils

Hi, friends! It’s Lauren and I am so excited to be sharing a sneak peek at two of the new stencils that will be released. It was hard to pick which two to create first as they’re all absolutely perfect for the Spring season, but I decided I just had to use the Layered Bunny Faces for a cute critter card and Layered Floral Vines for a floral card for Mother’s Day.

New release will be available March 6th

For the first card, I used the Layered Bunny Faces with a white pigment ink for Stencil (A) with the bunny shapes, Black Soot Distress Oxide for Stencil (B) with the bunny face details, and Rosy Cheeks Lunar Paste for Stencil (C) with the bunny ears and nose! I used kraft cardstock as I thought it would be so fun to have the bunnies in white.

When the stenciled bunnies were dry, I trimmed the panel to 4-1/4×5-1/2” (A2 size). I cut Bunny Face Shaker dies from white, black and pink cardstock to create a matching bunny face to the stenciled panel. I also cut the second largest Eyelet Circle out of pink cardstock, the carrots from Big Easter Cupcake in green and orange cardstock, and finally my Sentiment Strips out of white cardstock. I used “Hoppy Spring” from the Sentiment Strips: Easter stamp set!

For the second card, I wanted to create a Mother’s Day card with pink daisies, so I used those colors to inspire my stenciling! I started with a green ink for the vines on Stencil (A), pink ink for the flowers on Stencil (B), and Shooting Stars Lunar Paste for the center of the flowers with Stencil (C).

When it was dry, I cut the panel to 4×5-1/4″ and adhered it to a base of pink cardstock. I stamped and colored the images with alcohol markers from Daisies and used the Daisies coordinating dies to cut them out. I also hot foiled “Mother” from the Mom/Mother Foil Plates and used the Mom/Mother Shadow dies to cut it out. It’s a simple, but I think elegant card to sit on a mantel for the holiday!

I hope you enjoyed this sneak peek of the new Layered Bunny Faces and Layered Floral Vines Stencils. I hope you’re excited for this new release just as I was to receive these stencils to give you inspiration today!

| |

Sneak Peek: March 2024 Dies

Good morning! It’s Lindsey here, and I am so excited to share sneak peeks of the new dies today. You are going to love them! They are everything that makes a heart happy in the spring. Not only that, but you will probably also be delighted to hear that the dies are no longer wired together, which means they are ready for crafting right out of the package. Yay!

New release will be available March 6th

For all of you butterfly lovers out there, this release is going to make you really happy. The new Butterfly Cover Plate and Stitched Butterflies are fabulous!  I used both on my card today. I pulled my color scheme from the new Pastel Party Shaker Beads, so naturally I needed to make a shaker card. I just love the way the beads sound!  

After die cutting several of the Stitched Butterflies with cardstock and vellum, I layered them together. You are going to love the variety of sizes and styles!  I wanted them to playfully fly across my card, so I added little flight trails using 3mm Sparkling Clear Sequins.  

PS If you look closely inside the butterfly windows, you will also see a peek of the new Pierced Leafy Vines Plate that I used on my card base.

I finished the card with the new Spring Script Die and a sentiment from Sentiment Strips: Easter

My next card just screams spring (but in the happiest way). The new Bunny Face Shaker is absolutely darling!  I decided to make her a little girl bunny, and gave her a flower crown using the new Spring Mug Additions. (No worries, though…I made a little boy bunny on a different card and they are equally adorable.)

I created a colorful background using the Easter Egg Border Dies and used a vellum circle cut with the largest Eyelet Circle Die, so the sweet bunny would still stand out from the busy background. 

Then I embossed a sentiment from the previously released Easter Wreath Stamp Set onto a rounded stitched rectangle found in the Big Easter Cupcake Dies. Finally I framed the sentiment with two tulips from the Spring Mug Additions.

This card instantly makes me smile every time I see it. I hope it makes you smile, too! 

Thanks so much for joining me today!  I used many of the new dies on my cards, but there are a few more that I haven’t shared yet, so make sure you come back all week to see more of this fabulous new release. You won’t want to miss any of it!

| |

Sneak Peek: Decorative Butterflies

Hello, Gemma here today and I’m excited to share a sneak peek of the new Decorative Butterflies stamp set. The Decorative Butterflies stamp set includes both solid and outline butterflies, along with patterns and sentiments.

New release will be available March 6th

For my first card, I used the solid images to stamp with dye inks. I added patterns with a darker ink in the same colour family, then went one ink darker for the butterfly bodies.

I  die cut everything with the coordinating dies and adhered the bodies onto the butterfly wings.

Next, I used the new Layered Butterfly Lattice stencil set. This is a 2 layer stencil set, and I used a light grey ink on the lattice and Nuvo Glacier Paster in Winter White for the butterflies. Once dry, I trimmed this down to 5” square and adhered to a 5.25” card base.

To add a place for my sentiment to go, I die cut one of the new Eyelet Circles from white card. I stamped a sentiment from the Decorative Butterflies stamp set, then adhered the circle in the centre of my card.

I finished by adding the butterflies with foam tape for dimension.

For my second card, I used the outline images in the Decorative Butterflies stamp set.

I stamped them over some patterned papers, then added shading with copic markers. On some of the images, I heat embossed the patterns with gold embossing powder.

Copic colours:
R30 R20 R22; RV00 RV10 RV21: G40 G43; B000-01; BV00-02; E70 E71 E74

I cut a panel of white card, 5.5” x 2.75”, and adhered butterflies across the panel. For the butterflies without patterns added, I decided not to add the bodies so they were more of a background element.

I trimmed away anything overhanging the edges of the panel, then adhered it on an A2 card base. I adhered a strip of patterned paper below, then stamped a sentiment from the new Sentiment Strips: Easter stamp set to finish.

Thanks so much for joining me today! Stop by tomorrow for another sneak peek of the March 6th release!

| |

Sneak Peek: Easter Cupcakes + Easter Train

Hello crafty friends, Arsenia here and I’m super excited to be sharing these sneak peeks using Easter Cupcakes Stamps with coordinating dies and Easter Train Stamps with coordinating dies. This release is full of springtime goodness and will keep you busy crafting! Let’s get started!

New release will be available March 6th

For my first card I’m using the adorable new Easter Cupcakes Stamps and Easter Cupcake coordinating dies. I stamped the images and colored them with an array of Ohuhu markers. I also stamped and die cut a few images from an older set called Bunny Friends. Once I had all the images die cut, I added lots of white gel pen highlights. 

For my background I used the new Pierced Leafy Vines Plate, oh friends you’re going to love this die.  The texture from the piercing is phenomenal.  I backed the pierced layer with some light pink cardstock, added some black splatters to the top left corner and bottom right corner of the panel.  I wanted to add a small frame, so I took the large die from the Stitched Torn Rectangles Dies and cut it out of an A2 white card panel.  I then adhered the frame to the panel.  I started placing the images on the card panel and realized I wanted a bit more color on the panel.  I couldn’t help myself, I decided to use another new product called Eyelet Circles Dies!  I adore anything EYELETS!  I made some frames with circles and adhered to the panel.  

I arranged and adhered all the images to the card panel. I still wanted more color on the panel, I used the new Spring Mug Additions Dies for a few flowers!  I was completely thrilled when I saw the new Mug Additions Die set! Final step, I needed a sentiment!  Yay we have a new Sentiment Strips: Easter Stamp Set! I picked a sentiment and added to a few Sentiment Strips dies.  Ta-dah all done!  These cupcakes are super cute, and I’ll be sharing some more projects with these cuties!

For my second card I’m using the new Easter Train stamp set and coordinating dies, these images are the cutest!  I’m using the Valentine Train stamp set with coordinating dies for the engine car. I stamped and colored the images with an array of Ohuhu Markers. I then die cut the images and added white gel pen highlights. Oh, I did use one of the cupcakes from Easter Cupcakes stamps with coordinating dies to fill up the empty car, I think the little chicky looks stink’in adorable!

For my background I added black splatters to top left and lower right of an A2 panel.  I adhered some colorful strips of paper using the Stitched Strips dies.  I then took a piece of white cardstock and used the new Pierced Leafy Vines Plate die and back it with yellow cardstock.  I cut the panel down and adhered it to A2 panel with the strips.  

I arranged the images on the card panel and realized I wanted more color! The new Eyelet Circles dies to the rescue!  I die cut 4 of the smallest circles in colorful cardstock. I arranged them on the card panel, and then adhered the images. I had a few bits left from the Bunny Friends Stamps and coordinating dies, I adorned the panel with the florals. The sentiment was easy-peasy, I used the sentiment from the Easter Train Stamps and coordinating dies. I finished the card with a bit of sparkle on the wheels of the train.  

Thank you for stopping by and I hope you enjoyed the sneak peeks!  The release is chock full of springtime goodness and it’s spectacular!

| |

Sneak Peek: Daisies

Hello everyone! This is Melissa and I’m here to share a couple of cards made with the adorable Daisies stamps and coordinating dies.

New release will be available March 6th

I stamped and heat embossed my sweet flowers from the Daisies stamp set, using watermark ink and white embossing powder on my first card. I loved this darling bouquet of daisies and wanted to bring them to life with watercolor markers. They look so cute bunched together, tied up with the bow you can find in the Daisies set.

I matted my daisies on one of the new die cut Eyelet Circles dies. I adore these new circles…they make your focal point and sentiments pop all while adding soft curves and scallops.  

Behind my daisies, I have used the delightful, new Layered Butterfly Floral stencils. What a sweet treat they are and they look so cute paired with the Daisies stamp set. I added in a die cut Scallop Frame on my card base to frame everything in perfectly.  All that was left was the sentiment from the new Decorative Butterflies stamp set.

I wanted to share a different technique with you on my second card, so I paper-pieced my tiny daises and love how they turned out. Paper-piecing is one of my favorite techniques, because I love the quilted, pieced together look.  

I layered each of my paper-pieced daises on the smallest die cut Eyelet Circles, cutting each from a different color. I layered this trio of circles across the front of my horizontal card. I love the colorful, simplicity of them all lined up together, don’t you?

To create my background, I used the Daisies stamp set, stamping flowers and leaves in coordinating colors found in my paper-pieced daisies.  I then sponged ink over the surfaces of each and die cut my background using the largest Eyelet Rectangles dies. My sentiment was added last, using the Decorative Butterflies stamp set once again.  

I adore these new products from Pretty Pink Posh and am officially ready for Spring! Thanks for visiting, stop by tomorrow for another sneak peek!

Melissa