Pretty Pink Posh Shop

| | |

Creative Ways to Use Border Dies + Video

Good morning! It’s Ardyth here and I’m sharing lots of cards using ways to stretch your border dies to get more out of them!

Scroll down to the very bottom of this post to see all the stamp sets and dies used.

Watch the video above  I  Watch the video in HD on YouTube

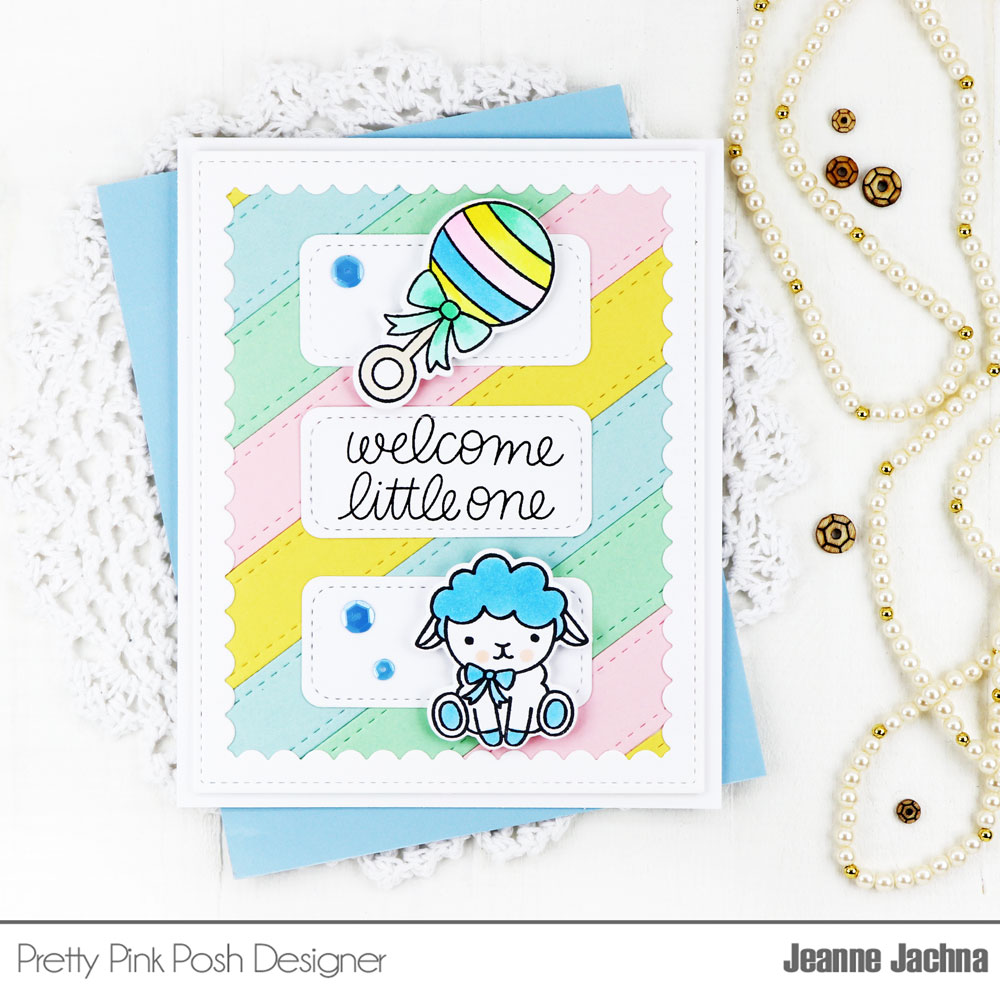
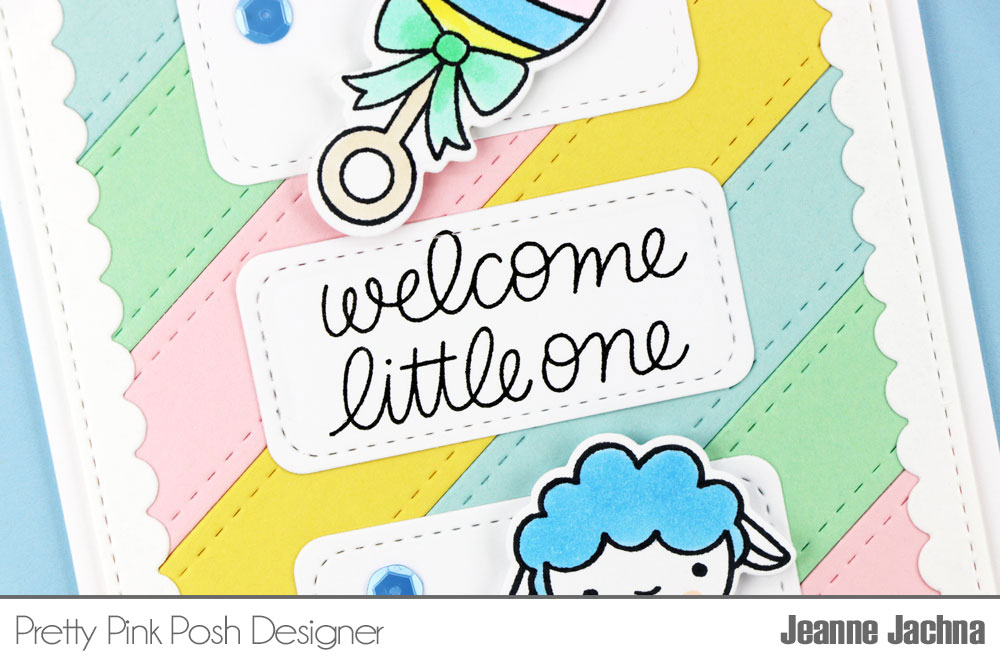
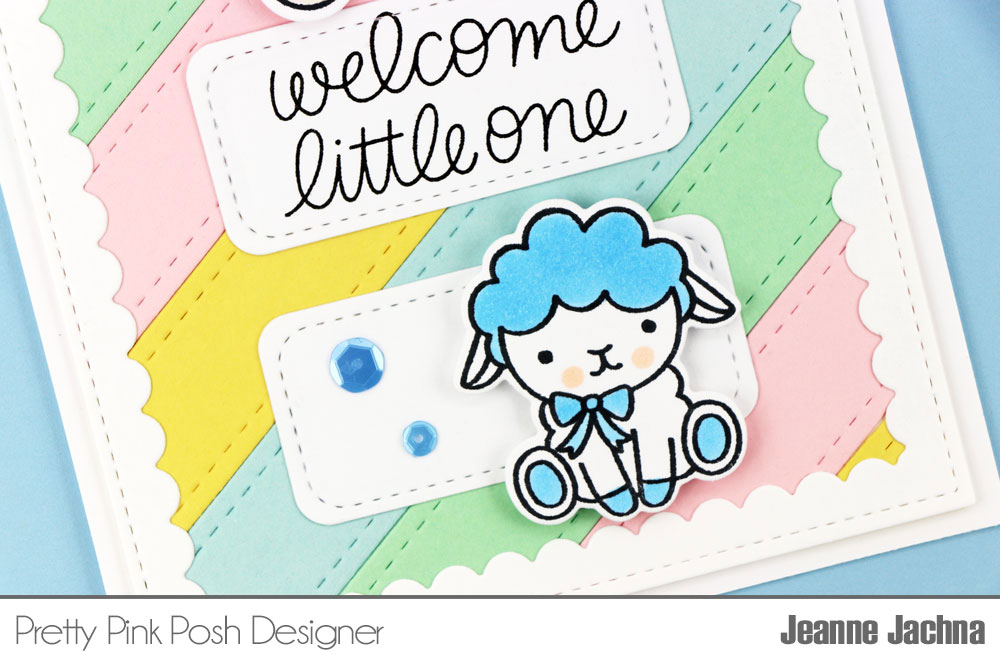
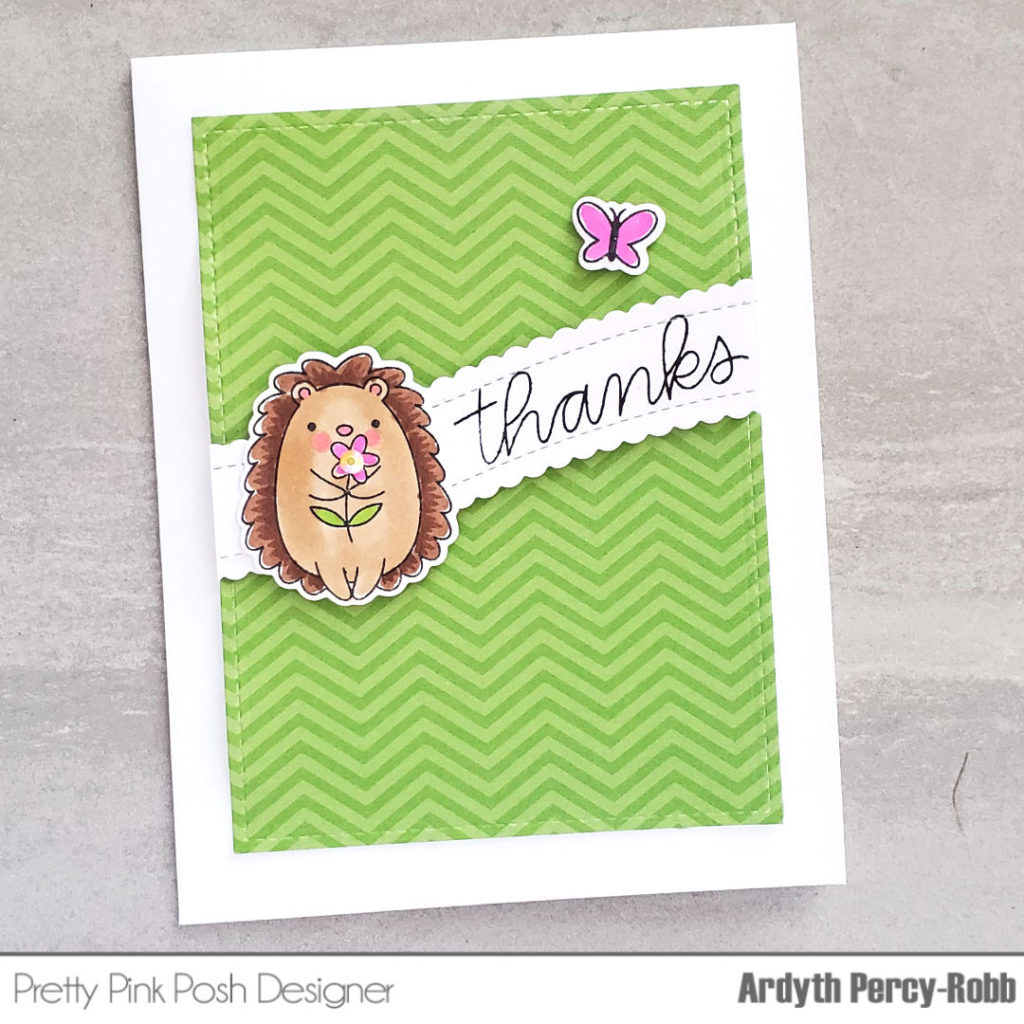
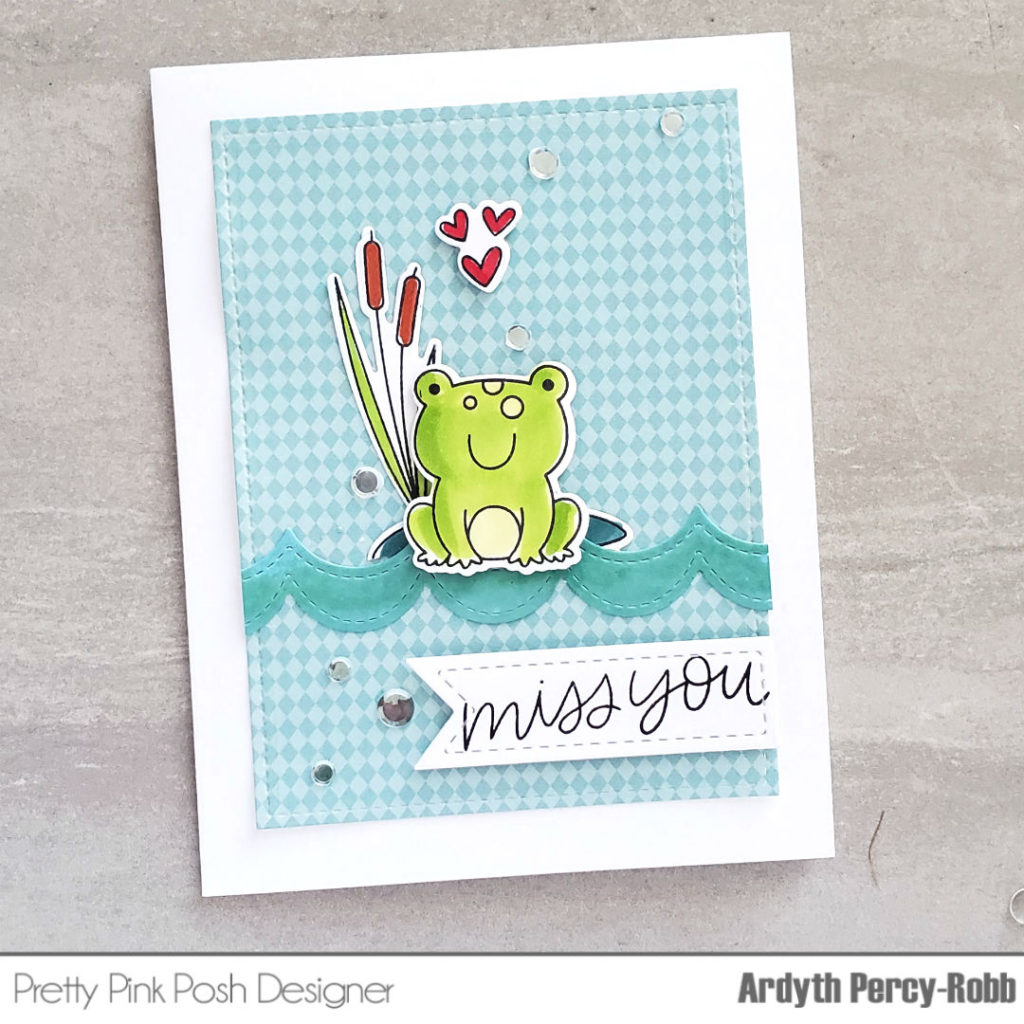
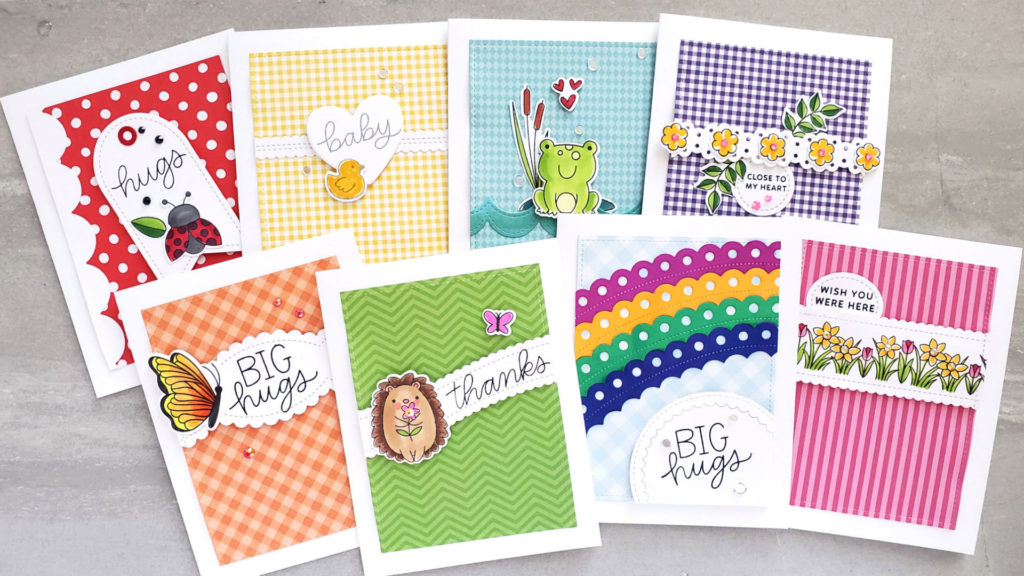
You can create sentiment strips by using a border die on each side of a strip, customizing the width to fit your sentiment or stamped images!

Pretty Pink Posh: Creative Ways to Use Border Dies + Video

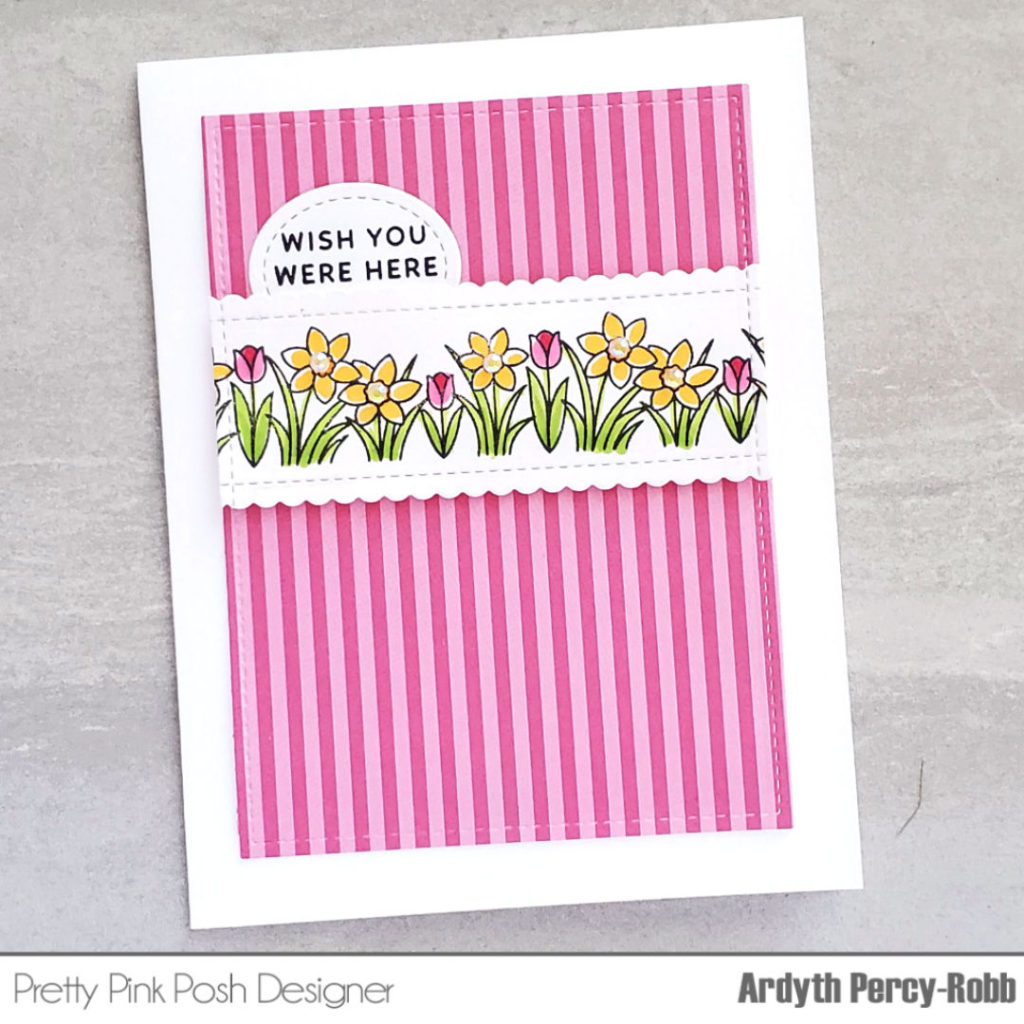
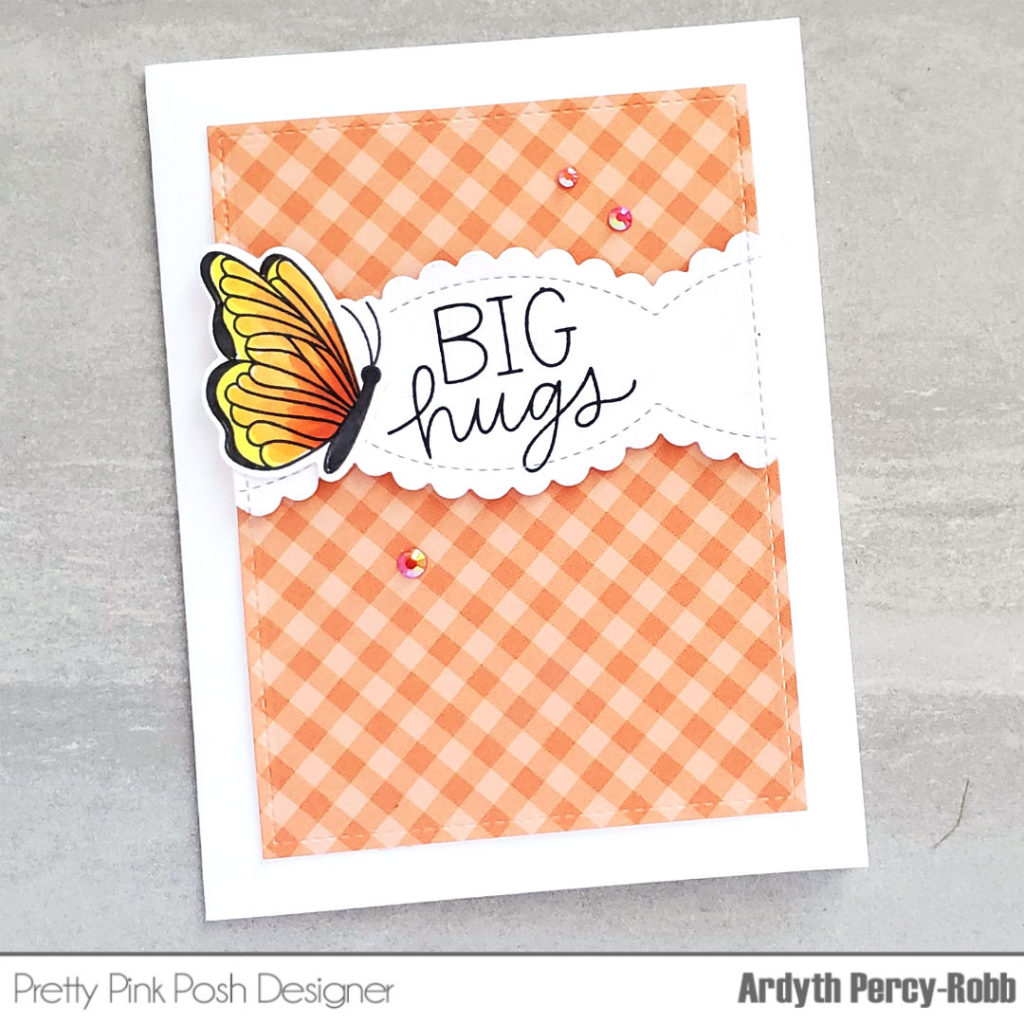
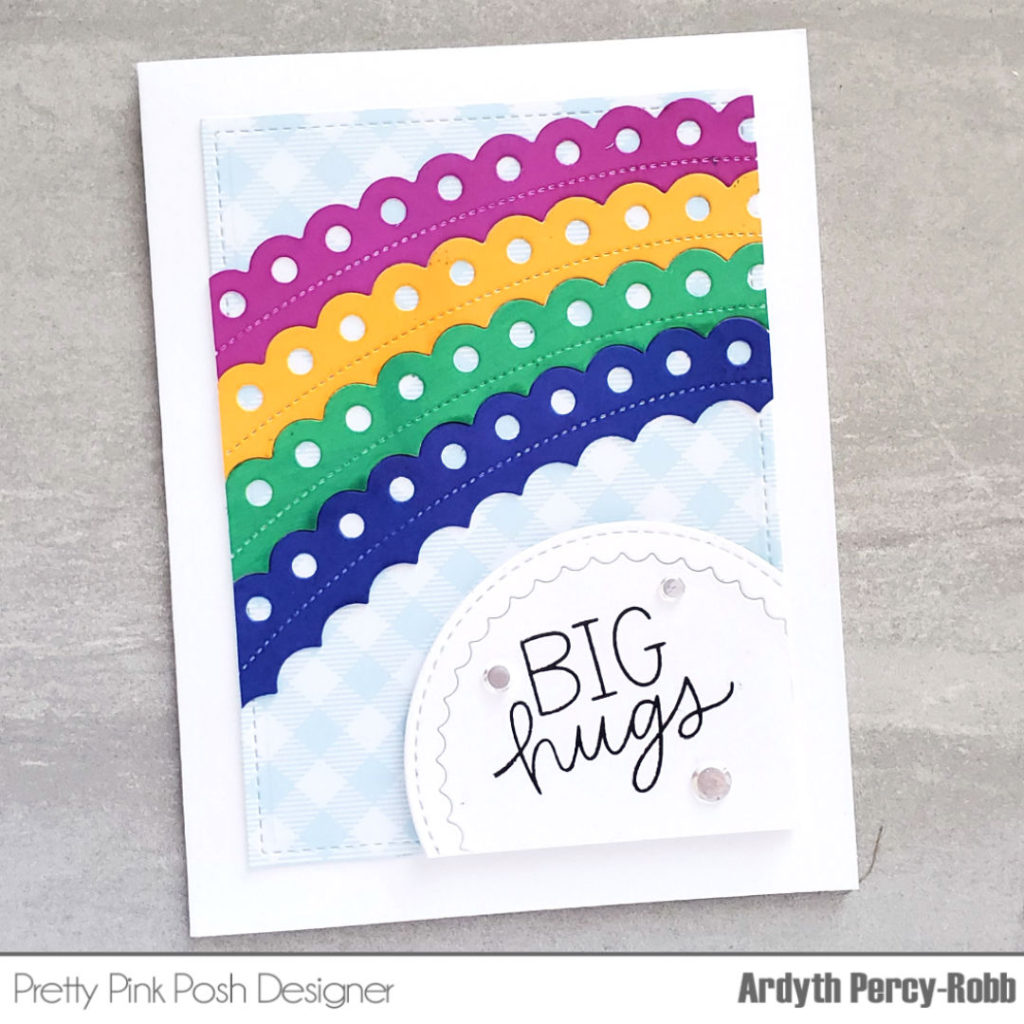
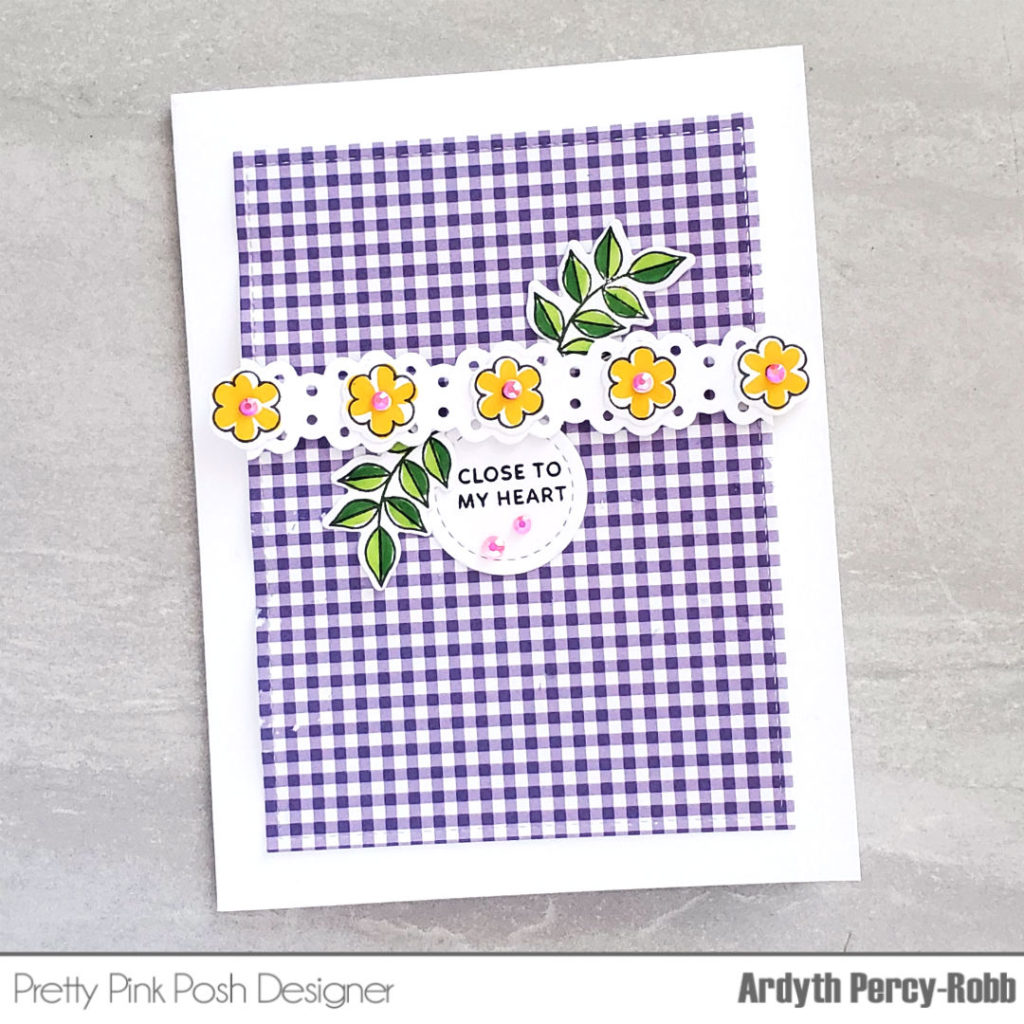
By making the strips narrow, you can create paper ‘ribbons’ or ‘lace’ to embellish your card fronts.

Pretty Pink Posh: Creative Ways to Use Border Dies + Video

You can also customize the width of your Stacked Edges dies, which are not exactly border dies, but have some similar features.

Pretty Pink Posh: Creative Ways to Use Border Dies + Video

You can even use the off cuts to get a different look!

Pretty Pink Posh: Creative Ways to Use Border Dies + Video

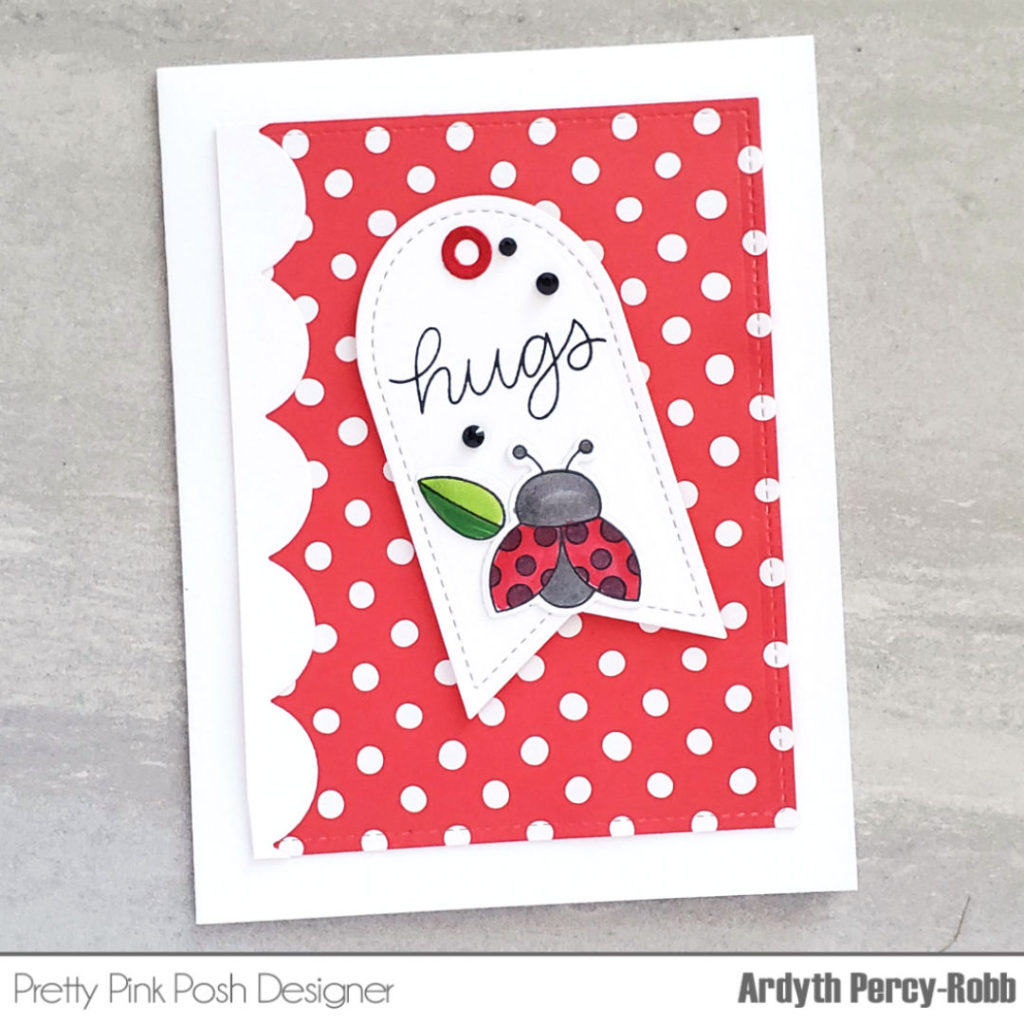
You can cut them so that they an even width, by using a grid or ruler, or you could deliberately make them wider on one end for a completely different look!

Pretty Pink Posh: Creative Ways to Use Border Dies + Video

I hope you’re inspired to get your border dies out and give this technique a try!

Eyelet Borders / Scallop Borders 1 / Stacked Edges 1 / Stitched Essentials / Stitched Labels Scallop Circles / Easter Eggs coordinating dies

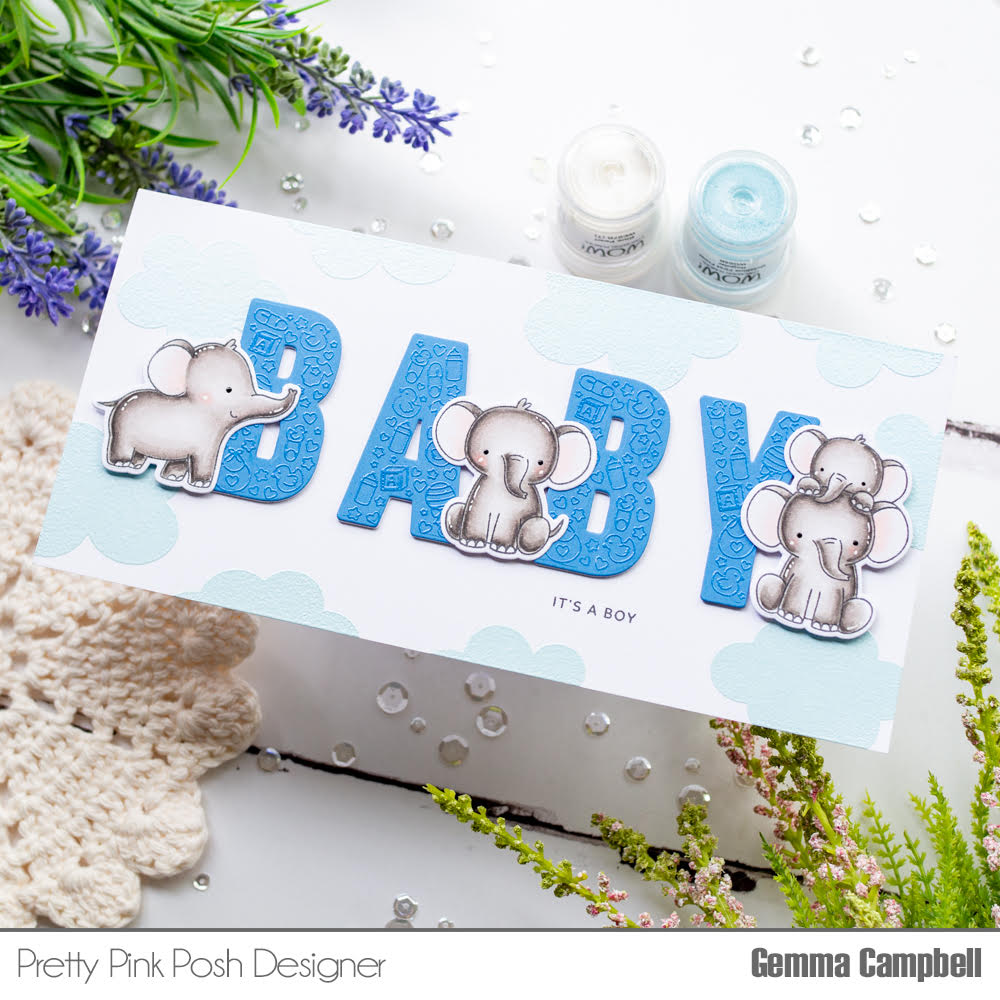
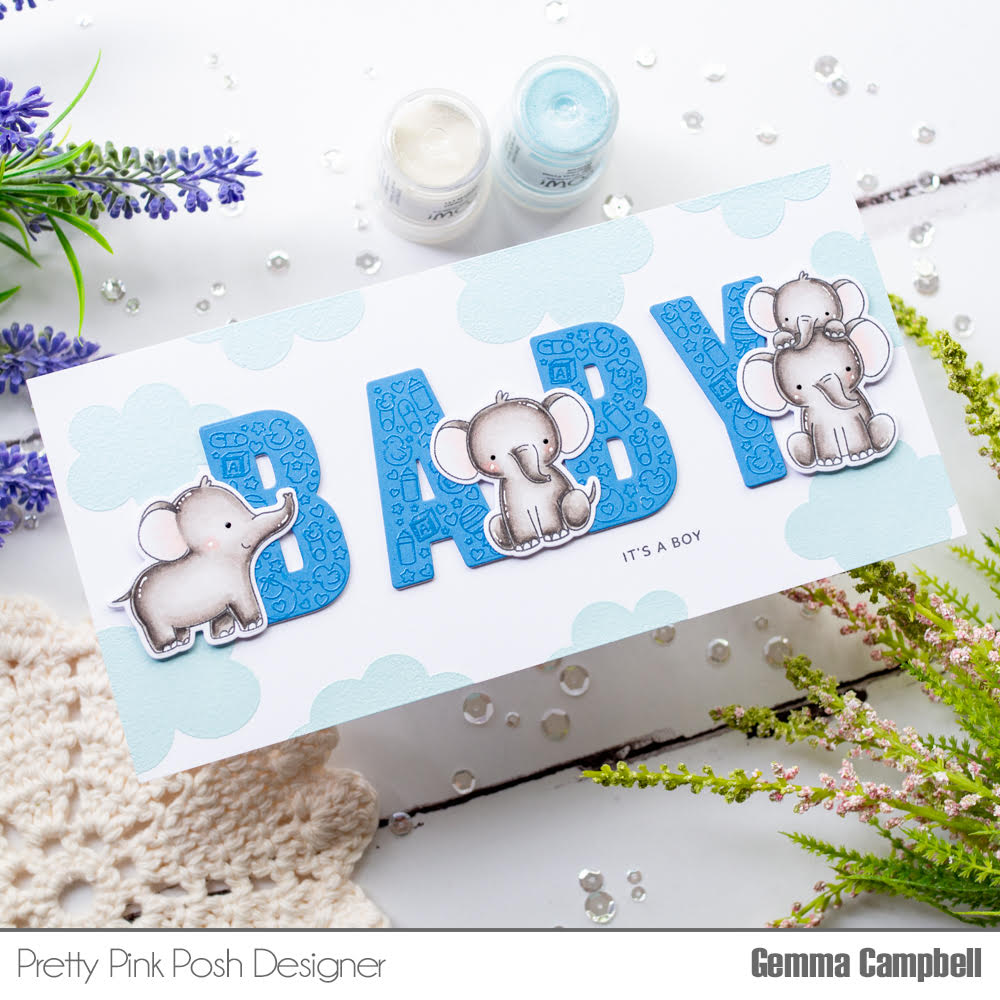
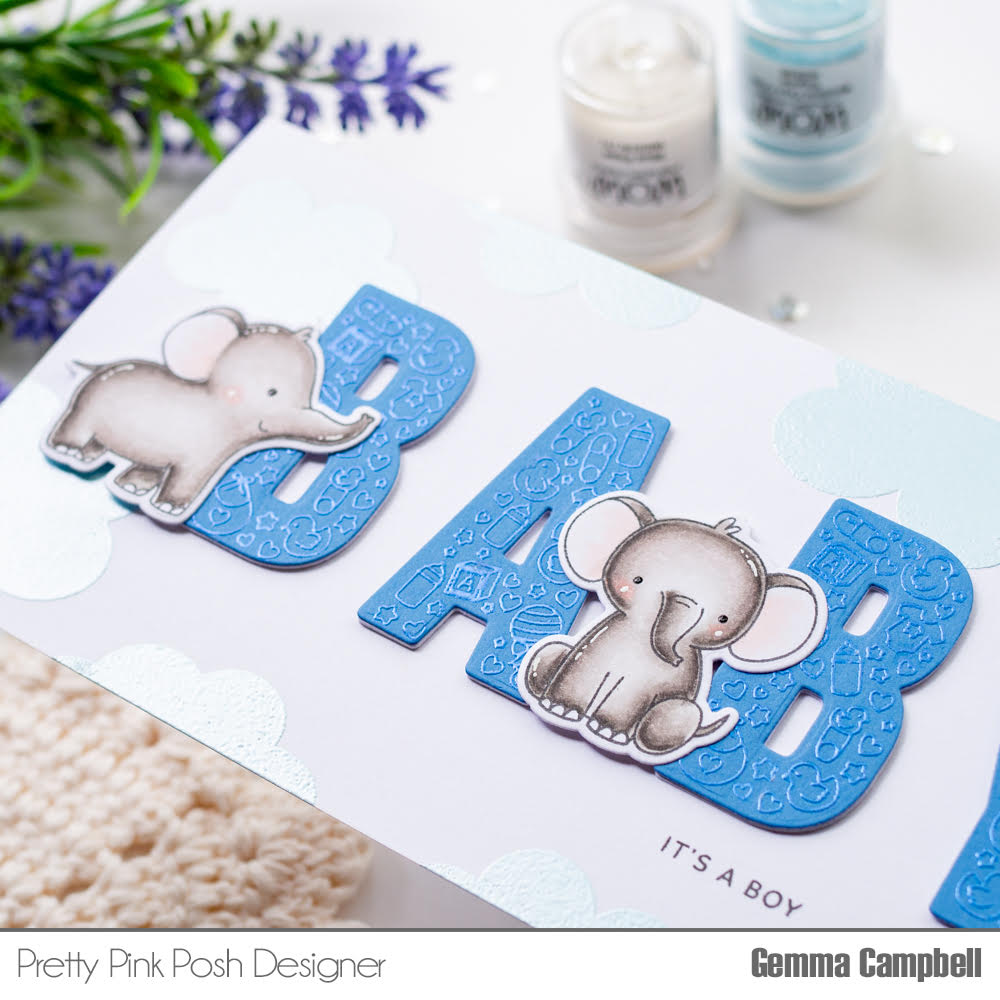
Spring Days / Tropical Birds / Elephant Friends / Beautiful Butterflies / Little One / Baby / Ladybug Friends / Hedgehog Friends / Large Floral Hearts / Pond Friends
Simple Sayings: Miss You / Bold Blooms / Thoughtful Sentiments

Flamingo Pink Jewels / Marigold Jewels / Raspberry Jewels / Glossy Black Jewels
Sparkling Clear Confetti

|

Dramatic Cherry Blossoms

Hi, Friends! It’s Caly and I’m here to share a card today made using the Cherry Blossoms set! Spring is finally here and this set gives me all the feels. I love Pretty Pink Posh florals and this is one of the first sets I ever got my hands on.

I’m a bit of a realist when I color florals so I chose a really pale pink with pops of darker colors for the flowers’ centers.  I wish the colors showed up better in the pictures, but I promise – there is light pink in every petal!  

Copic colors used:  G21, G24, G28, R0000, RV10, RV25, YR16

Pretty Pink Posh: Dramatic Cherry Blossoms

After coloring my images, I worked on my background.  I started with a light blue cardstock and ink-blended with Peacock Feathers Distress Oxide Ink around the edges only to create a glow in the center for my floral arrangement.

Pretty Pink Posh: Dramatic Cherry Blossoms

To frame my flowers, I first die-cut the smaller rectangle from the Scallop Frames set in white and attached it to my ink-blended panel using foam adhesive for dimension.  Then I attached my flowers with foam adhesive over the frame.  To finish my project, I embossed a simple sentiment from the Bear Friends stamp set in white over black cardstock and adhered it over my flowers at the bottom of the card.

I hope you enjoyed this project!  Thanks so much for stopping by today!

Caly

|

Celebrations Theme Week- Day 5

Pretty Pink Posh: Celebrations Theme Week- Day 5

Hi Friends! This is Angelica and today I am sharing a couple of Congrats Grad card ideas.

Pretty Pink Posh: Celebrations Theme Week- Day 5

I used both sentiments that are in the set, and the hats and diplomas. I kept the Copic Coloring simple, using the following colors: B24, B6, B29; YR23, Y23; R22, R24, R29; W3, W1, W0.

Pretty Pink Posh: Celebrations Theme Week- Day 5

I stamped the hats and diplomas randomly on this first card panel. I added a drop shadow first, then colored the images. I stamped the solid star included in the set with pineapple ink, and did a second-generation stamp for a lighter star. I added a few black dots with my Copic Marker. I finished with a strip of pattern paper and glitter paper for added interest.

Pretty Pink Posh: Celebrations Theme Week- Day 5

For this Clean and simple card, I cut a panel of white card stock with the rectangle frame from Stitched Notes Die Set. I added a blend of yellow ink to the middle of the rectangle, and stamped the sentiment. I added the coordinating die-cut cap and diploma, and a few Graphite Jewels to finish the card.

Pretty Pink Posh: Celebrations Theme Week- Day 5

Be sure to visit the Celebrations section on the website for 15% these products until May 10th!

Thanks so much for joining me today.

|

Celebrations Theme Week- Day 4

Hi and welcome to another day of Celebrations Theme Week. Melody here and today I am going to give you an idea for a Father’s Day Card created with the Father’s Day Stamp Set.

All week save 15% on all products in the Celebrations section!

Pretty Pink Posh: Celebrations Theme Week- Day 4

I chose a color combination of light grey, blue, and black for the card. I started by cutting a panel of pale grey cardstock to fit the card front. I wanted to add pattern to the background but wanted to keep the pattern subtle. A combination of pale grey ink and the Triangles Stencil worked perfectly. 

Pretty Pink Posh: Celebrations Theme Week- Day 4

Next I cut the Father’s Day Script Die twice from black cardstock. I layered the die cuts on top of each other to give the sentiment a little more dimension. I also cut a strip of white cardstock to go across the card and blended the background with light blue ink. 

Pretty Pink Posh: Celebrations Theme Week- Day 4

I stamped the shirt in the Father’s Day Stamp Set three times in black ink and then I colored with Copic Markers. I used T0, T1, T3, B91, B93, and B95. The shirts are die cut with the Father’s Day Coordinating Dies

Pretty Pink Posh: Celebrations Theme Week- Day 4

The tie on the shirt in the middle is paper pieced and I used a black gel pen to add the strips on the tie on the right. I used foam tape to adhere the shirts to the card. 

Thanks for joining me today! 

|

Celebrations Theme Week- Day 3

Pretty Pink Posh: Celebrations Theme Week- Day 3

Hi everyone! Jane here and I’m so excited to be part of the Celebrations Theme Week at Pretty Pink Posh! All week save 15% on all products in the Celebrations section.

Pretty Pink Posh: Celebrations Theme Week- Day 3

This rainbow colored birthday card uses a mix of old and new sets from Pretty Pink Posh. I love how this adorable little koala (from Koala Friends) looks like he’s floating away while holding colorful balloons!  

I started with a piece of Bristol smooth cardstock and the Birthday background stencil. I used the Catherine Pooler inks: limoncello, tiki torch, it’s a girl, sweet sixteen, it’s a boy and garden party used to ink blend the edges. In order to create a rainbow border with a center white focal point, I only ink blended the edges of the card front. 

Pretty Pink Posh: Celebrations Theme Week- Day 3

The sentiment was stamped from the Cupcake Critters stamp set using black versafine ink. Images from the Koala Friends and Birthday Friends stamp sets were stamped on Bristol smooth cardstock and colored using zig clean color brush markers. I used a cool grey for the koala and rainbow colors for the balloons. The images were mounted on foam tape and adhered to the background. To finish the card, I added some Iridescent Mini Circle Confetti for a bit of sparkle!  

Pretty Pink Posh: Celebrations Theme Week- Day 3

Thanks so much for stopping by today! Please check be sure to check the blog for additional inspiration the next few days!   

|

Celebrations Theme Week- Day 2

Pretty Pink Posh: Celebrations Theme Week- Day 2

Hello, Gemma here today with a new baby celebration card to share. All week save 15% on all products in the Celebrations section!

Pretty Pink Posh: Celebrations Theme Week- Day 2

I began with the background. On a slimline card panel, I overlaid one of the Layered Clouds stencils and inked just the clouds at the edges with an embossing ink. I then embossed the clouds with WOW Metalline First Frost embossing powder. 

I moved the stencil and repeated these steps until the edges around the whole panel were embossed with clouds. I then adhered the panel to my card base.

Pretty Pink Posh: Celebrations Theme Week- Day 2

Next, I stamped the large word image from the Baby stamp set on blue card with embossing ink. For a tone on tone look, I embossed the images with WOW Blue Pearl embossing powder.

Pretty Pink Posh: Celebrations Theme Week- Day 2

I used the coordinating dies to die cut the embossed letters, along with two layers of white card. I adhered these layers together for dimension, then added the letters to my card. I also stamped an additional sentiment from the Baby stamp set underneath the letters.

You could leave it there but I wanted to add some cute critters around the letters. I stamped images from the Elephant Friends stamp set and coloured them with copics. 

Pretty Pink Posh: Celebrations Theme Week- Day 2

I used the coordinating dies to cut them out, adding them to the card with foam tape to finish.

I hope you enjoyed this baby card. You can easily switch the colors and sentiment to make it for a baby girl.

|

Celebrations Theme Week- Day 1

Pretty Pink Posh: Celebrations Theme Week- Day 1

Hi friends! This is Angelica and we are having a Celebrations Theme Week on the blog this week. Today I am sharing two cards showcasing the Mother’s Day stamp set.

Save 15% on all products in the Celebrations section

Pretty Pink Posh: Celebrations Theme Week- Day 1

For my first card, I made a simple background, using a blender brush and pink ink. I splattered a pit of pink paint onto the panel, and stamped the sentiment. I stamped the bouquet from the set with chocolate ink, and used Copic Markers to color the flowers and vase. I used the coordinating die to die-cut the bouquet. I used thin foam squares to attach the vase to the panel, and adhered the panel to a pink card base with foam adhesive. I finished the card with a few Pink Blush jewels.

Pretty Pink Posh: Celebrations Theme Week- Day 1

My second showcases the smaller stamps in the Mother’s Day stamp set.

Pretty Pink Posh: Celebrations Theme Week- Day 1

I inked the middle of a panel again with pink ink, and stamped the sentiment. I stamped and colored several of the small images. I die-cut a ring, using the Beach Scene Die. I glued the floral onto the half of the ring, and attached it to the panel. I added a few Pink Blush Jewels, and attached the panel to a pink card base.

Pretty Pink Posh: Celebrations Theme Week- Day 1

Copic Colors used: BV000, BV01, BV04; RV14, RV13, RV21; R89, R85, R83, R81; YG17, YG05, YG01; E08, YR18, YR14; B91, B95; Y13, Y19, YR23.

I hope I have helped with Mother’s Day cards inspiration. Thanks so much for joining me today. Come back tomorrow and we’ll show you inspiration featuring a different celebration!

|

Vibrant Tulips

Hi friends! This is Angelica and I am showcasing the beautiful Tulips stamp set today. This set is currently 15% off during the Spring Savings sale valid through 4-28-2020. code: SPRING2020

Pretty Pink Posh: Vibrant Tulips

Up here, in the Pacific Northwest, tulips are in full bloom. It’s so much fun to watch my neighborhood become filled with spring flowers, and tulips are my favorite! I decided on no-line watercoloring, and stamped the tulips with Antique Linen Distress ink. I used Daniel Smith watercolors, and painted the flowers in layers. The first layer was adding color, second layer was adding shadows, third layer was deepening lines.  Once I was finished painting, I used the coordinating dies to die-cut the tulips.

Pretty Pink Posh: Vibrant Tulips

For the background, I brushed a light wash of blue sky onto watercolor paper, and let the panel dry. I trimmed the panel down, added the tulips with thin foam squares, and cut off anything hanging over the bottom edge. I attached the panel to a card base with foam adhesive, and finished the card with a sentiment from Hedgehog Friends stamp set.

Pretty Pink Posh: Vibrant Tulips

Thanks so much for joining me today. I hope I have helped with ideas using the Tulips stamp set. I will be back soon with more card inspiration!

15% Spring Savings

We are loving the spring weather these days and seeing the pretty flowers blooming. To celebrate this season, all items in the Spring section are 15% off for a limited time. Hurry and shop for the best selection! 

Pretty Pink Posh: 15% Spring Savings

We know that right now is a scary and uncertain time and more than ever we are grateful that you are supporting our small business. From the bottom of our hearts we thank you for your continued support. ♥

|

Welcome Little One

There is nothing more precious or welcome than a new addition to the family. The latest Pretty Pink Posh release has everything you need to celebrate the new little one in your life!

Pretty Pink Posh: Welcome Little One

This card starts with a pastel striped background made with the solid stripe die from Stitched Borders 3. I attached pieces at a diagonal on a panel of white card stock. Next I trimmed the panel so it would fit behind the opening of the large die from the Scallop Frames Set.   

Pretty Pink Posh: Welcome Little One

The three Stitched Pieces are perfect for embellishing with a rattle, sentiment and little lamb from the new Little One Stamp Set. A scatter of Cornflower Blue sequins is the perfect finishing touch. 

Pretty Pink Posh: Welcome Little One

This card would be easy to switch up “for her” with a pink colored lamb and Pink Blush Sequins for sugar and spice and everything nice.

Pretty Pink Posh: Welcome Little One

I love the new stamps and dies for baby! What a great addition to my collection!