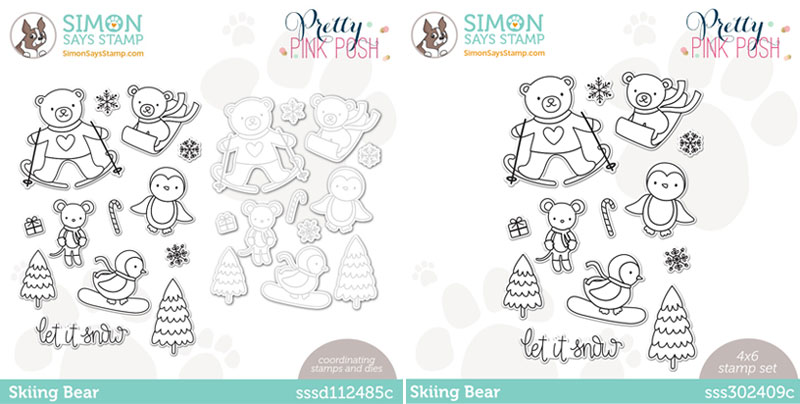
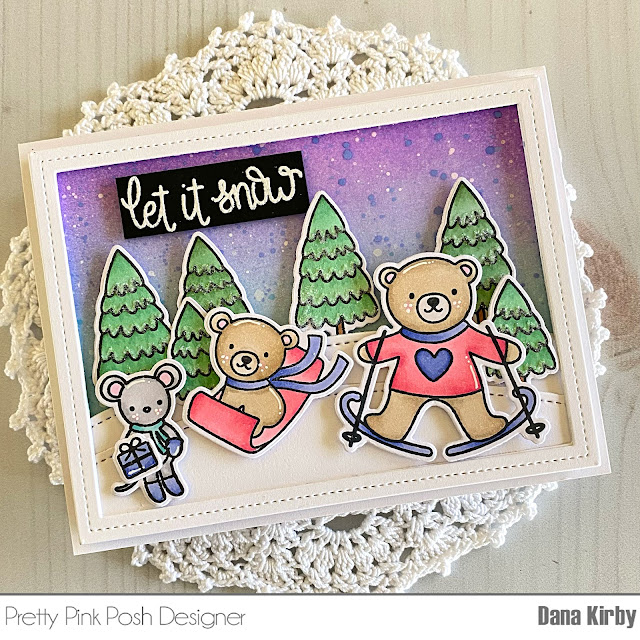
Hi friends! It’s Dana here today and I am so excited to be sharing a card that uses the much anticipated exclusive, limited edition collaboration set for STAMPtember! It’s called Skiing Bearand it is just so adorable!
Don’t forget: once this set sells out, it’s gone for good! Get this holiday set, which won’t be released again, while you can!
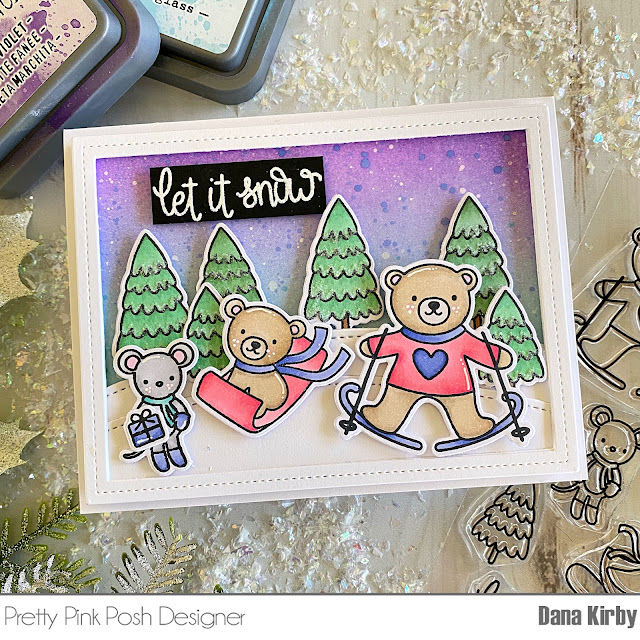
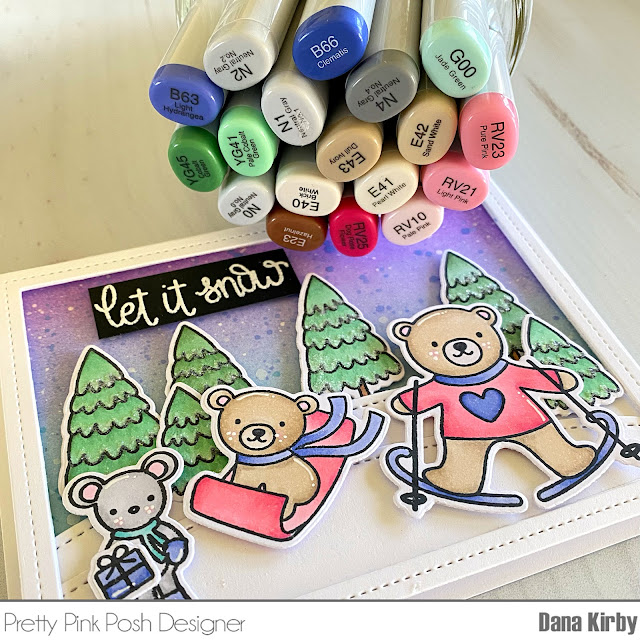
I started my card by stamping my images from the Skiing Bear set with a Copic friendly black ink. I then colored the images with Copic markers and used the coordinating dies to cut them out. Next, I added a little glitter to my trees and set them aside to dry.
For my card panel I ink blended Distress Oxide ink in Tumbled Glass, Shaded Lilac and Wilted Violet to make my background. I splattered the background with a little white paint and coordinating reinker and set it aside to dry. I then used the Stitched Borders 1 die to create my hillside. I attached the hills to my card panel and used the Nature Essentials die to frame the panel. Lastly, I attached my images and sentiment with foam adhesive to finish my card.
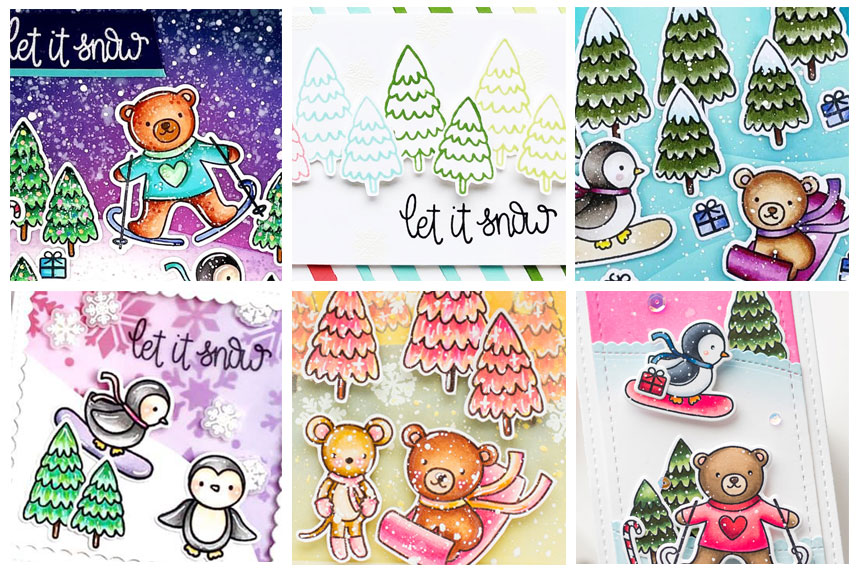
The other designers have been creating with this stamp set and will be sharing them in blog posts and/ or on social media.
I hope that you all love this stamp set and are inspired by the samples the design team created. A giant thank you to Simon Says Stamp for letting us be part of STAMPtember®.
I’m so excited to announce we are releasing another exclusive, limited edition stamp set for STAMPtember® over at Simon Says Stamp! We have been known for releasing cute stamp sets but recently, I’ve been getting requests for some elegant designs and I thought we would give that a try for this special exclusive set set called Damask Greetings.
Today we have Joni showcasing two stunning cards using this limited edition set in very unique ways. Plus, many of the PPP designers have created with it as well, so be sure to scroll down to get links to their projects!
Joni here sharing the set called Damask Greetings exclusively designed for Simon Says Stampby Pretty Pink Posh. This set is very elegant and perfect for so many occasions.
Next, I stamped one of the image from the Damask Greetings using four different color, then cut. For the sentiment, I stamped it on a black cardstock using Versamark Ink and heat embossed it with white embossing powder.
Next, I adhered the damask and sentiment with foam tape for dimensions.
For my next card, I used a different damask images to create my background, one using light yellow ink pad and the other a gray.
For my focal point, I stamped a different damask image in black to give it a bold look.
The sentiment was from the same set stamped in black. I also used one of the new Stacked Edges 1 Dies. For the little gold bow, this was die-cut from the Reindeer Friends Die set.
To finish off I adhered everything on using a foam tape and added some sequins in Lemon Meringue 4mm and 6mm.
Here a sneak peek of just a few of the projects the DT created with this set. Be sure to hop along to see their full posts!
I hope that you all love this stamp set and are inspired by the samples the design team created. A giant thank you to Simon Says Stamp for letting us be part of STAMPtember®.
NOTE: these sets are available exclusive through Simon Says Stamp and are limited edition. Hurry and get them while you can!
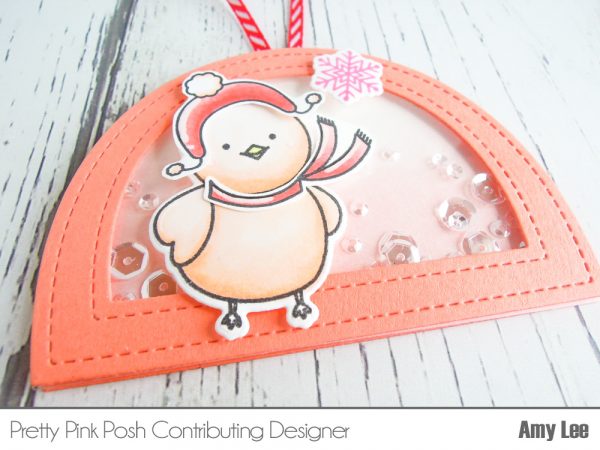
Hello friends!! Amy L. here today with a special project. I have made a set of Christmas ornaments. They are so adorable and so easy to create. Let’s get started right away!
Mount everything in place with foam tape. Embellish with ribbon, twine and jingle bells to finish
Now it’s time for our second giveaway of the week. We are giving away the two exclusive STAMPtember sets we designed for Simon Says Stamp that are sold out and no longer available!
Hi friends! It’s Nina-Marie back with you today and I am sharing some inspiration for using the new Pretty Pink Posh STAMPtember exclusive set that was designed for Simon Says Stamp!
This set called Winter Bird Friend is SUPER cute, and features some fun accessories that can be used to dress up the bird that is also included in the stamp set. I wanted to use the set however to show you that you can use the accessories with some of your other favorite Pretty Pink Posh sets!
I’ve paired the Winter Bird Friend set with the Fox Friends stamp set, also by Pretty Pink Posh, to create a cute snowy scene! I love how adorable the foxes look with their winter attire on… ready for a fun day in the snow!
In today’s video, I’ll be sharing how I created this fun scene, along with tips and tricks on a few techniques I used during the card process!
I hope this was inspiring to you and showed you how you can get even more use out of the fun images included in the Winter Bird Friend stamp set! Thanks for spending some time with me today… I’ll see you again very soon!
I’m so excited to announce we are releasing another exclusive, limited edition stamp set for STAMPtember® over at Simon Says Stamp! Last year we released our very first stamp set there and you all seemed to really enjoy it, so we thought another set was in order. Our new exclusive set is called Winter Bird Friend.
Today I have the lovely Liz, one of my PPP design team members, sharing cards using this new set. Let’s take a look at what she created…
I thought it would be fun to create a winter scene using these adorable little birds using this exclusive Winter Bird Friend set all dressed up in their little outfits, so I started off by using some distress inks for the sky and combined, Salty Ocean, Peacock Feathers, and Tumbled Glass. Also, added some white splatters to resemble some snow.
Next, I created these snow hills by using the new Scallop Borders die where I die cut three of them to place one on top of another to form the hills.
To add some dimension, I used some white fun foam underneath the middle and top hills, but before placing the top one, I stamped down one of the many wonderful Christmas sentiments.
I love the variety of the winter hats from this set along with the cute scarf’s, so I pulled out my copic markers to color them using a red combination of R35, R46, R59 and glued them in place. Also, added these adorable little ice skates and added some silver glitter.
To add some more details to the scene, I pulled out these wonderful trees from the Winter Friends set and added several 4mm Clear Droplets to give the illusion of snow falling. Plus, I love how they shine against the sky and snowy hills.
For this next card, I was thinking of a snow globe and thought it would be perfect to use this beautiful Window Frames as it’s also one of my favorites to create scenes. Plus, I love the detailed stitching it leaves along the window both outside and inside.
From there, I thought stars would look nice, so I pulled out some cute Silver Mini Star Confetti and glued them down. Love how these mini stars adds details. From there, I added several Silver Shimmer Beads for the shaker portion as I love the way they shake inside and adds to the snow effect.
Last but not least, I got another chance to play dress up with these darling little birds with their hats, scarfs, and little shoes. Also, I couldn’t resist but to use those little ice skates again while the other one has little booties. Aren’t they cute?
Here a sneak peek of just a few of the projects the DT created with this set. Be sure to hop along to see their full posts!
I hope that you all love this stamp set and are inspired by the samples the design team created. A giant thank you to Simon Says Stamp for letting me be part of STAMPtember®.
NOTE: these sets are available exclusive through Simon Says Stamp and are limited edition.
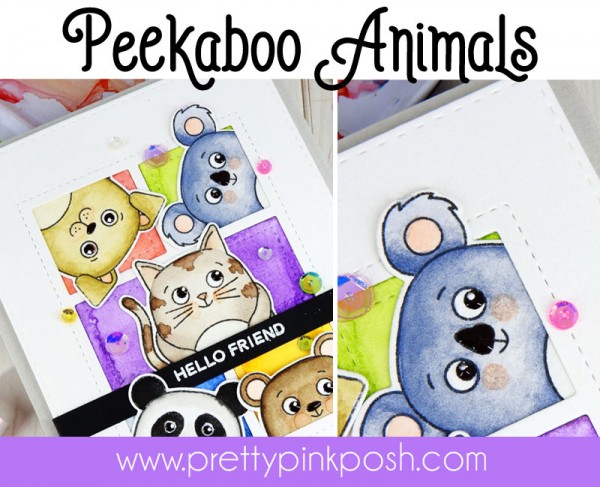
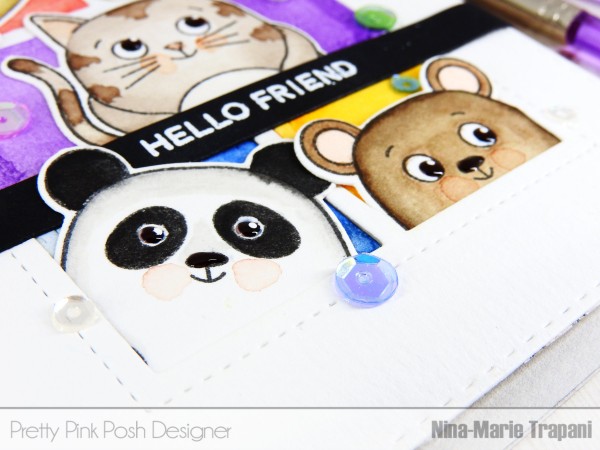
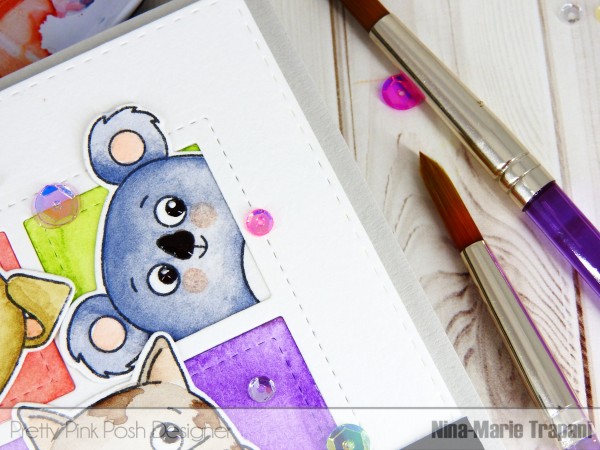
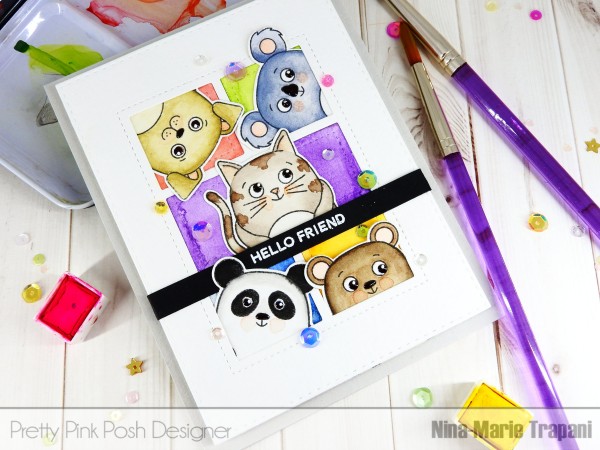
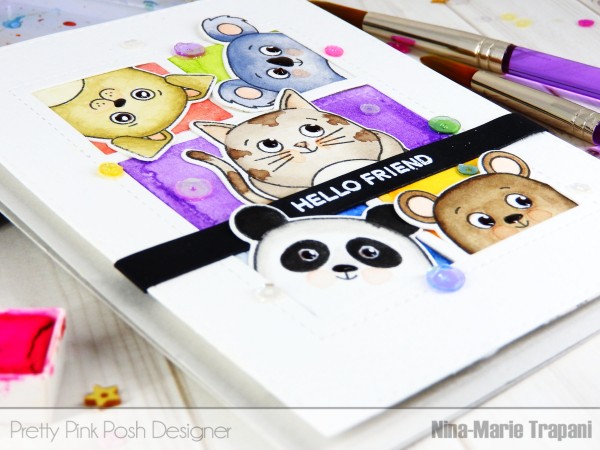
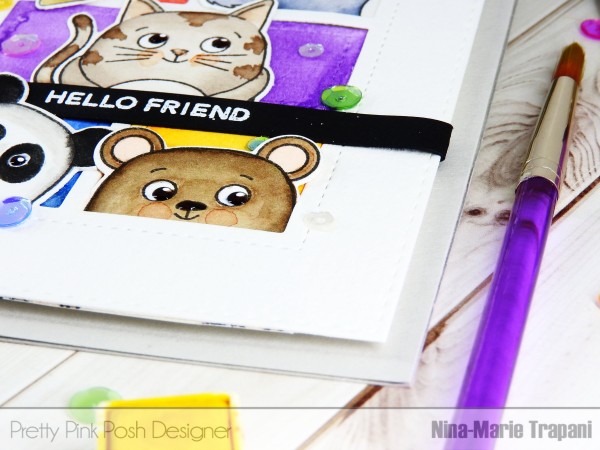
Hello everyone, it’s Nina-Marie here with you today with a fun peek-a-frame card to share with you featuring new sequins and dies from Pretty Pink Posh!
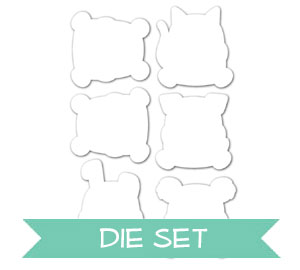
I love using the Storybook die collection that Pretty Pink Posh is known for (along with lots of other fabulous products!) and the new Storybook 4 die is great addition! I thought this would be a fun die to use with a bunch of little critters peeking out from each little rectangle.
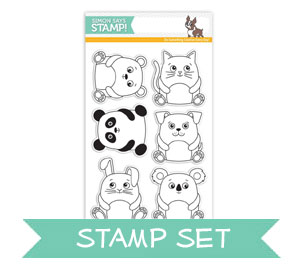
For this card, I have used the new Cuddly Critters stamp set from Simon Says Stamp and a sentiment from the Birdie Friends set. I also used quite a few different colors of the new iridescent 4mm sequins from Pretty Pink Posh, with match the fabulous 6mm iridescent sequins that were previously released… I LOVE that they are a new addition to the Pretty Pink Posh store because one can never have too many sequins, right?
If you enjoy, please give it a “thumbs up” and subscribe to our channel; we post new videos often!
If you have any questions about this post, feel free to leave it in the comments! Thanks for stopping by and spending some time with me… see you again soon! :)
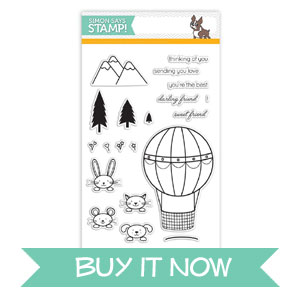
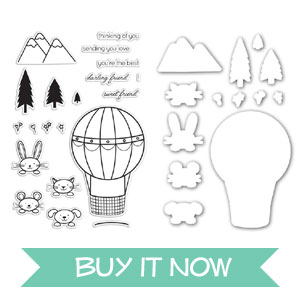
I wanted to pop in and share about the recent feature we had over on the Simon Says Stamp blog. Nina-Marie create the most adorable card using the Darling Friend stamp set that was designed exclusively for SSS back in September. This set was initially intended just to be sold in September, but it’s been a popular one, so they’ve been stocking it ever since. If you haven’t had a chance to get it, be sure to add it to your cart soon; I don’t know how long it’ll be available!
I wanted to remind you that the Valentine Challenge I have here on the blog is ending on February 14th, so there’s only a couple more days. This is a great way for share your talent and gives me the opportunity to see what you can create with your Pretty Pink Posh products. I’m always on the lookout for new talent!
Thank you for spending some time with me today. Be sure to check out Nina-Marie’s great post/ video and I cannot wait to see more of your entries in the Valentine challenge.
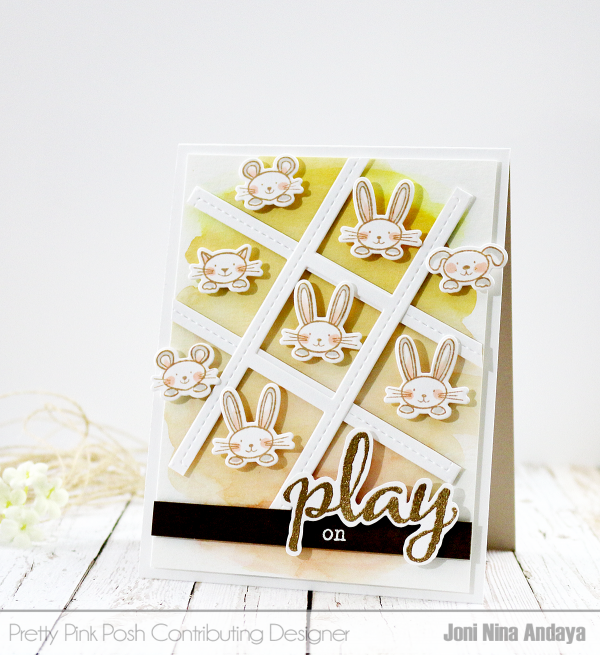
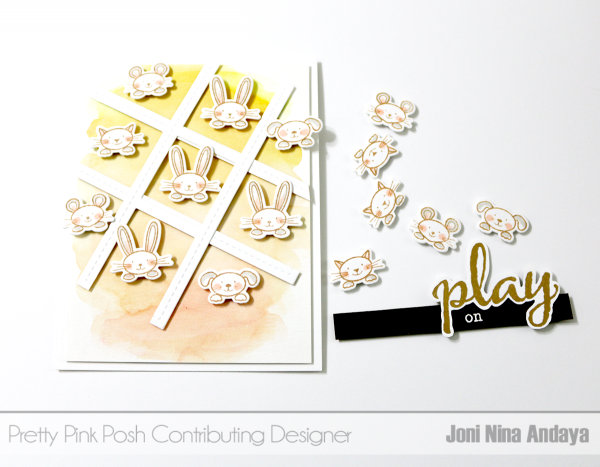
I am back with a fun tutorial for you today using my all time favorite Stitched Film Strip Die. I created a Tic-Tac-Toe game card that you can use as a card for your child’s invite or just a fun card that you can give out.
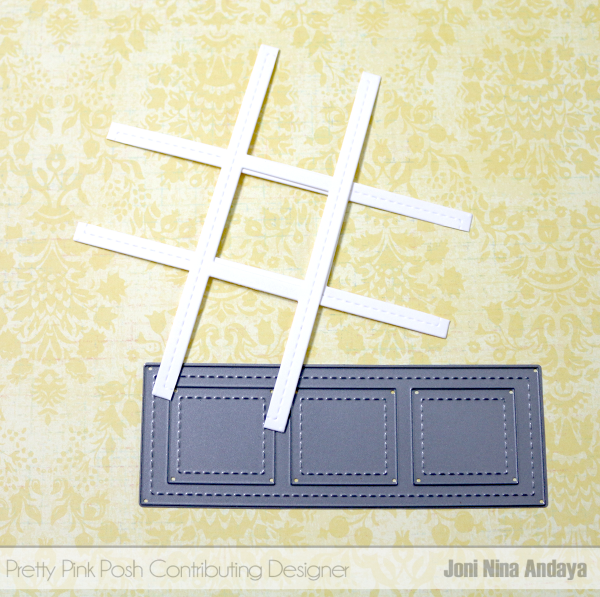
To begin, I watercolored a watercolor panel and adhered a magnet sheet at the back of the panel.
Next, I die-cut the Stitched Film Strip Die and cut the ends with scissors to create a tic-tac-toe shape for my card.
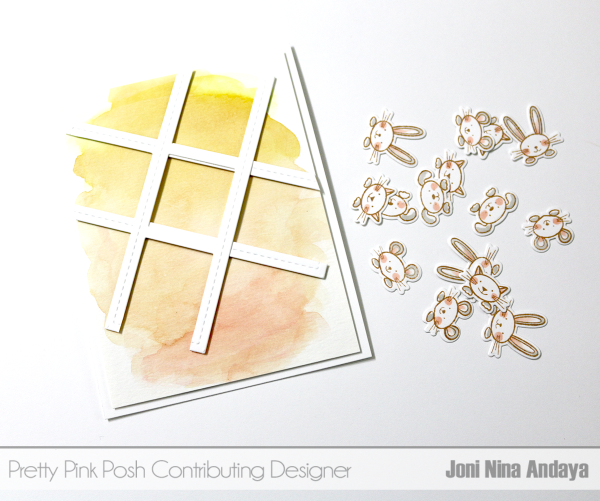
I adhered the film strip on top of the watercolored panel. I also stamped and colored the cute critters on a white cardstock from the Darling Friends stamp set, then die-cut using the coordinating dies. Then I adhered tiny pieces of magnet on the bottom of each critter to make the critters movable on the card for play time.
Then I added a strip of brown cardstock which I also adhered a strip of magnet at the bottom to make it removable. The gold embossed sentiment “Play” and white embossed “on” was from Winnie & Walter’s The Big, the Bold and Fun stamp set.
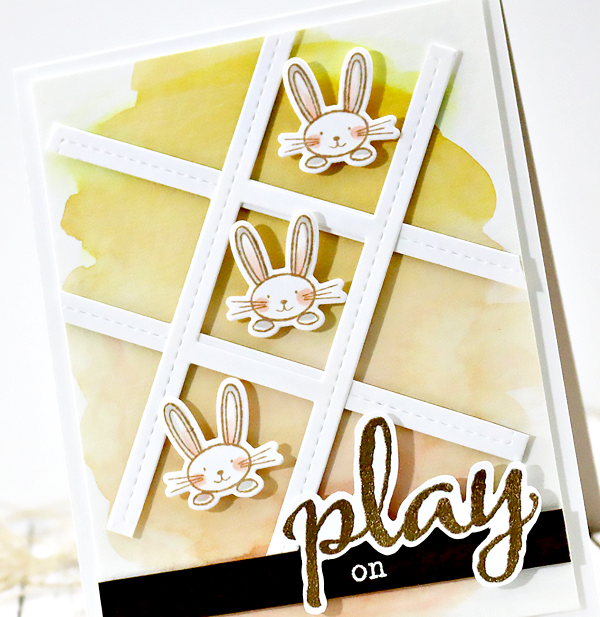
Here’s just another look without the other critters.
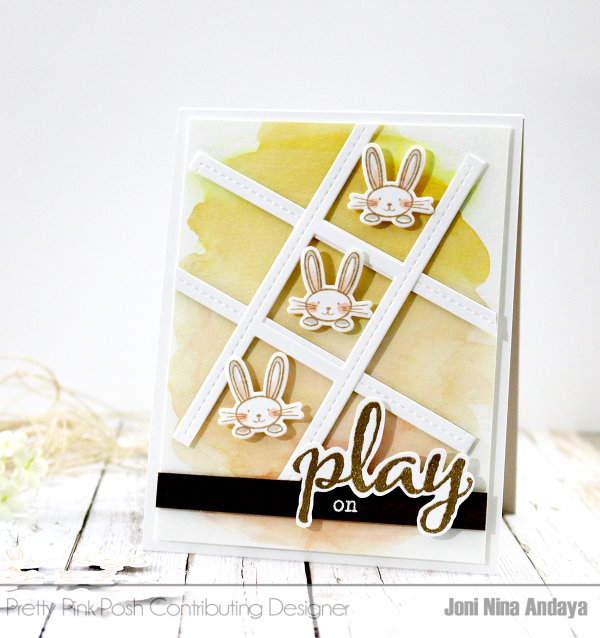
Another look of the whole card.
I hope you guys enjoyed this tutorial on how to create your own tic-tac-toe card. Thank you so much for stopping by and have wonderful week.
As you probably heard by now, Pretty Pink Posh teamed up with Simon Says Stamp for their STAMPtember event. We designed an exclusive stamp set called Darling Friends, which also happens to be the very first set I’ve ever designed. The whole process was so fun and it was even more rewarding when I began seeing what YOU, my amazing readers, customers and friends, created with the set.
Below are three of the latest ones I spotted…
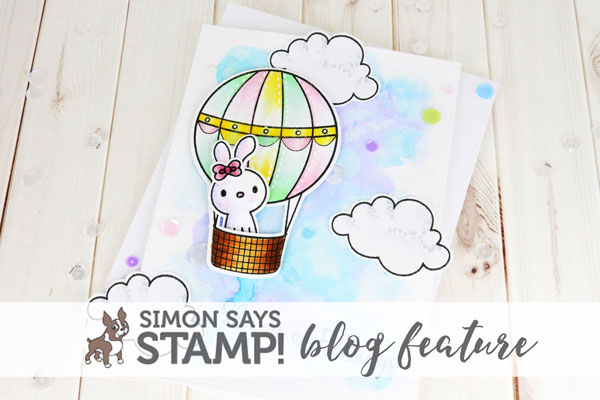
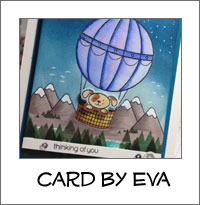
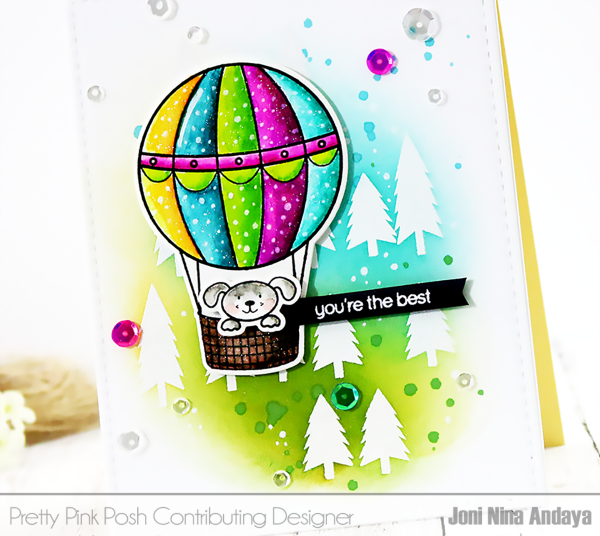
You may have seen this card that Joni created to kick off the STAMPtember festivities. She has a way of creating such amazing and vibrant cards, but the techniques can be done by beginners or professionals alike! Let’s take a peek at this fun little tutorial she created for this happy card.
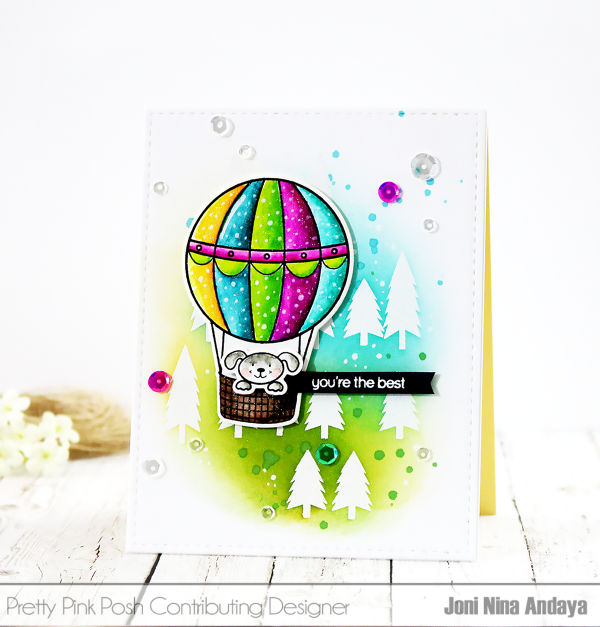
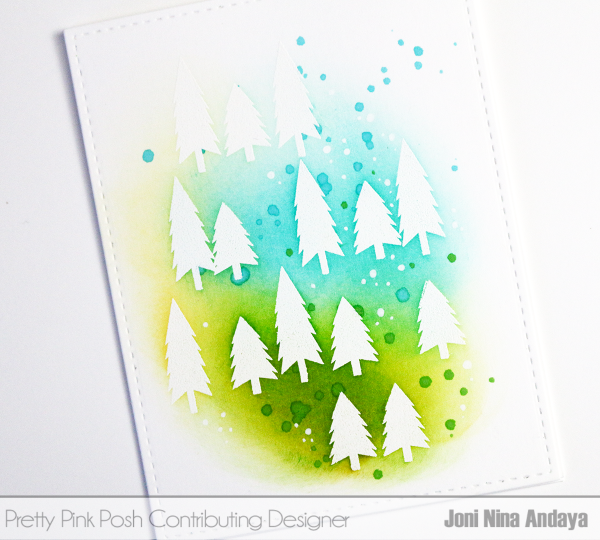
To begin, I stamped the large and medium trees using a Versamark ink from the Darling Friends stamp set on a white cardstock and heat embossed it with white embossing powder and then distressed it with Distress Inks in Peacock Feathers, Mowed Lawn, and Squeezed Lemonade. Then I smooshed the ink pad on an acrylic block, added water, and splatter it on the cardstock. Once it dries I die-cut the edge using the Wplus9 Gift Card Layers die (large frame).
Next, I stamped the air balloon and the dog image on a watercolored paper using Versafine Onyx Black ink, watercolored the images using the Zig Clear Color Real Brush, then I die-cut the images. I also added some white dots using the Sakura White Gelly Roll pen on the hot air balloon for a finishing touch. For the sentiment I stamped “you’re the best” from the Darling Friends stamp set on a black cardstock using Versamark ink and heat embossed it with white embossing powder.
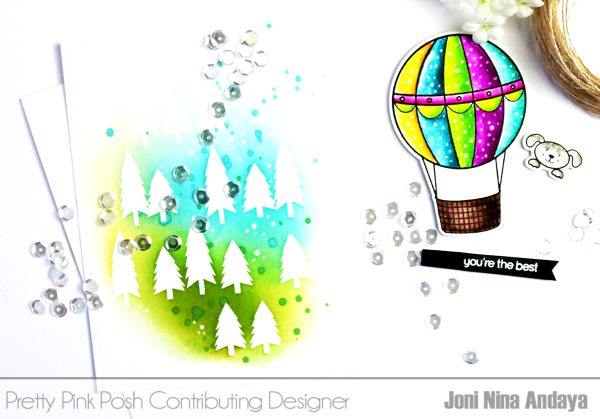
Here’s the closed up look of the trees with distressed inks and ink splatters.
Okay, now onto the winner of the $25 Pretty Pink Posh gift certificate and the Darling Friends stamp set from THIS post. A giant thank you to everyone who left comments- it was fun to read them and see all the well wishes to Joni!
In closing, I wanted to let you all know that all orders placed today- September 26th will begin shipping on September 28th. I’ve been working tirelessly the last few months and really need a few consecutive days off to rest up and spend time with family. Then I’ll be back at it for the brand new release on October 1st! Mark your calendars: it’s a GOOD release!
I am so very excited to share that Pretty Pink Posh designer, Joni, will be sharing tutorials here on the blog. I know you all love tutorials and with the busyness of orders and behind-the-scenes work, I’m not able to do them often. I knew I needed to fill this void and Joni so graciously offered to do a feature twice a month. She’ll be sharing how to do different techniques, start-to-finish cards and there may be some surprises in between!
With that intro, let’s get into her first official blog post here.
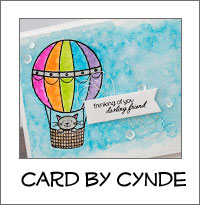
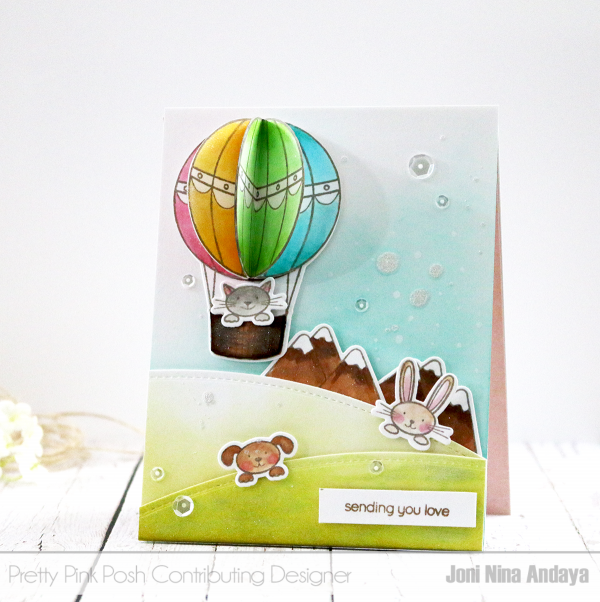
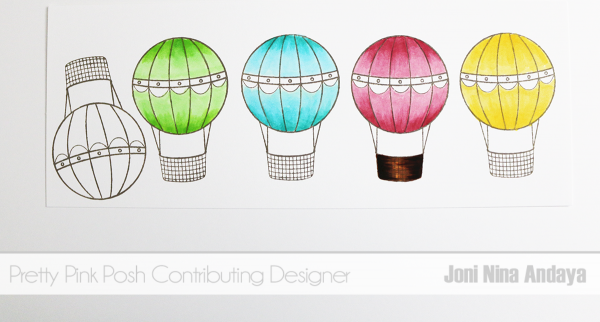
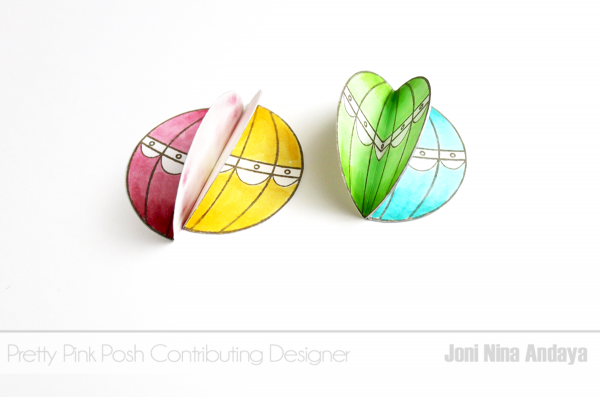
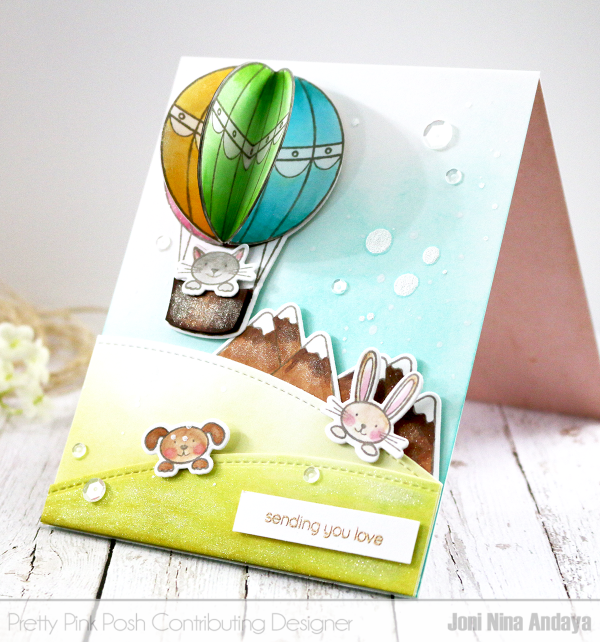
To begin my card I first stamped the hot air balloon image from the Darling Friends stamp set on a white cardstock a few times, then colored them with Copics.
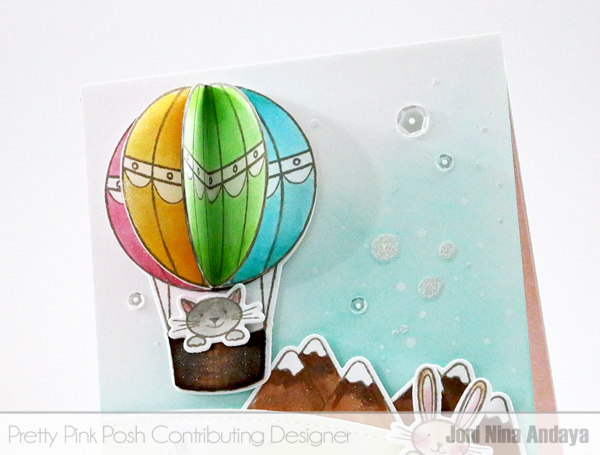
Next, I fussy cut the top of the balloon, scored the middle, folded, and adhered it with glue. Then I adhered the balloon like an accordion on top of the die-cut hot air balloon image.
Before adhering the die-cut hot air balloon and kitty, I first distressed the white card based with Distress ink in Peacock Feather then splattered it with Studio Calico Mister Huey’s in Shine.
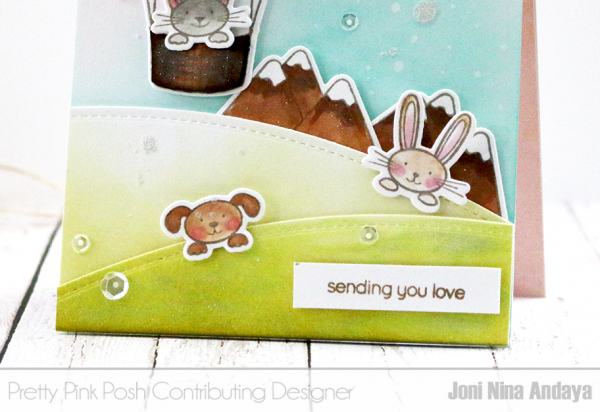
Next, I die-cut the hills for the scene using the Stitched Border dies 1 and distressed it with Distress ink pad in Crushed Olive. Then adhered on the distressed card based with foam tape with dimension. Next, I adhered the mountain die-cut image then added the dog and bunny as if they are peaking through the hill.
For the sentiment, I stamped it on a white cardstock and gold heat embossed cut the strip then adhere at the bottom of the card panel using foam tape.
In celebration of Joni becoming a blog contributor and the popularity of the STAMptember Darling Friends set, I thought it would be fun to do a giveaway in today’s post.
Over the weekend I received word that Simon Says Stamp restocked the Pretty Pink Posh STAMPtember exclusive set! This is VERY rare for the exclusive sets, but I am thrilled more of you are able to get it for a limited time. If you missed out the first time, hurry and get these while you can!
I hope you guys enjoyed Joni’s first feature. Be sure to leave her lots of love and encouragement! I’ll be back later this week… have a good one!