
Tutorial: Creating A Sequin Background
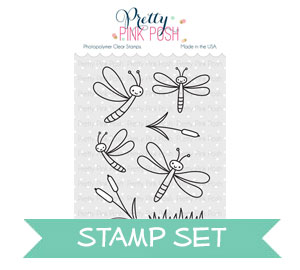
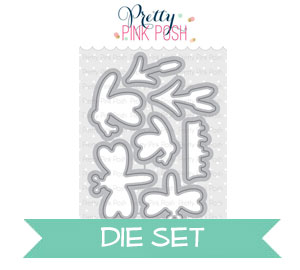
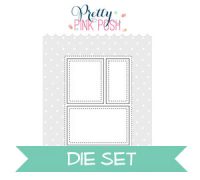
Hi friends, Eloise here today with a new project and video for you all. Today I’m going to be focusing on using some of my hoarded sequins for a fun rainbow background. I’ll also be pulling in the Darling Dragonflies stamp set as well as the Storybook 1 Dies for a little added interest.
To start off I took a piece of white cardstock and cut the Storybook 1 Dies from the top centre of the panel, I set that off to the side then I took another piece of white cardstock and used some 1/8” Scor Tape to create a full adhesive background. I then pulled out various colours of sequins from my stash and started in rainbow order. I like starting my rainbows at yellow and finishing in green, I don’t know why it’s just my preferred method sometimes. I used various sizes for my background and just mixed and matched as I went. To measure how far I needed to go along and down I placed my already die cut panel over top and went from there. In the end I needed 19 rows of sequins. If you don’t have as many colours as that though, either repeat the patterned again or use two rows of the same colour at a time.

Sequins: 4MM Lemon Meringue, 6MM Lemon Drop, 6MM Marigold, 4MM Champagne, 6MM Pumpkin, 4MM Raspberry, 6MM Pink Blush, 4MM Pink Peonies, 4MM Watermelon, 4MM Orchid, 4MM Pansy Purple, 6MM Amethyst, 4MM Aquamarine, 6MM Cornflower, 6MM Navy, 4MM Lime Sorbet, 6MM Fresh Mint, 6MM Shamrock

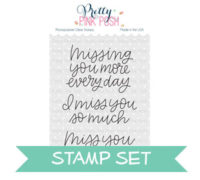
Now that my background was complete, I added foam tape around the sequin background. Then before adhering my front panel over top, I used the Simple Sayings: Miss You stamp set and stamped the simple ‘Miss You’ in black ink at the bottom. I adhered my panel over top and moved onto my stamping.

I stamped out my Dragonflies onto some white cardstock and coloured them in simply with Copic Markers. I used muted colours so they wouldn’t compete with the background. I added foam tape onto the back and adhered them over my sequin background. To finish off my card, I just adhered the entire panel to a card base and that completed my card.
Copics Used: B0000, B000, 0 / YR20, YR21, Y26 / R20

That took a lot of patience! But it is so cool! And beautiful.
Adorable!!!
I love the background! It’s so me & so colorful & uses my favorite color in the whole wide world, yellow. I have a question though. I don’t own a die cutter but there is a company that makes shaker card kits for people like me. I wish more companies made those. Could I do that with one of my kits? I want to make a card like you did. It’s amazing!
Wow! Awesome work!! Creative use of sequins :)
This is absolutely gorgeous!
Making a sequin background is very different and I really like it. I am going to try it myself some day when I have some time.
Thank you for the video.
Thank you so much for the wicked cool tutorial! This card turned out so nice! I may even give this technique a try!
Wow !! The result is just incredible !!